Thursday, June 30, 2016

Summer Stitches

Rather than write about a specific project or technique, I thought I would share a few snippets from some of my current projects. For good or for bad, I do tend to be one who often has multiple simultaneous projects. (This is something that is true in my work life as well as my stitching life. I will leave it to my readers to determine the merits of this characteristic.)
Here in Utah, our northern quilt shops have their annual "Shop Hop" in early June. This is always a fun event that is based around a given theme. This year's theme was "Travel Through Time," and each shop was assigned a given time period around which the owners and staff would decorate their respective shops and design a quilt pattern. My daughter and I decided to take a road trip day to visit the shops and check out some local food along the way. Our first stop was Corn Wagon Quilts in Springville, Utah. I love the historic building where this shop is located, and they also always do a great job with their shop hop assignment. To get to the point of this post, my daughter found a display quilt that she really liked. Although the shop was out of the fabric (it turned out to be a fabric line from last year), we were able to buy the book that included the pattern. Fortunately, we were able to locate the needed fabric online, and I've gone to work getting the quilt done. Here is a look at one of the blocks from this "Floating Square" quilt. I will wait to share a larger picture when it is finished. In case you are wondering, I'm liking how it is coming together.
Moving on now to a project that has been in the works for a few years. This is actually a project that I have been looking forward to working on and getting completed. I had a lot of fun picking out the different fabrics to include in this somewhat scrappy looking quilt. The challenge has been just getting it done. A few weeks ago I was making some pretty impressive progress, but I seem to be losing steam again. My challenges have been twofold (I think): 1) the blocks require several stages of measuring and cutting as you go and 2) I need sufficient space for laying out the completed blocks so that I can get a sense of which fabrics I have been using the most as well as which combinations I want to put together. I've started and stopped this project about three times now, but it's on a list of 2016 quilting resolutions that I am being held accountable to complete. Here is one of the blocks. Like the previous project, I will keep you guessing until the entire project is complete.

Lest you think that all I do is start projects, here is a project that I actually finished this week. It's probably no big surprise that it is a sheep. In addition to my machine-pieced projects, I like having a handwork project close by for when I am traveling or watching TV. Yes, I'm one of those who can't just sit and not do anything while watching TV.
One of the fun things about this wool appliqué project was using different decorative embroidery stitches to embellish the individual pieces. Here's a close up featuring a row of stars and a modified herringbone stitch. I also created some blades of grass on the green hillside.
This photo lets you see some of the different textures in the threads I was using as well as some different stitches. The gold on the branch is an overdyed thread. If you look closely, you can see the variegated tones in it. 
I hope that you are finding the time to enjoy a few summer stitching projects of your own. I am looking forward to spending some of the hottest summer afternoons in my cool basement sewing room. 
For fun, I thought I would find a verse that addresses summer. Here is a simple verse from Psalm 74 that is a reminder of God's sovereignty. In the midst of times that can feel troublesome and uncertain, I find security and peace resting in His sovereignty.
You have established all the boundaries of the earth; 
You have made summer and winter. Psalm 74:17

Wednesday, June 8, 2016

A Sun Safe Salad - and a colorful one at that

 With summer now upon us, many of us are finding ourselves participating in summer gatherings of one sort or another. One of the great things about these gatherings is sharing food with friends. Unfortunately, one of the downsides of such gatherings is the potential for bacteria to be lurking about in food. These bacteria can certainly wreak havoc on picnic gatherers as temperatures rise and the right growth medium is present in the food.
The recipe I am sharing in this post is one that is is relatively sun safe in that it doesn't include ingredients that tend to serve as a growth medium for bacteria that can cause food poisoning. It also is one that is rather colorful and tends to be a crowd pleaser. It does include some raw red onion so younger children and those with more sensitive tastes may not enjoy it as much. Nonetheless, this salad has a bit of a southwest flavor and makes a nice addition to outdoor summer picnics as well as indoor gatherings. It is also very easy to put together.
Corn and Black Bean Salad
Combine the following together in a large bowl:
  • 3 cans of black beans (I like to use the low sodium kind)
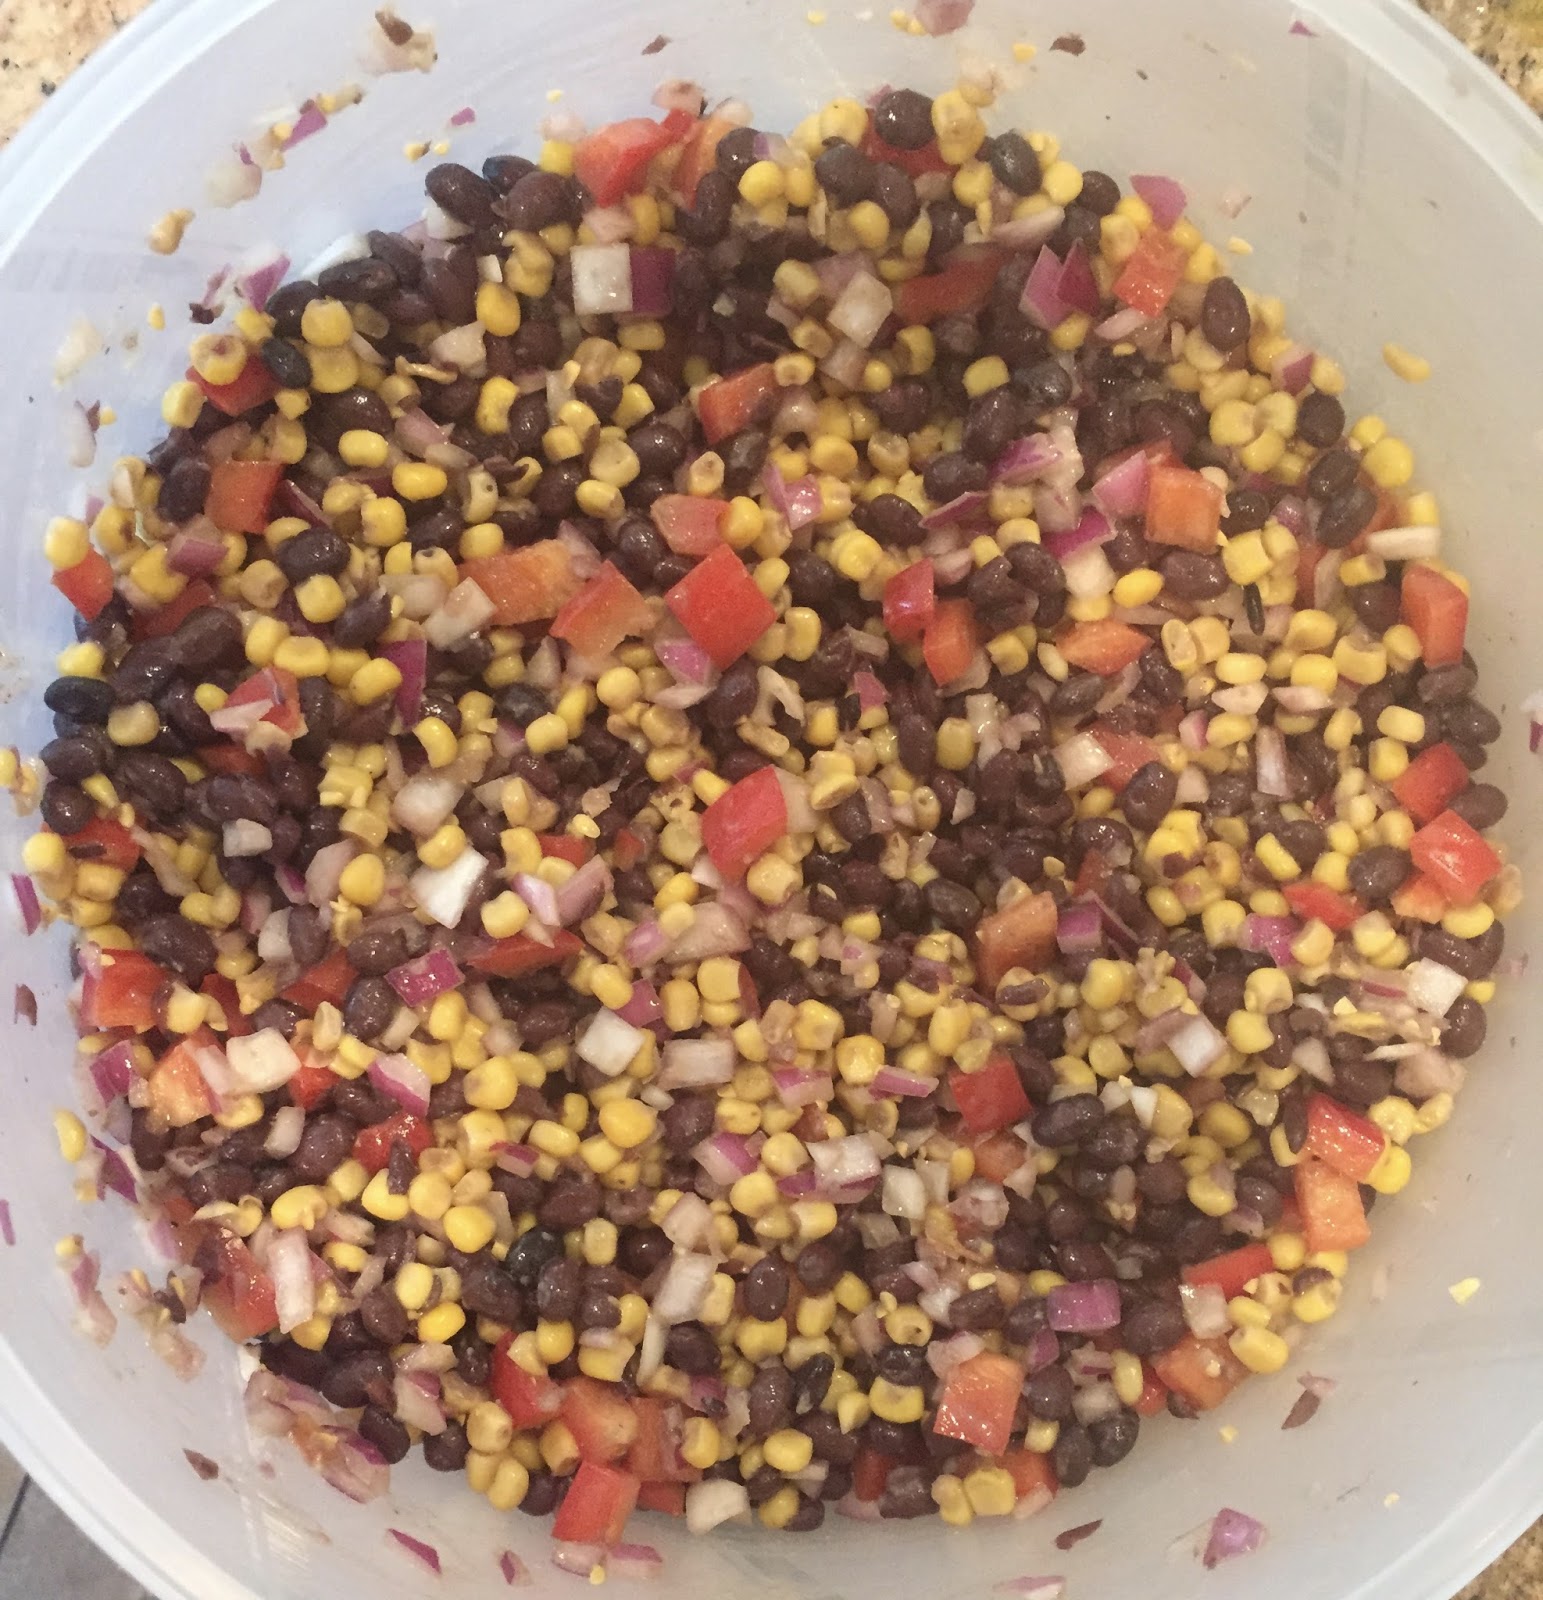
  • 2 cans of niblet corn (The picture below shows what the bean/corn mixture looks like using the proportions I have stated here.)
  • 1/2 of a large red onion, finely chopped (You can use more or less depending on your taste preference. It is raw so be aware of the strong taste. Here is a photo showing how finely I chop mine.)
  • 1 large or 1.5 medium red pepper, coarsely chopped (As with the onion, feel free to use more or less depending on your taste preference. Because the pepper adds a "sweet" taste, I tend to chop more coarsely.)
Here's an idea of what all of the vegetables will look like when you stir them together:
Now for the dressing part. I just pour the following over the chopped vegetables and stir it all together:
  • 2 tablespoons olive oil
  • 1 tablespoon cumin
  • 2 tablespoons lime juice
  • Salt and pepper to taste
  • 2 or 3 splashes of Tabasco sauce
Stir it all together and give it a taste. Adjust the seasonings as you wish.

Since we are on the topic of summer foods, here are a few food safety pointers courtesy of the US Food and Drug Administration.
When packing and transporting food
  • Keep cold food cold - use ice or frozen gel packs with a goal of keeping food at 40 degrees Fahrenheit or less.
  • Organize your cooler contents - consider keeping drinks in one cooler and perishable foods in another. This helps limit the number of times you will need to open and close the cooler with perishable food.
  • Don't cross-contaminate - keep raw meats securely wrapped to avoid juices from them leaking onto food items that are intended to be eaten raw.
  • Clean your produce - wash fresh fruits and vegetables before eating them.
When serving food 
  • The main thing is to keep cold foods cold and hot foods hot. In general, do not allow foods to sit out for more than 2 hours. Shorten this time to one hour if the outside temperature is above 90 degrees Fahrenheit.
  • Cold foods - keep them refrigerated until it is time to serve them. You can also set dishes in a pan of ice to help keep them cool.
  • Hot foods - wrap them well and keep them in an insulated cooler until serving time. 
  • Avoid cross contamination do not reuse a plate or utensils that have been used with raw or uncooked meat, poultry, or seafood unless they have been thoroughly washed in hot, soapy water

Have a fun and healthy summer!

Tuesday, May 31, 2016

Patriotic Ponderings

My overarching sewing goal for this year is to work through projects I have started (I know, not the most specific goal, but it is what it is). This goal also includes kits that I have purchased and are still sitting in my sewing cabinet or in a drawer. One of these kits that had been lying around for over a year was the one for this patriotic-themed table topper that will be the topic of this post.
I picked this kit up at the Stitching It Up quilt store in Cedar City, Utah, a couple of years ago. I liked the shades of red, white, and blue that would complement other patriotic pieces that I have completed through the years. The center features a variation on the traditional windmill block. The white side triangles or "points" feature machine appliquéd flags. 
One of the key things I learned from putting this quilt together was a bit of a lesson in humility. Before I started sewing this quilt, I cut all of the pieces per the instructions. Unfortunately, the four center squares finished bigger than anticipated. As a result, all of the other pieces needed to be adjusted. Fortunately, the kit provided enough fabric to accommodate all of the adjustments. If you look closely in some of these pictures, you can see where I created some extra seams to meet the new dimensions. Fortunately, again, when you look at the whole, the individual flaws tend not to stand out.
Here are a few other patriotic creations from around my house. I keep the alpine tree up year round and just change out the garland and decor with the seasons. The stars are ones that I bought a few years back and use to accent the tree.
The pillow is from a pattern by Shepherd's Bush, and I picked up the bear at a gift shop in Philadelphia. My daughter aptly named her "Philadelphia."
In pondering these patriotic pieces and the flaws hidden within them, I am reminded of the need for humility, both individually and corporately as a nation. Although some good quilting can help cover some flaws in the pieced work, the flaws are still there. Likewise, our best efforts to conceal our flaws can not remove their existence. As the psalmist reminds us:
He [God] rules by His might forever;
His eyes keep watch on the nations;
Let not the rebellious exalt themselves. Psalm 66:7
The psalmist also reminds us of God's faithfulness to those people and nations who will seek Him:
Let the peoples praise Thee, O God; 
Let all the peoples praise Thee.
Let the nations be glad and sing for joy;
For Thou wilt judge the peoples with uprightness,
And guide the nations on the earth. Psalm 67:3-4

Saturday, May 7, 2016

Kentucky Derby Day … Hot Brown Sandwiches

Happy Kentucky Derby Day!
As I have shared before, I am not exactly the most knowledgeable person with regards to the Kentucky Derby, but I do enjoy the elegance and tradition of this event. I'm hoping to have the opportunity to attend the Kentucky Derby some day, if for no other reason than to dress up and wear an elaborate, but elegant hat. Here's a little peek at some of the hat tradition:
Hot Brown Sandwiches are regarded as part of the Kentucky Derby cuisine. The name, Hot Brown, actually refers to the Brown Hotel in Louisville, Kentucky. The sandwich's origins date to the 1920s when the hotel hosted late night dinner dances. The hotel decided to come up with a late night snack alternative to ham and eggs, and the Hot Brown was born. The Hot Brown is essentially an warm, open-faced turkey sandwich covered with a Mornay sauce. It is further enhanced with slices of tomato and bacon. 
At the Brown Hotel, Hot Browns are prepared in individual crock ware and use two slices of bread. We used a glass baking dish and made 6 smaller sandwiches.
Here's a look at the recipe we used and how we put ours together.

Sauce ingredients:
  • 3 tablespoons salted butter
  • 3 tablespoons all-purpose flour
  • 3 cups heavy cream 
  • 1/2 cup Pecorino Romano cheese, plus extra for garnish
  • Pinch of ground nutmeg (we just used a slight sprinkle)
  • Salt and pepper
For the sandwiches:
  • 1 lb sliced roasted turkey breast (we used deli turkey and had it sliced thick)
  • 6 slices of bread (crusts trimmed - you can use Texas toast if you want, we used homemade bread)
  • 12 slices of bacon
  • 2 Roma tomatoes, sliced into wedges
  • Paprika
  • Parsley
First to make the sauce: In a two-quart saucepan, melt the butter and slowly whisk in the flour until combined to form a thick paste or roux. Continue to cook the roux for 2 minutes over medium-low heat, stirring frequently. Note that this roux is going to be a light one.
Whisk heavy cream into the roux and cook over medium heat until the cream begins to simmer, about 2-3 minutes. Remove the sauce from the heat and slow whisk in Pecorino-Romano cheese until the sauce is smooth. 

Add nutmeg, salt, and pepper to taste.

To assemble the sandwiches:

Place the bread in an oven-safe baking dish. 

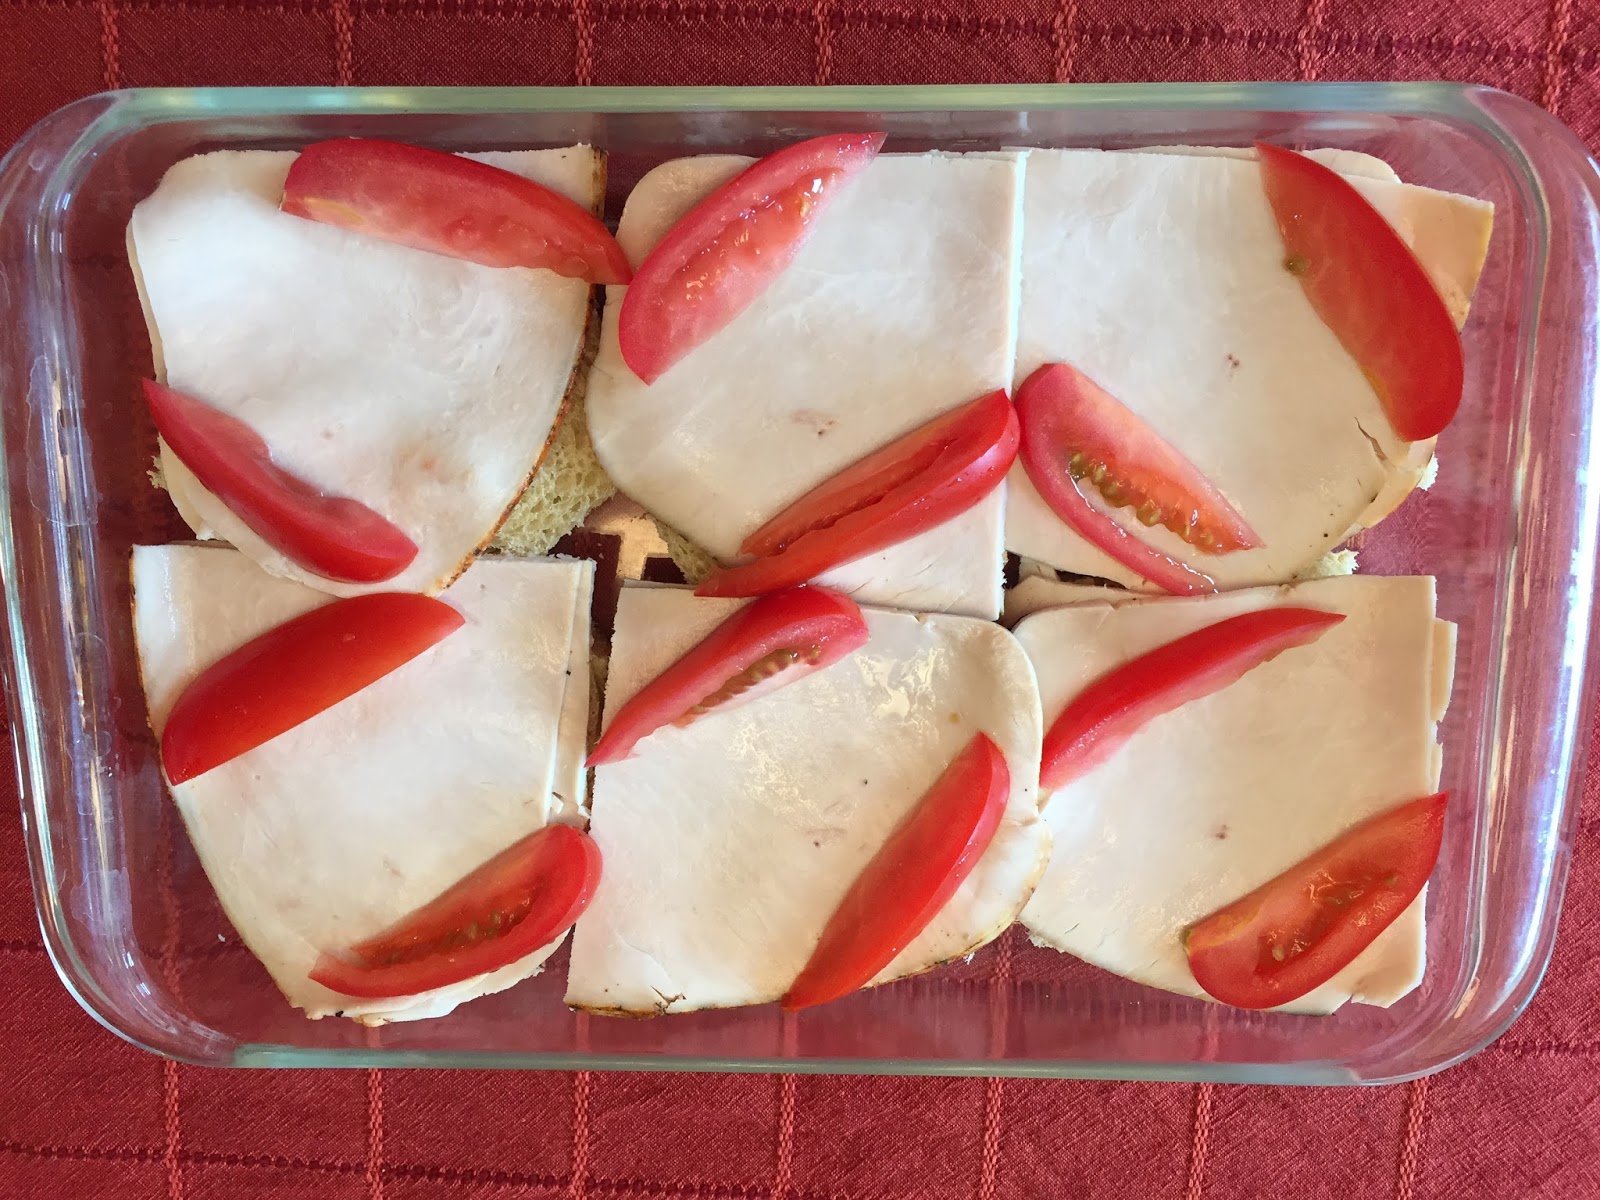
 Arrange the turkey and some of the tomato wedges over the sliced bread. At this point, you can put the pan in the oven for a few minutes to start to get the turkey and bread warmed through - you only need to put it in for about five minutes or so.
 Pour the sauce over the turkey, tomato, and bread. Arrange the remaining tomato wedges on top of the cheese, and place the bacon slices over each sandwich. Sprinkle each with some parsley, paprika, and some additional grated cheese.
 Broil everything for about 5 minutes or so until the sauce is nice and bubbly.

Our assessment of these sandwiches is that they are a success, and we will likely be enjoying them for next year's Kentucky Derby as well. Now that our pre-race meal is complete, it's about time to sing My Old Kentucky Home.

Saturday, April 30, 2016

Miniature Spring Flowers

As the saying goes, "April showers bring May flowers." As such, a post on flowers seemed appropriate for closing out April and welcoming in May. The flowers that appear in the late spring also are some of my favorites. 
This month, I thought I would share a project that I recently completed.This project is one that took me three years to complete. In all honesty, I didn't work on this project steadily over the past three years, but rather in two major bursts about three years apart. I purchased this Primitive Gatherings project in early 2013 after I was introduced to wool appliqué. I actually finished the appliquéd flowers fairly efficiently that spring. After that, the project pretty much stalled. 
Enter 2016 … I made the commitment in 2016 to buckle down and get back to work on projects that were sitting around "in progress." This project was on my priority list to get finished. To give you an idea as to how small the flowers in this project are, take a look at the picture below that includes a quarter as a frame of reference. Yes, these flowers really are quite small; and, yes, I did hand appliqué around all of the flowers, leaves, and stems.The sashing strips around each of the flowers measure about 1/4 inch wide.
Part of what got me stalled on the project was the half square triangle border. I'm really not a fan of creating half square triangles. This project called for using Thangles, paper strips that are used to help you create more precise half square triangles. This finished project called for more than 90 half square triangles. Here is a sampling below at their unfinished dimensions of 1x1 inch square. That means that in the finished project, they are only 1/2 x 1/2 inch - lots of itty bitty triangles. The thought of creating that many half square triangles is probably why the project stalled.
Here are a couple of additional pictures that provide a more zoomed in look at the featured flowers. In addition to spring flowers such as iris, tulips, and daffodils, the project also includes late summers such as asters and sunflowers.
I thought I would add a few pictures of some of the April/May flowers around my own backyard. I do wish that they lasted longer than just a few short weeks.
Here are some tulips …

Miniature iris, the larger ones won't be blooming until later in May …
And finally, some lilacs that are just barely starting to bloom …
The fleeting beauty of these spring flowers brings to mind a memory verse from my early Sunday school years. Even though the flowers don't last, we can be secure in the constancy of God's Word that does last forever. In today's uncertainty and tense times, these are particularly comforting words. As Isaiah spoke …
The grass withers, the flower fades, 
But the word of our God stands forever. Isaiah 40:8

Monday, April 25, 2016

Cuban Black Beans and Rice

We are always game for a warm, filling meal that will last us several days. A few years ago, we found a recipe for Cuban black beans and rice that we have come to enjoy. I'm not quite sure how true-to-style this recipe is, but we like it just the same. 
The Spanish name for black beans and rice is Moros y Christianos which translates as Moors and Christians. The name of this dish may be a reference to the 8th century Islamic conquest of Spain and then the 15th century re-conquest. Both of these events impacted Spanish language and culture, including food. 
Similar to the red beans and rice, which are popular in the southeastern United States, the black beans and rice are prepared separately and then served together. Some serve the beans over the rice, while others serve a scoop on top of the beans. We tend to go with the former but then stir the two together.
With the blending of cultures from Europe and Africa in the Caribbean, Caribbean cuisine has its own unique flavor and blends of spices. In looking through other recipes for Cuban black beans and rice, I've seen ham hocks substituted for the sausage we use in our recipe. Also, as you will see, this recipe uses turkey sausage, however, I'm doubting turkey sausage is typical of Cuban cuisine. Feel free to substitute another type of sausage or smoked meat if you wish.

A word about black beans … You can use either canned or dried black beans in this recipe. Typically, we just use canned, but we weren't able to find any at our Neighborhood Walmart Market when we went shopping for the ingredients to make this batch. We opted just to go with dried beans instead. I found that one pound of dried beans was the equivalent of about 4 cans of beans. If you opt to use the dried beans, you will need to allow time to soak them and then cook them until tender. 

Please also note that the amounts I am stating below make a pretty large batch. Feel free to cut in half if you wish.
Cuban Black Beans & Rice
Olive oil
1-1.5 pounds turkey sausage - we tend to use sweet Italian seasoned sausage; you can buy bulk sausage or links. If you use links, you will need to remove the casings.
1 chopped onion
3 cloves garlic
8 ounce can of tomato sauce
1 quart chicken broth - you can either buy it in a can or make it using a bouillon cube or chicken base
1 chopped bell pepper
1-2 teaspoons cumin
1-2 teaspoons oregano
1/2 teaspoon ground pepper
1 or 2 bay leaves 
4 cans of drained black beans or 1 pound of dried black beans, soaked, cooked, and drained
Cooked white rice

1. Heat a teaspoon or two of olive oil in the bottom of a large skillet. If needed, remove the casings from the sausage and cook until nearly completely browned.
A few years ago, I purchased this handy-dandy star chopper tool from a Pampered Chef party. It is probably one of our best-used Pampered Chef products. It does look a bit like a medieval torture device, and its taken a few beatings through the years, but it works great at chopping up ground meat for browning.
 2. Once the meat is almost browned, add in the onion and garlic. I had two half onions - one yellow & one red on hand so I just went with them. Feel free to use whatever type of onion you like. 

3. Continue cooking until the meat is cooked through and the onion is soft and nearly translucent. If needed, add a little additional olive oil to prevent the mixture from sticking. At this point in the cooking, your house will be smelling great.
4. Stir in the tomato sauce and broth and bring to a boil.
5. Add the remaining ingredients. Feel free to start with the lesser amounts of the spices and increase to taste. Regarding the bay leaves - if the bay leaves seem particularly strong, I will just use one - again, it's really a matter of personal taste.

6. Simmer for about 20 minutes or so until the bell peppers are fully cooked.
7. Add additional seasonings as desired
8. Serve with cooked rice.

Thursday, March 31, 2016

Sheep, Sisters, and Basketball

By now, I think I have established that I like projects that involve sheep. I thought I would use this entry to share another sheep project - this one has ties to my sister as well as to the NCAA men's basketball tournament. I know this may sound a little strange. Hopefully, I can tie all of the pieces together.
Although my sister and I enjoy a number of the same things, we are also quite distinct in our interests and skills. I've come to describe myself as the "frou frou" sister. I like the frills and dressing up. I also am the one who is more inclined toward the handwork projects. My sister is the more outdoorsy one and is the one who excelled in team sports. In more recent years, she has been putting her outdoor skills to good use by participating in Disaster Relief teams to help minister to people who have been affected by natural disasters. While she has become adept with a chainsaw, you wouldn't want to be around me if I was the one holding it.
Some things we both enjoy are sheep and watching sports together. Here we are feeding a couple of our bottle lambs. I think we were about 4 1/2 and 3 years old.
As teenagers, I think we watched about every televised moment of the Los Angeles Olympics during the summer of 1984. Among our favorites was watching women's volleyball.
Somewhere in our high school years, we also started paying attention to the NCAA basketball tournament and all the fun of March Madness. Our favorites have been, and still are, the underdog teams. To be honest, sometimes, we just go for the team with the cutest mascot. Last year, we found ourselves rooting for the Wofford Terriers. They didn't make it out of the first round, but they did put forth a good effort against a higher ranked team. You have to admit, the statue featuring their mascot really is cute.
So now, how does this all tie together …
For each of the last two years, we have been getting together for a March Madness weekend during the first week of the tournament. That week really is my favorite with all of the games and upsets going on. 
In 2014, I gave my sister a small quilting kit that featured a sheep. (I got one for myself as well.) During our 2015 March Madness weekend, we began working on our projects. We got the top portion pieced together and then packed our kits up and stored them in my sewing room for another day. The picture below shows the initial piecing along with the machine quilting to hold the top, batting, and backing together.
This year, we continued our work on the kits. We added the wool appliqué sheep and the log cabin block for the upper right hand corner. 
Now, the question remains, will we finish these projects completely before the year is over, or will we leave that task for the 2017 tournament. As King Solomon might say, to everything there is a season …
There is an appointed time for everything. And there is a time for every event under heaven. Ecclesiastes 3:1