Thursday, December 31, 2015

A lesson on machine quilting

I certainly do not claim to be an expert in machine quilting. I am working to develop my skills and thought I would share some of what I am learning. Please consider this to be more of a very basic presentation of some of the fundamentals.
I should also add that I will be talking about machine quilting that involves the use of a walking foot rather than free motion quilting. While I have attempted some projects with a free motion foot, my skills are very limited. Perhaps I will continue to develop them in the new year.
A walking foot is a sewing machine attachment that provides a top set of feed dogs. This allows the upper and lower fabrics to move through the machine at the same rate. When you are working with a quilt with its back, batting, and top, you definitely want to avoid the layers shifting as you work. My walking foot came with my machine accessories. If you don't have a walking foot, they can be purchased for around $20 to $40. Looking at the online pictures, this accessory doesn't appear to be machine brand specific, but you could always ask at the store.
The project that I will be sharing in this post is a miniature quilt made with Civil War Reproduction Fabrics, which are some of my favorites. This quilt pattern is titled, "Small Joys," and is featured in the book, Civil War Legacies II
I picked up the kit for this quilt from a darling shop, Corn Wagon Quilts, in Springville, Utah. This shop is in a historic building which adds to its charm. This shop features reproduction fabric projects as well as wool appliqué projects. It's probably a good thing for my budget that this shop is about an hour and a half from my home. Here are some of the miniature 9-patch blocks that are featured in this quilt.
When contemplating having a project quilted  whether you are quilting by hand or machine, doing it yourself or having someone else do the work, the first question to ask is "How do you want it quilted?" I found myself a bit puzzled the first time I was asked that question. I was thinking, "You are the expert, that's why I'm coming to you." Here are a few things to think about as well as the rationale for some of the choices I made in relation to this project.
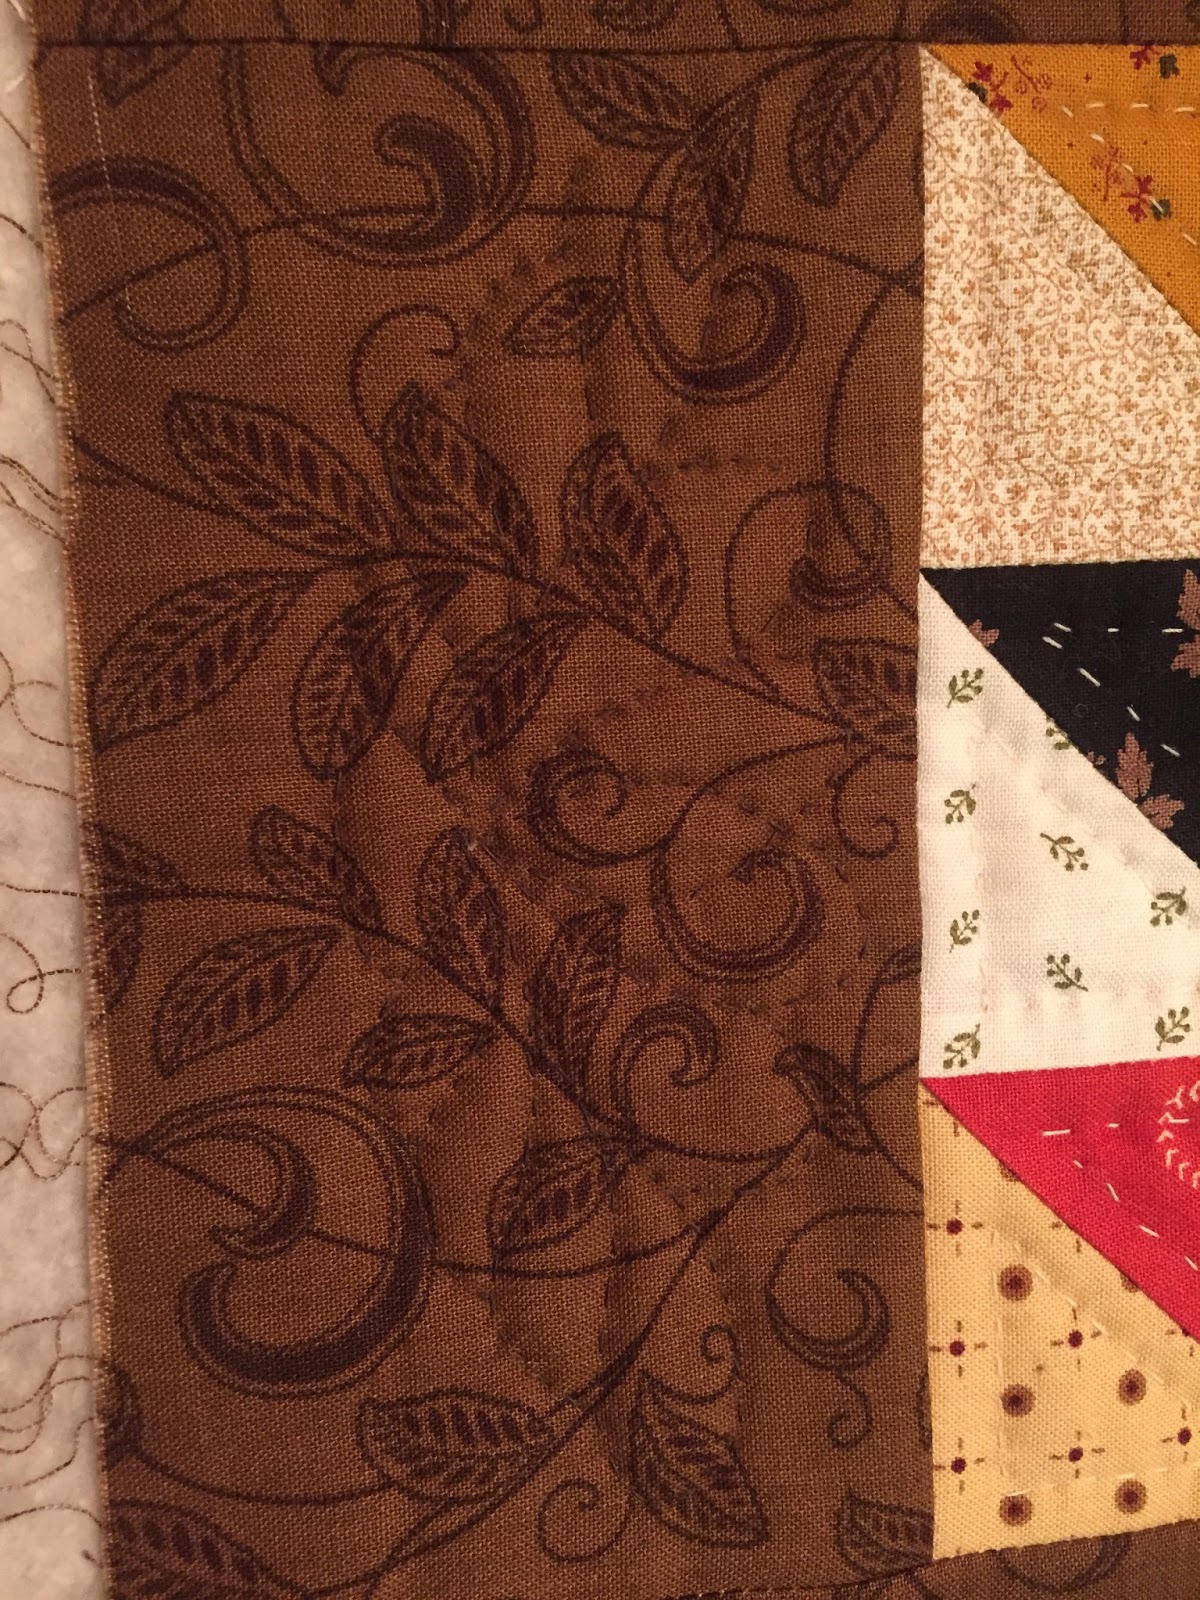
  • The style of the quilt. The overall style of the quilt itself is going to help drive decisions about quilting. The choice of quilting pattern should match the quilt's style. A more geometric pattern may be appropriate for a quilt with more modern colors and larger blocks. For this particular quilt that only measures about 18 x 22 inches, I wanted a more simple pattern and one that would fit with the reproduction style fabrics. I opted to go with a cross-hatch pattern that essentially made Xs through each block. This is also the pattern that was featured on the example in the book. It is also a pattern that is rather forgiving for a novice machine quilter.
  • Choice of batting. I tend to like an 80/20 blend batting for my quilts. This tends to provide warmth without too much bulk. Given that this was a small quilt, I had a scrap leftover from a larger project that was just the right size.
  • Choice of thread. Again, you want to think about the colors in your quilt and how "visible" or not you want the quilting thread to be. I have some quilts with darker colors for which a lighter thread that stands out is a nice option. In this case, my quilt had a mixture of dark, light, and medium colors. My goal was to have the quilting blend in with the quilt itself. I opted to go with a coral thread that blended in with the flowers in the dark red border. It also blended in with the solid pink blocks within the quilt and didn't provide too high or a contrast with the light fabrics in the 9-patch blocks. As you can see in the picture, I unrolled the spool of thread a little so that I could lay the strand of thread out on the quilt to see how it might look before proceeding with the project.
  • Choice of backing. This really can be anything you want. You can even sew two or more pieces together to get the size of backing that you need. Your backing does need to be about 2-3 inches wider all the way around relative to your quilt top. For a smaller piece such as this one, you can go closer to 2 inches. I elected to use a reproduction style fabric that was different from the fabrics in the quilt itself yet still fit with the larger theme. A solid color also would have worked just fine. Remember that this is the back and not the side people will be looking at. It's also your quilt so feel free to also select a design that is completely different and distinct from the quilt top.


Now it's time to put the quilt together. Here are some steps that I 
have learned along the way that I hope will be helpful for you, too. At this point in the process, you will need to make sure that you have a nice large flat surface. You also want the surface to be one that can withstand working with safety pins.
  • Mark the design on the quilt top. There are multiple options for marking quilt tops. The main thing is that you don't mix heat-soluble and water-soluble marking pens. For a mostly dark top like this one, my marker of choice is a white Clover brand marking pen. This is a heat-soluble marker that looks like chalk on the fabric. The marks didn't show up very well in any of the pictures I took, but they were adequate for sewing. Since I was using a cross-hatch design on this top, I just used a large ruler and drew the lines across the quilt going both directions.
  • Secure the backing to the work surface. This is where I like to have a work surface that can tolerate safety pins. I have a couple of plastic-topped tables that I like to work on when doing this phase of the work. Painter's tape is also a great accessory for this phase because it will hold the fabric in place without leaving a residue behind. You want to have the quilt back tight and secure. Here is a picture of what mine looked like. 
  • Lay the batting and quilt top on top of the back. These two pieces do not need to be secured as tightly as the back. Lay the batting out on top of the back and then smooth out the quilt top on the back and batting layers. You can see from the picture how the batting and back extend beyond the edges of the quilt top.


  • Pin the three layers together. This is what is going to secure the quilt layers together and allow you do do the machine stitching. As you can see from the picture, I have placed safety pins every 2-3 inches across the quilt top. You just remove them as you sew along so don't be intimidated. I'm also featuring a picture of my favorite tool for securing the safety pins. This tool definitely helps prevent broken fingernails and punctured fingertips in the pinning process. You can buy one at a local quilt shop.


  • Machine quilt along the marked lines. The marked lines didn't show up well in any of my photographs, but they were sufficiently visible for me to see them and stitch on top of them. When sewing, start near the middle of the project (in my case, I started near a middle edge), and move outward. This also helps keep the project smooth. With the cross-hatch design, I would sew one diagonal line across the quilt, pivot the piece, sew along the edge until I reached the next marked line and then proceed back across the quilt. I more or less repeated this pattern until the quilting was complete.
  • Bind the quilt and enjoy. I cut my binding 2 1/4 inches wide and then double fold it. Feel free to use your preferred technique to bind your quilt. I also tend to add in a muslin sleeve (or loops) for hanging so that I can decide later how I wish to display my quilt.
As much as I enjoy Civil War history as well as the fabrics and styles of this era, I am troubled at this divisive time in our nation's history. I will close out this post reflecting on some of the final earthly words of the Prince of Peace. In the midst of divisive, troubling times in our world, they provide a source of perspective on true peace and the assurance that believers have. Wishing you a truly blessed 2016.
Peace I leave with you; My peace I give to you; not as the world gives do I give to you. Do not let your heart be troubled, nor let it be fearful. John 14:27
These things I have spoken to you, so that in Me you may have peace. In the world you have tribulation, but take courage; I have overcome the world. John 16:33.

Wednesday, December 23, 2015

Weinachten in Deutschland


I realize that German dinner may not be the most appealing to everyone, however, a traditional German meal has become part of our family's Christmas traditions through the year. I am actually part German, so this has become a fun way to honor our heritage. We typically have our German dinner about a week before Christmas. This year, like most, we enjoyed rouladen, red cabbage, and potato salad. In case you might enjoy preparing any, or all, of these dishes, here are the recipes.

Red Cabbage:
The style of this red cabbage recipe is patterned after the Danish style. While the traditional German versions tend to feature spices, and sometimes apples, the Danish version is a bit simpler. I'm half Danish, so I don't mind including a bit of my Danish background into our dinner as well. This is a dish that I think tastes better each time it is rewarmed.
Ingredients:

  • One head of red cabbage
  • 4 tbsp butter or margarine
  • 4 tbsp sugar
  • 2 tbsp cider vinegar
  • 1/2 cup water
Directions
  • Finely shred the cabbage. Here is a picture of how I cut mine up. Essentially, I divide the head of cabbage into fourths and then thinly slice up each one.
  • Place all ingredients in a large cooking pot or crock pot. Slowly simmer for about 2 to 2.5 hours or so. 
  • Add additional vinegar and sugar to taste during the cooking process. 
German Potato Salad
My family found this recipe years ago in an issue of the Ruralite magazine. This is a magazine targeted at the rural western United States and was initially developed with the goal of reaching member-owners of electric cooperatives in the Western US. Over time, I have continued to adapt this recipe. Our revised version follows.
Ingredients:
  • 6 to 8 potatoes
  • 4-6 slices of bacon (we like pepper bacon, but use what you wish)
  • One medium yellow or sweet onion, thinly sliced
  • 1 to 1.5 cups thinly sliced celery
  • 1 tbsp dried parsley
  • 1/2 tsp celery seed
  • 2/3 cup cider vinegar
  • 1/2 cup water
  • 1/4 tsp dried mustard
  • Salt and pepper to taste
Directions:
  • Boil potatoes in their skins until fork tender. When done, peel, slice about 1/4 inch thick and set aside in a large bowl.
  • Cut up the bacon and fry in a large pan until nearly done.
  • Add in the onion and celery. Saute until the vegetables have become soft. 
  • Stir in the parsley and celery seed (here is what the mixture will look like in the pan)
  • Pour the bacon/vegetable/seasoning mixture over the potatoes and toss together
  • Boil the vinegar, water, and mustard together (I just use the microwave). 
  • Stir the liquid mixture together, and pour over the potato mixture. I generally start with about 1/3 of the liquid and evaluate little-by-little. More often than not, I don't need the entire amount of liquid. 
  • Add salt and pepper to taste.
Rouladen
For those of you unfamiliar with rouladen, they are essentially beef rolls that are wrapped around a pickle. Oh, and they include bacon as well. This year, we were fortunate to find a local grocery store that was able to provide us with some thinly cut slices of beef roast - perfect for making rouladen.
Ingredients
  • Thinly sliced beef. Take a look at the picture below to get an idea as to how thin the beef should be sliced.
  • Bacon slices
  • Pickles
  • Mustard
  • 3 tbsp shortening or cooking oil
  • 2 tbsp flour
  • 1 1/2 cups water
Directions
  • Spread the mustard on the slice of beef. Lay a slice of bacon on the beef. Place a pickle on one end and roll it up. You can either tie the roll together with string or use a couple of toothpicks to hold it together. (I typically opt for the toothpicks.)
  • Prepare as many rouladen as desired.
  • Heat the shortening or oil in a large frying pan. Brown the rouladen on all sides. It can get a little tricky if you are using toothpicks.
  • Place the browned rouladen in a baking pan and pour the water over the top of them.
  • Cover with foil and bake in a 325 degree oven for about one hour. 
  • After the rouladen have cooked through, remove them from the pan and whisk the flour into the remaining liquid. Place the rouladen back in the pan and heat until the gravy is bubbly. Season with additional salt and pepper to taste.
Here is our 2015 German dinner. We wish you all a froehliche Weinachten!

Monday, December 21, 2015

Cheery Christmas Cardinals

Given that Christmas is fast approaching, this post will be a brief one. The quilt that I am featuring in this post is an "impulse buy." In early November of this year, I was scrolling through Facebook and saw a post from Anderson Fabrics, a shop in Blackduck, Minnesota, that I have visited on past Minnesota vacations. The post included a partial photo of this quilt. I was drawn to this quilt for a couple of reasons: it featured cardinals, my favorite birds, and rich north woods colors. I called up the shop and asked if kits were available. Fortunately, one was, and ordered it by phone.
This is a pattern that was relatively easy to put together. The fabrics that were included in the kit were from the Winter's Song fabric line from Moda fabrics. The pattern is from Antler Quilt Design. I was also very fortunate to find a local machine quilter who was able to complete the quilting for me. I chose an overall pattern that featured pinecones and pine needles. Here is what the back looked like.
Here are a few other close ups of one of the 4-block units and an individual block of one of the cardinals.
Although we don't see cardinals here in the Intermountain West, they are still my favorite bird. I think I am drawn to their cheery red color which provides  a lovely contrast to the white winter snow. They also have a distinct cheery call. 
If you look closely in this picture, you will see that my Christmas tree features a number of cardinals. In addition to the many ornaments we have accumulated through the year, the cardinals give our tree a bright "birds and berries" theme.
I wish you all a very Merry Christmas and will share these same words of cheer that were first delivered to shepherds over 2000 years ago, but still are a message of cheer for all of us today:
Fear not: for behold, I bring you tidings of great joy, which shall be unto all people. For unto you is born this day in the city of David a Saviour, which is Christ the Lord. Luke 2:10-11

Thursday, November 26, 2015

Cranberry Creations … featuring sweet potatoes

To be honest, sweet potatoes or yams haven't been one of my favorite Thanksgiving foods. I'm not quite sure what it is about them. I remember having been served candied yams (probably the type out of the can) when I was little and that I didn't like those at all. I've never been crazy about having them with marshmallows or even just plain for that matter. I do, however, love cranberries in about any context.
A few years ago, I had some sweet potatoes that had been prepared with cranberries at a church dinner. During the past couple of years, we have done some experimenting with cranberry/sweet potato recipes. Here is one that we like and hope that you will as well. We like the added tart taste of the cranberries along with a little added sweetness of the glaze or sauce we pour over them.

First, a quick word about sweet potatoes and yams. My source is the North Carolina Sweet Potatoes web site
Sweet potato 
Although the terms "sweet potato" and "yam" are often used interchangeably, they are actually distinct from one another and belong to different botanical families.  Yams are native to Africa and grow primarily in tropical climates. Sweet potatoes are believed to have originated in South America where they have been grown for at least 5,000 years. Today they are grown in warm, temperate regions across the world, including the southeastern United States. Sweet potatoes are a great source of Vitamin A and beta-carotene. Although the dark orange-fleshed variety is the best known, sweet potatoes come in a variety of colors
Varieties of sweet potatoes
Now, on to the recipe. This is one that you can prepare ahead of time and then warm through in the oven just before serving.
Ingredients:
5 sweet potatoes
1/4 cup butter
1/2 cup sugar
1/3 cup dark corn syrup
1/4 tsp vanilla
1 cup fresh cranberries
1/2 cup chopped pecans

Steps:
1. Lightly spray a 2-quart casserole dish with non-stick spray.
2. Boil the sweet potatoes until fork tender. If you want, you can stop just before they are fully cooked since they will cook a little more when you bake them.
3. Peel and cube the sweet potatoes and place them in the casserole dish. 
  • You can see from this picture, that I used two different varieties of sweet potatoes. When we went shopping at the commissary Sunday afternoon, there were only 3 of the dark orange ones left. I think that's because they were selling for 59 cents a pound and we were late to arrive. As a result, I picked up 2 of the more expensive ones. I actually like the variety and slight differences in taste, so it's all good by us.

4. Now to prepare the sauce, glaze, topping, or whatever you wish to call it.
  • Melt the butter in a small saucepan over medium heat. Stir in the sugar, corn syrup, and vanilla until well combined. Stir in the cranberries and bring to a low boil. Allow the cranberries to "pop" open as you would if you were making cranberry sauce. Remove from heat and stir in the pecans. 
5. Pour the mixture over the sweet potatoes.
6. Bake in a 350 degree oven until heated through. If you wish, you can even do the "prep" work the night before, put the sweet potatoes & sauce in the refrigerator overnight and then heat through the next day before dinner time.

Wednesday, November 25, 2015

A small fall project …

Here we are at Thanksgiving Eve. Although Thanksgiving week is one of my favorite times of the year, I think that this November has sped by much too quickly for me. Just the same, I am still enjoying the season and am looking forward to good food and a day full of family tomorrow.
This post will be brief and feature a small project that I completed a few weeks ago. The pattern is from Buttermilk Basin, and I purchased the kit from my local quilt shop, K & H Quilt Shoppe
This project is one that appealed to me for a number of reasons - the fall colors, the primitive style, wool appliqué and a chance to incorporate some hand quilting in the process. 
Here are a couple of "tools of the trade" related to hand quilting - a marking pen and a stencil. There are multiple types of marking tools out on the market - some are heat-soluble and some are water soluble. I don't know that one is necessarily better than the other. The main rule of thumb is to be consistent in your choice of tool within the same project. For example, with this project I used both dark and light marking pens, both of which were heat soluble. I used the dark pen on the light triangles and the light pen on the darker fabrics. 
These next pictures feature some completed hand quilting and a pattern that has been traced. The choice of thread color is really up to the individual quilter. I chose to use a light thread for both the dark and light triangles in the center of the project, and I chose a brown thread for the pattern on the edges. 
In the below picture on the left, you can see some of the stitching within the triangles as well as the traced pattern. I stitched over the white lines using brown threads. When I was finished, I ironed over the area; and the marking disappeared, leaving only the stitching (below right picture).
After the hand quilting was complete, I tacked down the mini-quilt. It features the churn dash block which is one of my favorite traditional block patterns. The next step was to appliqué the owl in the lower left corner of the project (see the very top picture). I then sewed on the binding and a hanging sleeve so that we could have this mini quilt hanging in our house for the Thanksgiving season.
As I said at the outset, this is a short post. I wish you all a very blessed Thanksgiving Day. I am going to close with these words from the psalmist:
O come, let us sing for joy to the LORD
Let us shout joyfully to the rock of our salvation.
Let us come before His presence with thanksgiving
Let us shout joyfully to Him with psalms
For the LORD is a great God
And a great King above all gods.
Psalm 95:1-3

Saturday, October 31, 2015

A colorful Halloween curry …

As many of you are well aware, we enjoy finding opportunities to create cooking traditions around various holidays or even events in general. Through the years, we have come to create some traditions around Halloween. The recipe I am sharing in this post is one we have more or less created on our own using a few assorted recipes as a bit of a starting point. We like it, most of all, because it tastes good. We have also found it a great recipe for this time of year because it is warm, filling, and features some great fall colors that add to the spirit of the season.
For a little background on curry …
Curry is a cuisine that originated in India. The term, curry, refers to a dish that is prepared using a number of characteristic herbs and spices such as coriander, turmeric, cumin, and chilis. Curry dishes can be "wet," meaning that they are covered in sauce, or "dry," meaning that the liquid has evaporated and the remaining meat or vegetables are coated with the spice mixture. Today, curry dishes are part of the cuisine across many of the southeast Asian countries, each with its own distinct style. The following picture shows a number of Indian vegetable curry dishes.
Curry powder itself seems to have appeared around the 18th century. It is proposed to have been generated by Indian merchants to sell to members of the British government and military. Although curry powders can vary somewhat based on region, most contain a mixture of coriander, turmeric, cumin, and chilis. The turmeric is what gives the curry its characteristic yellow color.
Given that curries can vary based on geographic region, consider this curry to be in the tradition of the Intermountain West of the United States. As I have said, we do like it, and I hope you will too. Here is how we put it together.

Ingredients:
4 tbsp butter or margarine
One large onion
3/4 cup flour
6 cups chicken broth
Juice of 1/2 lemon (about 1.5 - 2  tbsp)
2 cups cream
2 tbsp curry powder (we like the Hot Madras powder)
Carrots
1 green bell pepper
4 or 5 potatoes
1.5 pounds boneless, skinless chicken breasts
Cooked jasmine rice

Steps:
1. Melt the butter over medium heat. Chop the onion and saute until the onions are soft and golden. The below picture gives you an idea as to how coarsely I chop the onion.
2. While the onion is cooking, go ahead and get the chicken started. I typically cut it up into about 1 inch chunks and cook it up in a pan on the stove. I add a little water and a tablespoon of oil, cover the pan with a lid and let the chicken cook until done. Once it is cooked, just turn off the heat and let it sit until you are ready to add it (and the resulting broth) to the curry mixture.
3. Once the onions are nice and soft, stir in the flour until well mixed. 
4. Slowly stir in the chicken broth and lemon juice so that the flour is dissolved into the liquid.
5. Stir in the cream and curry powder.
6. Now it's time to cut up the vegetables. Here is a picture of the carrots and the bell pepper so that you can see how coarsely I cut them up. My advice is to add the carrots first and let them cook a while before adding the bell pepper and potatoes. The carrots take longer to cook, and the potatoes require less time to cook so this is how I try to have everything cooked up nice at the same time. Once I stir in the carrots, I make a judgement as to whether the amount looks right to me. For this batch of curry, I ended up adding additional carrots. On a side note, I had plenty of carrots in the garden, many of which were a bit small so this was an easy opportunity to use a bunch of them.
7. Once the carrots are about halfway cooked, stir in the bell pepper and potatoes. Slowly simmer until the vegetables are cooked through. We love the taste of potatoes that have soaked up the flavor of the curry powder. Yum!
8. Stir in the chicken and the broth you created in the process of cooking it.
9. Heat through and serve over steamed jasmine rice.

Here is a picture of the curry cooking on the stove. We like that this recipe makes a batch that will give us leftovers for a couple of days.
Wishing you all a safe and happy Halloween with very few tricks and lots of good treats.

Monday, October 26, 2015

Primitive Piecing … part 2

Since I posted part 1 a few weeks ago, it seems only fitting that part 2 should follow. As you may recall, at the close of the last post, I had created some rows of pieced blocks and a center. The center included three pieces of homespun that had been sewn together.
The next step was to begin work on the "picture" that would emerge on this center. This meant the addition of three pumpkins, each in a different pattern of orange fabric. I used a turned edge, or needle turn, appliqué technique to secure them to the background. Alternatively, I could have used a fusible technique and machine stitched around the edges. Given the primitive style for this piece, I felt that the turned edge technique would be more consistent with the look I was trying to achieve - more about the turned edge technique later in this post.
Now it's time to add the lower border. What do you think?
Next, I cut out the cat and stitched him on the "ledge" sitting in front of the pumpkins. The wool stars actually weren't added until the very end, but I had forgotten to take a picture of just the cat in front of the pumpkins. I used a turned edge appliqué technique with the cat as well.
Next came the task of creating one final border. This vertical border includes five turned edge appliqué stars. I will just say that working with pieces such as these stars can be quite daunting and is not for the faint of heart. These stars feature some very tight angles that can be difficult to navigate. I will attempt to illustrate in the next few pictures.
This picture shows step 1. The white line indicates the actual finished shape of the star. The task at hand is to turn the edges under and to stitch the star to the background fabric. You can also see the short appliqué pins in the picture. I like this shorter length as it helps avoid getting stuck multiple times while working on a small piece. At the same time, they are somewhat heavy and will easily leave holes and snags in very fine fabric. For pieces such as this one, they do just fine.
This next picture features a star that is in process. You can get the idea as to how the edges are turned and the need to clip some of the fabric to allow the concave angles to turn under as they should. The points are where things get tricky. As you turn the fabric under, you also need to manipulate it such that it tucks under at the point. With these narrow angles, that is no easy task. While the top point of this star turned out pretty good, you can see that the two side points are somewhat rounded and the one on the left sort of swings upward. Let's just say that I am still very much in the process of developing my skills.
Here are some pictures of a completed star block as well as the vertical row to be attached to the left side of the quilt. You can see that, in some of the blocks, the right point ended a little close to the edge and got a bit "chopped off" once it was sewn to the quilt.

The final step in completing this quilt will be to get it quilted and bound. I'm actually thinking that I am going to be brave enough to attempt the machine quilting on my own using the walking foot for my machine (perhaps my adventures in machine quilting will be a future post). 
As I look over some of the challenges and my perceived inadequacies in completing this piece, I am also reminded that, in life, I am inadequate in my own strength. At the same time, I can be confident in the One who has made me adequate. My adequacy is not based in the accuracy of the angles on my star points or whether the points escaped being chopped off by the seam allowance. My adequacy is based solely on what Jesus has done for me. 
The verses that I am sharing are ones that were included in a Student Week talk by during the summer of 1988. They continue to to shape my perspective today:
Not that we are adequate in ourselves to consider anything as coming from ourselves, but our adequacy is from God, who also made us adequate as servants of a new covenant, not of the letter, but of the Spirit; for the letter kills, but the Spirit gives life. 2 Corinthians 3:5-6.

Sunday, September 27, 2015

A Filling Soup for a Fall Day

Soups are one of our favorite aspects of fall. They also provide a great opportunity to use the garden produce that is needing to be harvested this time of year. We have had tremendous success growing carrots in our garden. I'm not really a fan of peeling and chopping carrots for freezing or canning so I'm always glad to find a soup recipe that includes carrots. 
The recipe that I will be sharing is one that features not only carrots, but lentils and garbanzo beans as well. It also includes curry powder. While we are not exactly the "earthy" vegetarian types, this is a soup that we very much enjoy. The inclusion of the curry powder leaves the whole house smelling good and provides a nice accent to the flavors of the vegetables. I will admit that this isn't the most "aesthetically pleasing" soup that I have prepared, but it is quickly becoming a fall favorite with us.
Before I proceed to the recipe, a quick word about lentils…
Lentils are a member of the legume family and were among the first crops that were cultivated in the Near East. They are commonly consumed in western and southern Asia as well as in the Mediterranean region. Among legumes, their protein content is second to that of the soybean. Lentils grow on short busy plants that produce pods. The pods typically contain two seeds. Lentils are available in multiple colors, depending on the specific variety.
Lentil plants

Three colors of lentils

In India, lentils are commonly prepared with rice, often as part of a curry dish. In Ethiopia, lentils are include in a stew that is often the first solid food fed to babies. You may be surprised to learn that the top lentil-producing country in the world is … Canada. That's right. The province of Saskatchewan produces 99% of the nearly 2 million metric tons of lentils grown in Canada each year.
So, let's make some curried carrot and lentil soup …
Here are the ingredients:

Soup base:
2 tbsp olive oil - add more if needed
1 medium onion, chopped
4-5 carrots, chopped
2 large garlic cloves
2 tablespoons curry powder (feel free to add more to taste)
2 cups lentils
2 quarts of water - add more as needed. I would imagine that you could include a vegetable stock or chicken broth if you wanted. We have just used water.

Chickpea puree (to be added after the lentils have cooked through)
2 16-ounce cans chickpeas
2 tbsp olive oil
2 tbsp lemon juice
1/2 cup water
1-2 garlic cloves (optional)

Heat 2 tbsp olive oil over medium heat. Add the onion and cook until the onion is nearly translucent. Add the carrots and garlic and continue to cook until the carrots are starting to become soft. Add the curry powder and stir until fragrant. Add the lentils and water. Sprinkle with salt and pepper. Bring the soup to a boil and then reduce the heat to medium. Simmer until the lentils are tender, which will take approximately 30 minutes. Add additional water as needed. 

Here is the amount of carrots I used from the garden. You will see that they are various sizes. I chose a combination that would be equivalent to about 4 large carrots from the store.
We like this Hot Madras curry powder. It's easy to find in the grocery store.
I'm not sure what "variety" or "color" you would call these lentils. They were what was available in the dried beans section of the grocery store and labeled as "lentils."
While the soup is cooking, prepare the chickpea puree:
Puree the chickpeas, olive oil, lemon juice, water, and additional garlic together. The mixture will look much like hummus only you wouldn't have included tahini, a key ingredient in hummus along with the additional seasonings.
Once the lentils have cooked, stir the puree into the soup. Season to taste with salt, pepper, and additional curry powder. Add additional liquid as desired.
Serve with a salad and warm bread. 
The amounts that I provided here will make a pretty big pot of soup. You can look forward to 1) being able to feed a large group, 2) leftovers for a few nights, or 3) freezing some of the extra for a ready-to-go meal at another date and time.