Monday, October 31, 2016

Projects for a plane ride and glimpses of Ireland

Here we are at the end of October. I don't know about you, but it's been a full, busy month for us. Most eventful was our recent trip to Ireland. I presented some of my research at a scientific meeting there and decided that bringing my husband along would be a good idea. One of our sons is currently doing an internship in Germany so we had him fly over to tour the country with us after the meeting. Given that both my husband and I have ancestral ties to Ireland, we were eager for this trip.
Many of you probably know that I'm someone who needs some type of project to keep my hands busy - especially when traveling. For this post, I thought I would share some of the wool appliqué blocks that I brought along for this trip. These blocks are part of a row that was created by Sewing Seeds Quilt Co. in New Ulm, Minnesota for the 2015 Row by Row experience. The 2015 theme was H2O, so this Noah's ark-themed row was quite apropos.
As I plan for travel projects, I am now finding that I need to take into consideration the reality of my aging eyes. Even with bifocal contact lenses and reading glasses, I need at least some natural lighting to be able to do really fine cross-stitching. Fortunately for me, wool appliqué projects are airplane lighting friendly. Here are the blocks that will be included in this row.
Of course, we need to start with Noah and the ark itself.
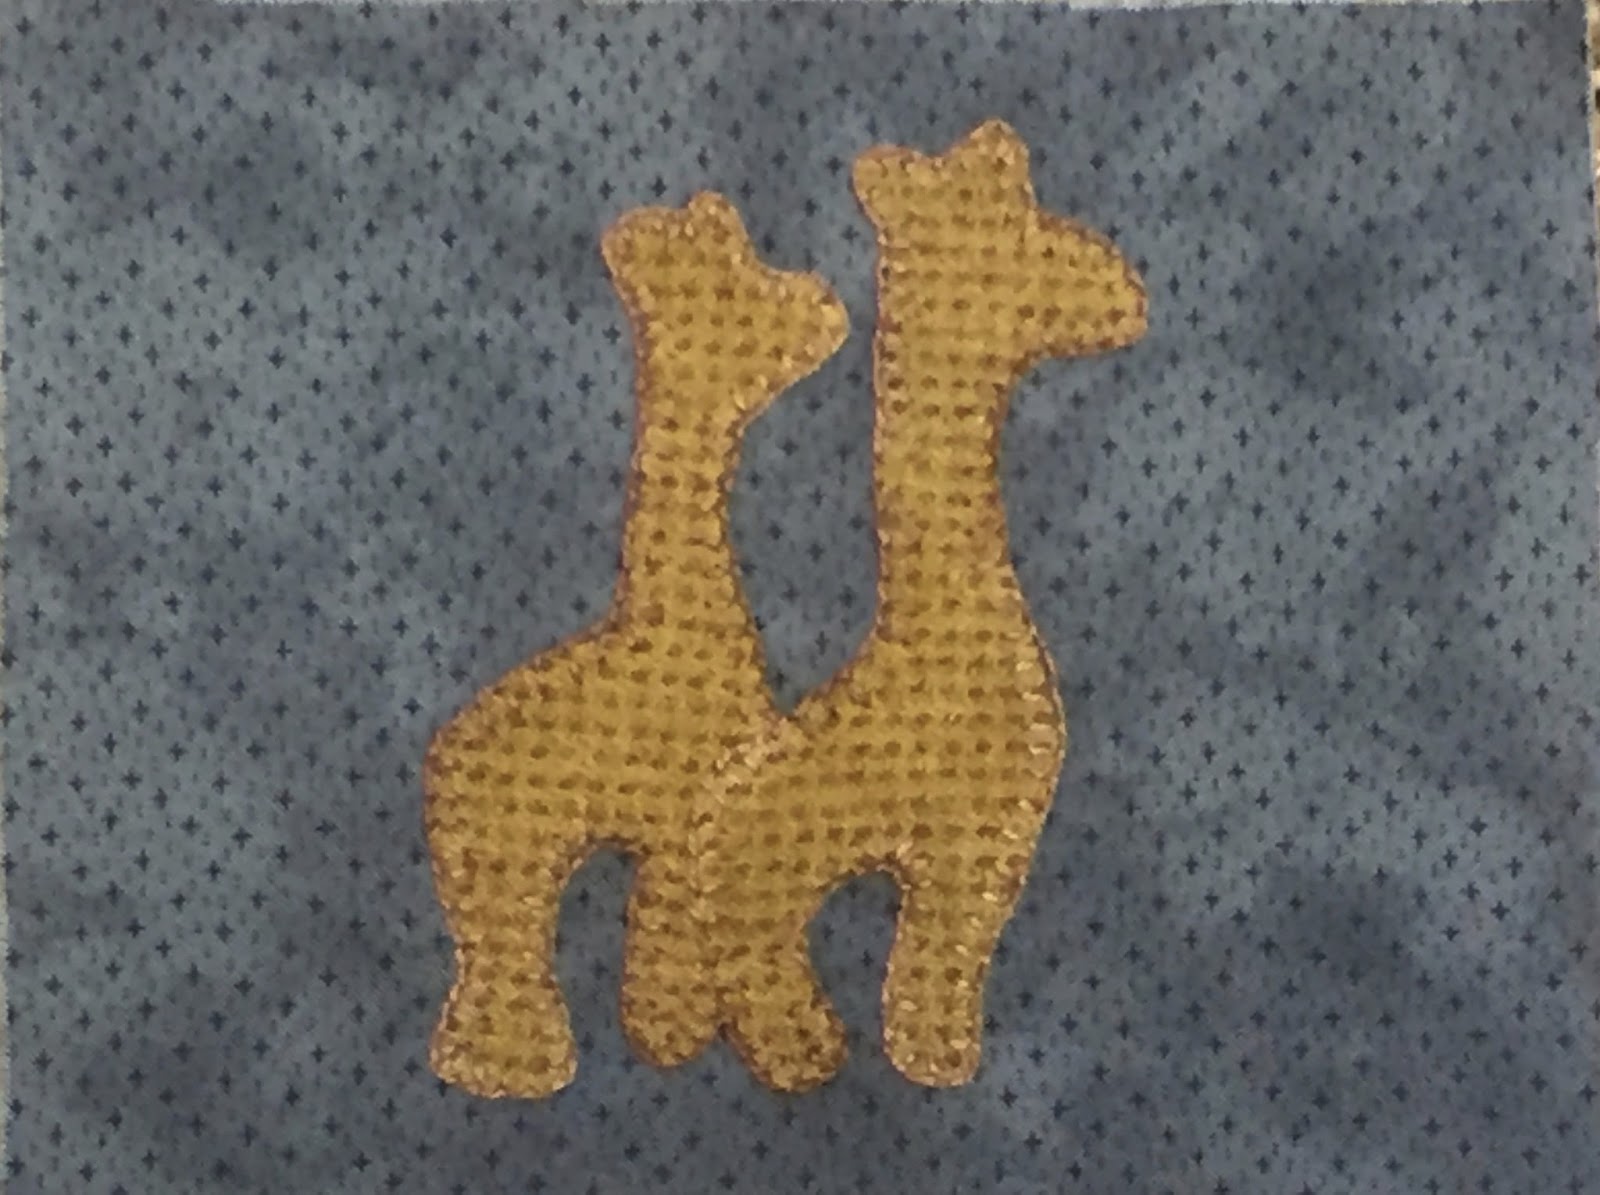
Then we need to fill the ark with animals - two-by-two. Some giraffes. 
Some flamingos. 
Not quite sure how the whale was accounted for, but we will acknowledge him anyway.
Next, we need a dove with an olive branch in her mouth to let Noah know that the floodwaters had receded.
Finally, we have a rainbow as a reminder that God will never again destroy the earth with a flood.
Now that you've seen how I spent my time on the plane, here's how I spent my time touring  Ireland (after the conference, of course). It's somewhat Ironic that my handwork project related to rain, yet we traveled to a country that was anticipated to be rainy and we never opened our umbrellas once. 
This is some street art in Dublin. The picture on the left is an Irish wolf hound. These are HUGE dogs. 1916 was the year of the uprising in Ireland that ultimately led to its independence from the United Kingdom. We saw a number of exhibits marking its centennial year.
Here is the Dublin castle. Dublin has a rather fascinating history beginning with the Celtic tribes, followed by Viking invasions, followed by the Normans.
In the mid-1800s, Ireland was havocked by failure of the potato crops, a period known as "The Great Hunger." Many died from starvation, many died from disease, and many emigrated from Ireland in search of better opportunities. This figure is part of a memorial to the victims of the potato famine. It was a gift from Canada in recognition of the contribution of the Irish immigrants to the country of Canada.
 A visit to Blarney Castle.
 The autumn colors in Ireland were amazing.
Yes, I did kiss the Blarney stone. I didn't realize I would have to hang over the top of the castle. For some reason I had thought it was down in the ground.
Glimpses of the Irish countryside.
An Irish traffic jam. The pink markings are "brands" to help tell flocks apart.
The Ladies' Point. A look out spot along the Ring of Kerry. Queen Victoria visited this area during her reign, and her ladies-in-waiting were particularly enamored with this spot. 
The beautiful Cliffs of Moher.
The Celtic cross. I was able to learn a little about the symbolism within the Celtic cross. Although its exact origins are unclear, tradition suggests that St. Patrick introduced the addition to the ring around the arms of the cross. Initially, the ring was a symbol of the sun which was worshipped by the pagan tribes. The ring was later used as a symbol of eternal life through Jesus' death on the cross. 
This concept of taking something once foreign and hostile to the gospel and giving it a new meaning and purpose is one that resounds through God's Word. In Paul's sermon on Mars Hill in Acts 17, rather than berate or ridicule the Athenians, he acknowledges their religious nature, yet is clear in explaining to them who this "unknown God" is and the need for all to come to repentance. In Paul's second letter to the Corinthian church, he reminds them of their new identity in Christ and that the old things are now passed away. I'm glad for a God who doesn't leave us in the "old things," but delights in making us new creatures.
Therefore if anyone is in Christ, he is a new creature; the old things passed away; behold, new things have come. 2 Corinthians 5:17

Saturday, October 29, 2016

How to smoke a tomato

I realize that this is a bit of an odd title for a blog post, but I hope that you will enjoy the associated recipe. This recipe is for a great marinara pasta sauce that has been adapted from my Gumbo Shop cookbook. This cookbook features great New Orleans-style recipes, including ones for turkey sausage gumbo and creole. Of course, we include our own adaptations to make these recipes our own.
This year, we've been enjoying a prolonged frost-free season here in the Intermountain West. This means that we continue to have tomatoes ripening on the vine. Of course, this, in turn, means that we need to find things to do with them. The other night, I went out and picked a nice bunch of them. I didn't have enough to put up in jars, but still needed to do something with them. I decided that this marinara sauce would be a great choice.
This sauce features smoked tomatoes. We always enjoy an opportunity to use our smoker. The flavor that the smoking process adds to this sauce really gives it a nice touch. Start by peeling and coarsely chopping the tomatoes. 

Here is the recipe. I am basing the amounts on what I am used today. You can size it up or down to suit your own needs. The main thing is that you divide whatever amount of tomatoes you use and smoke half of them. You will then adjust the amount of the other ingredients. 

Here is a picture of the tomatoes I used - all peeled, chopped, and ready to go!
Ingredients: 12 cups of coarsely chopped tomatoes, divided (You can use either fresh or canned)
1/2 to 3/4 cup olive oil
2 cups chopped onion
8 ounce package of sliced mushrooms
2-3 tbsp minced garlic
4 tsp salt
2 tsp black pepper
2 tsp dried oregano
1 tbsp dried basil
Meat as desired (sausage, chicken, and/or shrimp)
Prepared pasta such as penne, rotini, or bowtie

Step 1: Smoke the tomatoes. To smoke the tomatoes, spread them out on a baking sheet and place in a smoker or covered grill for 20 minutes. We used our smoker and set the temperature at 225. The goal isn't to cook the tomatoes but to impart the smoky flavor. Here they are in the smoker and what they look like after the smoking process.

Step 2: Prepare the sauce. Saute the onions in the olive oil until they are soft. Add the mushrooms, garlic, salt, pepper, oregano, and basil and cook for about 1 minute or until these ingredients have blended well together. Stir in the smoked and non-smoked tomatoes. Simmer to reduce the liquid a bit. about 20-30 minutes. This isn't intended to be a really heavy thick sauce, but I like having some of the liquid reduced. I also stirred in about 2 tsp of cornstarch that I had mixed in about 1/4 cup of reserved liquid from the non-smoked tomatoes to thicken the sauce just a little. This step isn't necessary, but is an option depending on your preference. 
Here's a look at the volume of the sauce that we prepared. Yum! The capacity of this dutch oven is about 4 quarts to give you a reference.
Step 3: Prepare the meat and add to the sauceFor the meat, you can use shrimp, chicken, or sausage or, perhaps, a combination. If using chicken or uncooked sausage, brown it separately before adding it to the sauce. We used our favorite, Chef Aidell's Cajun andouille sausage, which is pre-cooked; however, we also opted to slice the links into coins and brown them under the broiler in the oven. If using shrimp, you can cook them separately or cook them in the sauce itself. 
Because we made such a large batch of sauce, we will be freezing some to use later. I wasn't sure how the shrimp and sauce would hold up through the freezing and reheating process. As such, we stirred the sausage into the sauce and then cooked a few shrimp to add to each individual serving.

Step 4: Serve over pasta and enjoy

Friday, September 30, 2016

A Sampling of Fall

As I've shared in previous posts, fall really is my favorite time of year. It's hard to say which month of fall that I enjoy the most. September brings the hints of colors on the mountainside and cooler evening temperatures. By late September, the passing of the autumnal equinox brings us longer hours of darkness that drive home the message that summer has passed. October brings out the full colors of the season along with children planning their costumes for a night of trick-or-treating. November is a more reflective month; the rich colors have faded, and the bare, brown tree branches remain. We may see a few weeks of Indian summer or some early snowfall as we prepare for the Thanksgiving season.
I thought I would use this month's post to share a wall quilt I made a few years ago. It is fall-themed and features a sampling of different quilting techniques and patterns. The name of this piece is Wonky Fall Foliage and is designed by Sandy Workman of Pine Mountain Designs. Her shop, Pine Needles, is located in Gardner Village in West Jordan, Utah. This shopping center features a number of shops and boutiques, including Archibald's Restaurant which is housed in an historic flour mill.
I began this project as part of a class offered by Village Dry Goods in Brigham City, Utah. I didn't finish the project that day, but I was introduced to each of the techniques featured in this quilt. Unfortunately, I don't have pictures from when this project was in process to illustrate the techniques, but I will do my best to explain as I go.
The first thing we learned was how to make wonky blocks featured on the top and bottom rows. For someone like me who likes to have everything neat and ordered, being tasked with making blocks that were of irregular angles and off balance was a bit unnerving. You can even see that some of my blocks didn't end up as "wonky" as perhaps they could have. For these blocks, you start with the center square, you then add four strips around the center and press them out. You then use a straight edge ruler and rotary cutter to create irregular angles at each of the corner. The next step is to add another row of fabric strips and then repeat the process of trimming the fabric in such as a way to create irregular angles. After you add the third row of fabric strips all the way around, you "square up" the block to the desired dimensions.

The "grass" in this piece is made up of multiple green prints and features a tumbler block. In case you are wondering, a tumbler block is a tall trapezoid that resembles a tumbler glass. these blocks can be arranged in a number of different ways and using different colors to create patterns.
In my quilt, the small green tumblers are simply arranged in a straight row.
Another fun aspect of this quilt was learning how to paper piece hexagons. I've shared some experiences with paper piecing in another post; however, this project marked the first time I had someone show me the process. In this quilt, the hexagons simply form a dividing line between one portion of the quilt and the other. After I pieced the individual hexagons, I hand-sewed them together and then used a blind stitch to attach them to the quilt top.
Working on the center portion of the quilt introduced me to principles of fusible appliqué, including the use of a light table to help with tracing pieces, and then placing them onto the background fabric. I learned a few other things about fusible appliqué:
  • If the paper doesn't want to peel off nicely from the edge, use a pin to gently scratch through the paper near the middle of the shape and then peel it off starting from the middle and moving out.
  • Be careful that the fusible side of the appliqué fabric is not facing up when you go to iron your pieces to the background fabric. Otherwise your appliqué piece will be stuck to the iron.
  • If faced with the above scenario, a dryer sheet is a useful resource for removing adhesive from the iron. Another technique to remove adhesive is to sprinkle some salt on a piece of paper and iron over the salt. (In case you are wondering, I keep a box of dryer sheets in my sewing room.)
We also learned some embroidery stitches to embellish the appliqué pieces and to help "create" the center picture. I've enjoyed learning different embroidery stitches since I was in elementary school, and I had fun adding stitches to this piece.


I had this piece machine quilted at Village Dry Goods. When I brought it in, it was fun to be announced as "someone who finishes projects." Although I have plenty of "in progress" or "not yet started" projects in my repertoire, I certainly seek to be one who sees projects through to completion. Here is the label I added to the back of this quilt to mark its completion:
Whether we're speaking of the season that reminds of a year coming to a close or finishing a project, there is something satisfying about bringing something to completion. The terms "finish" and "complete" are used throughout both the Old and New Testaments. Depending on the context, they can serve as a warning or provide hope. For example, in some cases, the nations are warned of complete destruction because of their disobedience. In other cases, we see the manifestation of God's glory as a work is brought to completion such as the building of the temple. In yet other uses, complete refers to the state of the individual who is surrendered to Christ. I am going to close with the words of Paul in his second letter to the Corinthian church. In this letter, he challenges these believers to be complete and speaks of the promise in response to their being made complete:
Finally, brethren, rejoice, be made complete, be comforted, be like-minded, live in peace; and the God of love and peace will be with you. 2 Corinthians 13:11

Sunday, September 25, 2016

Potato Leek Soup

One of our favorite things about fall is enjoying the harvest from our backyard garden. This time of year, our attention turns to the root crops. This is the second year that we have included leeks in our garden. Last year, we turned them into some pretty good potato leek soup. Today, I'm working on this year's first batch, which actually a quadruple batch of the recipe that I am sharing. Our style of cooking is to make soup in extra large batches, keeping some for a meal or two and freezing the rest. With our family's busy schedule, we love having a freezer full of ready-to-go meals.
Before the recipe, a word or two about the two key ingredients in this soup …
First of all, leeks.
Leeks have been grown for at least several thousand years. In the Old Testament book of Numbers, the children of Israel grumble to Moses remembering, "… the fish we used to eat free in Egypt, the cucumbers and the melons and the leeks and the onions and the garlic, …" Other archaeological evidence also supports leeks being consumed in Egypt and Mesopotamia by at least 2000 BC. Leeks have also become an important part of Welsh cuisine and is one of the national emblems of Wales. One legend relates that a Welsh king had his soldiers wear leeks on their helmets to identify themselves in a battle agains the Saxons that took place in a leek field.
Nutritionally, leeks are a great source of vitamin K, iron, manganese, copper, and folate. They are grown in a manner similar to onions. In early spring, I set out the small seedlings that are rather thin and then leave them to grow throughout the summer and into the fall. In contrast to the bulb of the onion, the leek is more cylindrical in shape. Leeks also have a more complex root system than onions. The edible portions of the leek are its white base and the light green portion of the stalk (similar to green onions). Here is a picture of a few of the the leeks I pulled from my garden.

Second, Yukon gold potatoes.
While you probably could use other types of potatoes in your soup, we are rather partial to the Yukon golds. The Yukon golds are actually a new variety of potato that was developed in  the 1960s in Ontario, Canada, and officially released on the market in 1980. This potato was patterned after a smaller yellow potato that was indigenous to Peru. It is a great source of iron and vitamin C.
Now, on to the recipe …
I am providing an ingredient list for a single batch of soup. This amount will feed our family of four for two meals, provided no one has seconds. We love serving this soup with warm crusty bread.
Ingredients:
3 tablespoons butter (yes, just go for the real stuff, it tastes so much better)
4 leeks (This is based on the size of leeks that are typically available in the grocery store. The leeks from my garden are slightly smaller so I will pull enough leeks to equal the amount that I would get from four leeks from the store.)
3 cloves garlic (roughly one tablespoon of chopped garlic if you're like us and just buy a big jar and spoon out what you need)
2 pounds of Yukon gold potatoes, peeled and cut into 1/2 inch cubes
2 quarts chicken broth (you can make your own from bullion cubes or base or buy the Swanson's brand quarts)
2 bay leaves
sprig of fresh thyme (about 1/4 to 1/2 tsp if you are using dried thyme)
1 teaspoon salt
1/4 teaspoon pepper
1 cup heavy cream

Directions:
Melt the butter over low heat in a large pot. Add the leeks and garlic and sauté for about 10 minutes until the leeks are wilted. Be careful not to have the heat up too high so that the leeks brown and burn. Here is a picture of how we chopped up our leeks for this stage of the process.
Add the potatoes, chicken stock, bay leaves, thyme, salt and pepper and bring to a boil. Boil over low heat for at least 15 minutes or until the potatoes are very soft.
Remove the bay leaves and thyme sprig. Allow the soup to cool a bit and use an immersion blender to puree the ingredients together. Immersion blenders cost about $30 - 40. If you like making soups like this one, it is a great investment. We bought ours a few years ago when we started making butternut squash soup. We've definitely put it to good use!
Add the cream and bring the soup to a slight simmer. You don't want to bring it to a full boil or the cream will start to separate. Adjust seasonings as desired and enjoy!

Wednesday, August 31, 2016

Hip to be a floating square

Two months ago, I shared a picture of a "floating square" block. This was one of several blocks I created for this quilt. A few days ago, I put the final stitch on the binding , and I am ready to share the quilt with you. It has been a fun project to put together this summer. One of the nice things about it is that the blocks are rather easy to cut and then piece together. If you are efficient, the top could be finished in a weekend.
As I shared earlier, my daughter and I saw a quilt using this pattern during our visit to Corn Wagon Quilt Company during the Utah Quilt Shop Hop back in June. This is one of our favorite shops along the Shop Hop route. It's probably a good thing for my bank account that this shop is about an hour and a half drive away from my house. They have a great selection of fabrics and patterns in many styles. My favorites are their wool projects and Civil War reproduction fabrics.
So, back to the story of this quilt …
The pattern for the quilt is found in the book Piece of Pie by Pie Plate Designs, which is based in Fountain Green, Utah
The patterns in this book are described as layer cake friendly. In this case, a layer cake is not a dessert but rather forty-two 10-inch squares from a given fabric line. For this quilt, the fabric line was Chic Neutrals.
One of the nice things about layer cakes is that you get a sampling of the different fabrics without having to buy a significant amount of yardage. They are great for smaller wall quilts and even up to lap size quilts. They also make it easy to match shades and colors. You can see the variety of related patterns and colors that were included in this fabric line. I will note that, in addition to the layer cake package, I also needed to purchase additional fabric for the borders - just something to be aware of when working with pre-cut fabric such as layer cakes.
Because this quilt was for my teenage daughter, I elected to use minky fabric for the back. Minky is a type of plush fabric. It is softer and thicker than fleece and isn't prone to "pilling." Minky fabric does tend to slip apart when you are trying to sew it together. When I was piecing the backing for this quilt, I found it easier to use a 1/2 inch seam rather than a typical 1/4 inch seam. I also pressed the seams open rather than to one side. A fun thing about minky is the way in which the machine quilting design shows in the fabric. I elected to use an edge-to-edge geometric pattern for this quilt. Here is what the back looks like.
In case you were wondering, my daughter was rather happy with her new quilt.
As I contemplated the term "floating" in the name of this quilt block, the image of something fleeting or temporary came to mind. In the New Testament, James reminds us that this life is temporary, like a vapor, and that we do not know what tomorrow will bring. Paul also reminds us in his second letter to the church at Corinth that, "the things which are seen are temporal." I will close with some excerpts from Hebrews 11, also known as the "Hall of Faith." As we live our our lives in this temporary world which is seen, we are reminded to walk by faith with an eye to the eternal things which are unseen.
 By faith Abraham … went out, not knowing where he was going … for he was looking for the city which has foundations, whose architect and builder is God. 
Hebrews 11:8,10

Sunday, August 14, 2016

An Olympic Meal: Brazilian Pork and Black Bean Stew (Feijoada)

As I've shared in previous posts, I love the Olympics, and I enjoy creating meals around events. During the 2014 Winter Olympics in Sochi, I shared our recipe for borscht, a Russian beet soup. For these Rio games, I did a little work to find a Brazilian recipe that we would enjoy. I settled on a pork and black bean stew. While this recipe is a little similar to the Cuban Black Beans & Rice recipe, I shared earlier this year, it also has its own distinct flair. The name of this stew is Feijoada and has been described as the national dish of Brazil. It can be made with either pork or beef. In Rio de Janeiro, it is most commonly prepared with black beans, other regions of brazil may use red beans. Feijoada also can include vegetables such as kale - we used collards, and it is often served over rice.

Before moving on to the recipe, here are a few fun facts about Brazil:

  • Brazil is the 5th largest country in the world in both area and population
  • Brazil's official language is Portuguese. Portuguese explorers first arrived in Brazil in 1500.
  • Brazil is divided into 5 regions. The north region includes the Amazon rain forest.
  • Brazil's plant and animal species are highly diverse. Over 1,200 species have been identified in the Amazon rain forest alone.


  • Rio de Janiero, the site of the 2016 Summer Olympics, is the second largest city in Brazil. The Christ the Redeemer statue is considered one of the Seven Wonders of the Modern World. 


Here is our recipe for Brazilian pork and black bean stew. We've enjoyed it, and we hope you will, too. 

Ingredients:
1 pound of black beans
4 Tablespoons olive oil
1 Large sweet onion, chopped - set aside about 1/4-1/3 of the onion to use later
1-2 teaspoons chopped garlic
2 or 3 bayleaves, crushed
2 ham hocks - these really are going to provide flavor as much as anything so it's okay if they don't have a lot of meat on them
1 pound sausage - we used andouille, but you could use another smoked sausage such as linguica if you like
1/2 pound bacon
2 bunches of collards
Salt and pepper to taste

Instructions:
1. Soak the black beans overnight in cold water. The next day, drain and rinse them, cover with water, and cook until tender. As the beans are cooking, you can continue with some of the other steps. Note: do not drain the beans after they have cooked. 
2. Heat 2 tablespoons of olive oil and sauté about 2/3 of the chopped onion along with the garlic. Stir in the crushed bay leaves and sauté a few minutes longer. 
3. Cover the ham hocks with water and add the remaining onion. Simmer until the meat is starting to fall off the bones. Remove the ham hocks from the liquid and allow them to cool until they can be easily handled. Pour the broth from the ham hocks into the beans.
4. Now to prepare the meat. Pull the meat from the ham hocks and discard the bone and fat.  Slice up the sausage and bacon and place all of the meat on a baking sheet. Bake for about 15 minutes at 375 degrees until the meat starts to become slightly crispy. Drain off any fat and stir the meat into the bean mixture.
5. While the meat is cooking, you can prepare the collards. I rinse them off well and then separate each leaf half from the stalk. I then stack up the half-leaves (will create several stacks) and roll them up tight like a cigar. Next, I make 1/2 to 1-inch cuts through the collard cigar. In a separate pot, heat another 2 tablespoons of olive oil. Add the collards to the oil and slowly sauté them. You can add the collards to the oil in stages, allowing some to cook down a bit before adding more. The collards will cook down quite a bit (well, a lot) as you sauté them. You can also add a bit of water if you wish to keep them from sticking to the bottom of the pan. I also covered the pot as the collards were cooking. After they are nice and tender, stir into the beans. You will now have a pot of stew that looks something like this.
6. Ladle your stew over some steamed rice and enjoy your Olympic dinner!