- Be willing to learn about current issues, even if it feels challenging and uncomfortable.
- Reach out to elected officials via letter or phone call.
- Identify local and regional efforts to advocate on behalf of vulnerable individuals facing injustice and join in the work being done.
Saturday, January 31, 2026
Warm Winter Woolies (in a season in which things aren't as they should be)
Monday, March 3, 2025
A Muffuletta for Mardi Gras
For us, Mardi Gras season means an opportunity to enjoy some good New Orleans-style food. With this year's Super Bowl also being in New Orleans, we took advantage of the opportunity to "practice" a new recipe in advance of Mardi Gras - the muffuletta.
The muffuletta doesn't have the same Creole or Cajun origins as other typical New Orleans cuisine. At the same time, it does represent the contributions of individuals from multiple nationalities. The muffuletta is believed to have originated at Central Grocery in New Orleans - the creation of an immigrant from Sicily. The muffuletta features a muffuletta loaf - think very oversized burger bun, olive salad, deli meats and provolone and/or Swiss cheese.
Just what is olive salad? It's actually a rather tasty mixture of chopped olives, cauliflower, carrots, onions, herbs, vinegar, and oil. You can also think of it as chopped up giardiniera (pickled carrots, cauliflower, celery, and onion) with chopped olives, herbs, and a little oil stirred in. We opted to order a 2-pack from Central Grocery - one for the Super Bowl and one for Mardi Gras.
- 1 cup warm water - about 105-110 degrees Fahrenheit
- 1 tablespoon sugar
- 2 teaspoons yeast (if you buy it in packets, just use a whole packet)
- 3 cups bread flour (you can use all-purpose if that's what you have, too)
- 1.5 teaspoons salt
- 2 tablespoons vegetable shortening
- 1 egg, beaten
- 2 tablespoons sesame seeds
- One 16-ounce jar of Central Grocery olive salad - feel free to create your own if you wish
- A nice selection of deli meats: mortadella, salami, capicola, soppressata, ham (go to a nice deli and get the good stuff!)
- Cheese: we used provolone. You can also use Swiss
Saturday, February 8, 2025
Singing in Thorny Places
For the past two months, I've been contemplating the concept of "thorny places." My Advent devotional was built around the traditional carol, Joy to the World. Week 3 of this devotional emphasized the often overlooked third verse:
No more let sins and sorrows grow, nor thorns infest the ground; He comes to make HIs blessings flow far as the curse is found.
Week 3 of this devotional came at a time when two families within our church were grieving the abrupt and untimely losses of loved ones. These losses were a raw reminder of the sorrows of this present world and the consequences of the thorn-infested ground on which we now reside. The devotional sessions also directed us to remembering that Jesus' blessings extent to all reaches of the thorny ground, and that we are called to be the hands and feet of Jesus in the thorny places.
This has let to my contemplation of additional thorny places. The convergence of politics, pandemic, and patriarchy over the past decade has been particularly unsettling and has resulted in my being in thorny places I never would have anticipated. It's also been a season of deeper spiritual reflection and discernment between cultural norms and traditions within what I have considered to be my faith community and the enduring truths of God's Word. I've also gained a deeper appreciation of what it means to count the cost of following Jesus. As a familiar song says:
I have decided to follow Jesus; No turning back, no turning back.
While navigating these complex, thorny places, I've subscribed to a freely available online devotional that has been a nice addition to other personal Bible studies. On the weekends, this devotional features hymns, some of which date back several centuries. In the midst of the thorny places, I've found comfort in the lyrics of many of these hymns and felt encouragement in seeing enduring truths of the gospel presented in song across time. One of these hymns is "How can I keep from singing." This hymn has an American folk tune melody to it. Its author is known only as Pauline T and was written in the 1860s.
Since Christ is Lord of heaven and earth, how can I keep from singing?
Jesus loves the little children, all the children of the world. Red and yellow, black and white, they are precious in His sight. Jesus loves the little children of the world.
My song in the thorny places may not be the melody of the cardinal. Since Christ is Lord of heaven and earth, I will keep on singing. I will sing of God's mercies through advocacy, education, and seeking to do justice.
I will sing of the mercies of the LORD forever. Psalm 89:1
Wednesday, January 1, 2025
Collard greens and black-eyed peas
Both black-eyed peas and collard greens are traditional New Year's Day foods in the South. While they can be eaten separately, this recipe combines them in one dish. It makes a great side dish at a barbecue. Alternatively, it can be served over rice as something of a main dish. We've enjoyed them both ways.
For several years now, we've grown collards in our garden. We typically plant them in the early spring along with the cabbage and kale. Some years, they grow well with nice full leaves. Other years, they are a more scraggly looking. This past year was more a case of the latter. The good thing, though, is that once you chop up the collards for cooking, you really can't tell what they looked like at the outset. As we were harvesting our 2024 garden, I decided just to harvest the remaining collards all at once and be done with them. That meant cooking up a lot of black-eyed peas as well. With such a large batch, we froze a number of bags of them to use for later, including our 2025 New Year's Day dinner.
Here is the recipe which has been scaled to an amount that you might want to make if you are bringing a side dish to a barbecue. These black-eyed peas do pair very nicely with smoked brisket or pulled pork. They also taste good with a dash of Tabasco sauce (we like the chipotle kind with our black-eyed peas) or a sprinkling of Slap Ya Mama seasoning (yes, that's really it's name).
Ingredients:
- 1 pound of dried black-eyed peas
- 4-5 slices of bacon, chopped
- 6 ounces sliced, smoked sausage, we've used about half of a Hillshire farms smoked sausage. We cut it into about 1/8-1/4 inch coins and then cut them in quarters
- 1 onion, diced
- 1-2 stalks of celery, diced
- 2-3 cloves of minced garlic (feel free to add more if you wish)
- 3/4 teaspoon dried thyme
- 1 bay leaf
- 1-2 teaspoons of Creole seasoning (there are many types out on the market. We like Slap Ya Mama). If you don't want to go out and buy Creole seasoning, you can make a little homemade concoction with paprika, garlic and onion powders, dried thyme and oregano, cayenne pepper along with some salt and pepper. Don't make it hard, just sprinkle in the seasonings that you like.
- 7-8 cups of chicken broth
- 2 cups (or more) chopped collard greens. If you have more on hand, feel free to use more. If you don't have a full 2 cups on hand, just use what you have.
- Rinse the black-eyed peas and soak in cold water overnight. Drain them in a colandar.
- Use a large, heavy pot to prepare this dish. We have an old second-hand Club aluminum pot that we tend to use for dishes like this one.
- Saute the bacon until cooked and then add in the sausage until it is thoroughly heated through. Remove the sausage and bacon and set aside until later.
- Saute the onions, celery, garlic, thyme, and bay leaf in the bacon/sausage grease until the onions are translucent. Your kitchen will be smelling pretty good now.
- Add in the chicken broth.
- Place the drained black-eyed peas in the pot and add in the Creole seasoning. For a little added heat, you can sprinkle in a little extra cayenne pepper (about 1/4 teaspoon or so). Cook until the beans are nearly tender, about 20 minutes or so. Remove the bay leaf at this point.
- Stir in the chopped collard greens along with the reserved bacon and sausage. Cook until the greens are well-cooked and the black-eyed peas are tender.
- Adjust seasonings as desired.
- Enjoy as a side with barbecue or over rice as a stand-alone dish.
Wednesday, November 27, 2024
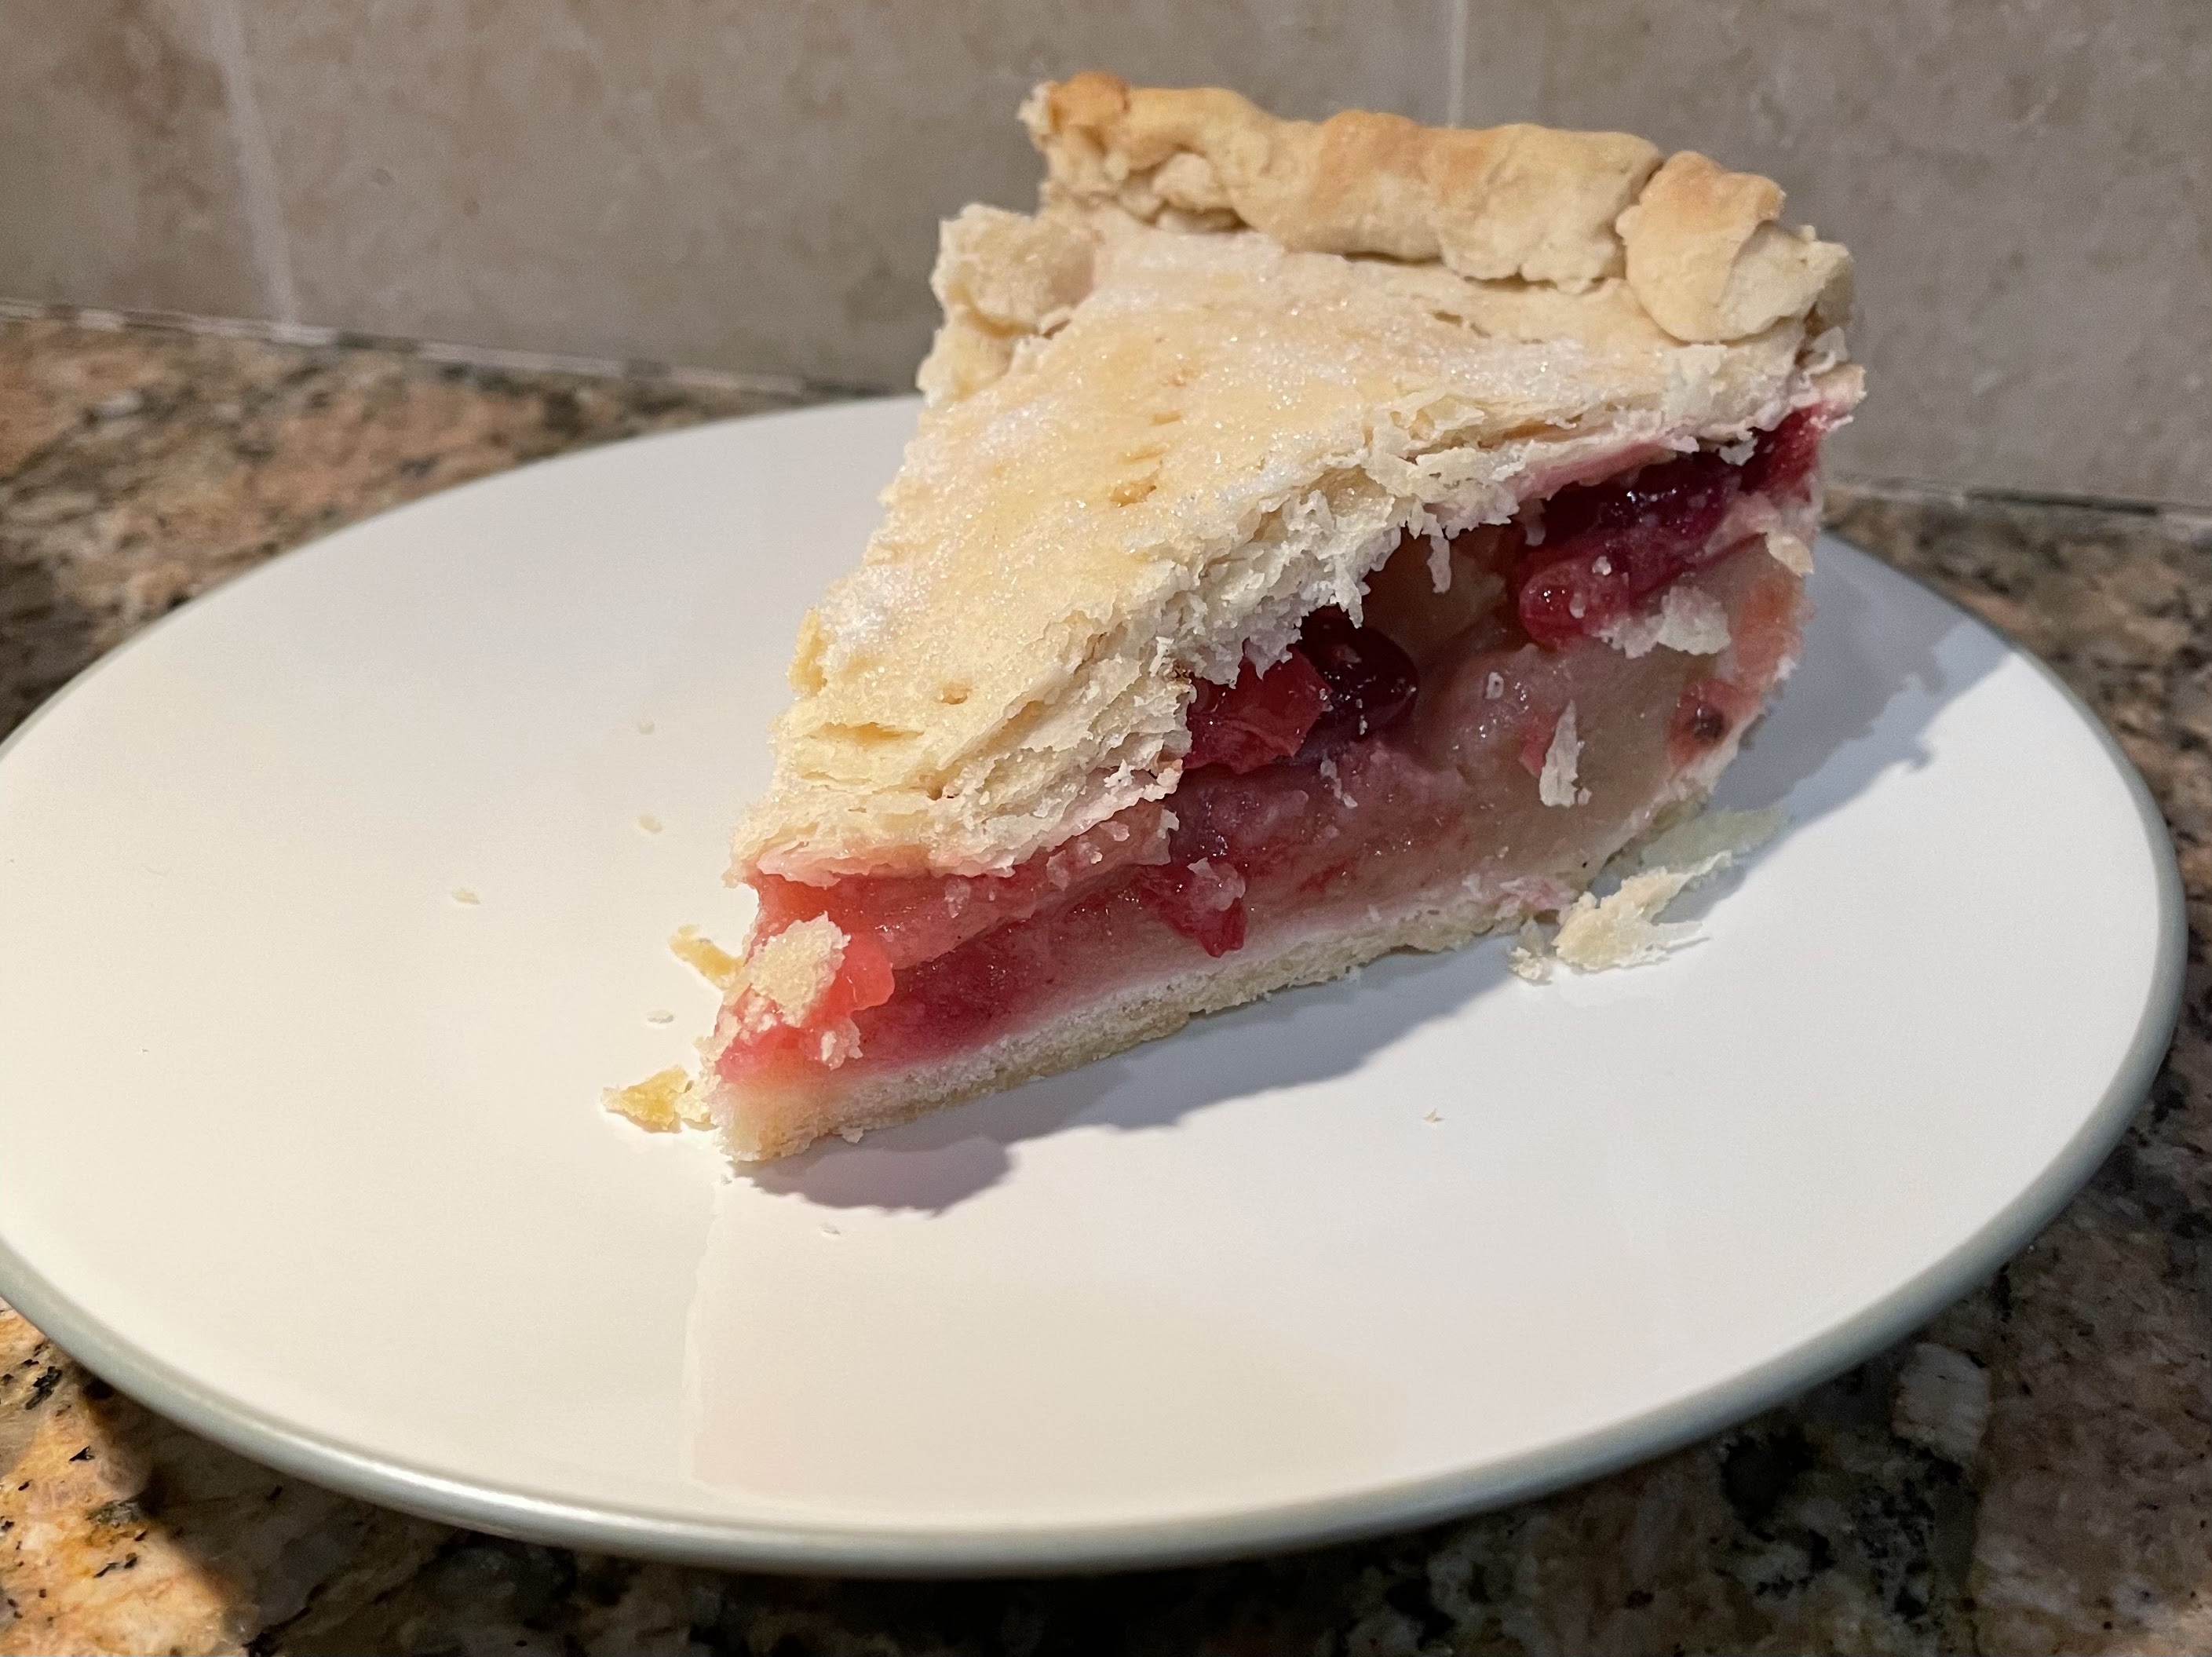
Cranapple pie for Thanksgiving
Because I also like cranberries, about 10 or so years ago, I decided to give a cranapple pie a try. Since then it's replaced the traditional apple pie as part of our Thanksgiving Day dessert options. If you are making an apple pie and have some whole cranberries on hand (dried cranberries would likely work as well), that's all you need.
Here is how I put my cranapple pie together. The recipe is for a 9-inch pie, but you can scale up or down depending on the size of pie you would like to make. With fewer of us at home for Thanksgiving this year, I will scale down for a 7-inch pie. We still want all three of our pie options, but three full-size pies are a bit too much for us, even if we justify cranapple pie for breakfast as "fruit pastry."
Filling for a 9-inch cranapple pie:
- 3/4 cup white sugar
- 1/4 cup flour
- 1/2 teaspoon ground nutmeg
- 1/2 teaspoon cinnamon
- dash of salt
- 6 cups thinly sliced and pared apples (I like Granny Smith, but use what you prefer)
- 1/2 cup or so of fresh cranberries - stir them in and see if the combination looks right to you.
- 1/4 cup of walnuts (optional - I've used them some years, but not others - your choice)
- 2 tablespoons of margarine or butter
- 2/3 cup plus 2 tablespoons of shortening (I use Crisco sticks and keep them in the freezer until I'm ready to use them)
- 2 cups flour
- 1 teaspoon salt
- 4-5 tablespoons of cold water
- Stir the dry ingredients together.
- Stir in the apples, cranberries, and walnuts (if using). You will end up with a mixture that looks something like this. Don't worry if it looks as though the cranberries aren't totally evenly distributed. It all works out during the baking.
- Stir the flour and salt together
- Cut the shortening into the flour and salt using a pastry cutter until the shortening particles are the size of small peas and the mixture is crumb like. Alternatively, you could put the mixture into a food processor and pulse it a few times. If you do, be careful not to run the processor too long, or the shortening will start to melt which will alter the texture of the pie crust.
- Sprinkle the water in about a tablespoon at a time and mix it in with a fork. This helps you avoid overworking the crust and making it too tough. If needed add in a tablespoon or more of water to get it all to come together.
- Divide the crust in half. Roll out the bottom layer, and line the pie pan with it.
- Spoon the pie filling into the crust-lined pie pan.
- Dot the top of the filling with the cut up pieces of margarine or butter.
- Roll out the top crust layer, seal and flute the edges. I'm not really an artist when it comes to pie crust edges. I just kind of crimp and roll them together.
- Cut slits in the top and sprinkle with a little sugar or cinnamon sugar if desired.
- Cover the edges with a strip of aluminum foil to keep them from burning. Remove the foil after the pie has baked for about 20 minutes or so.
- Bake in a 425ºF oven for about 40 minutes or so until the crust is slightly browned and you can see the juices bubbling through the slits in the top crust.
Sunday, December 24, 2023
Christmas Stitches and Christmas Wishes
Here we find ourselves at Christmas Eve morning. The days of anticipation and preparation are nearly complete. Before the day is over, we will take part in our church's candlelight service and enjoy our annual family Christmas Eve dinner of Manhattan clam chowder. (Watch for the clam chowder recipe early next December.)
This short post shares this year's additions to the garland I have on my bannister. Over the years, I've accumulated more ornaments than can reasonably fit on our Christmas tree. I've elected to use my garland as a place to display my cross-stitched ornaments, most of which feature designs from Shepherd's Bush.
Here are a few "up close" looks at some of the ornaments on the garland.
This year's additions include one original Shepherd's Bush design and one from With Thy Needle & Thread. I now have a total of 21 stitched ornaments on the garland. Here is another look at the two new additions:
With that, I will bring this post to a close and wish you a very merry Christmas and extend my best wishes for a happy 2024. I will leave you with the apostle Paul's perspective in his letter to the Galatians. Just as we are now experiencing the culmination of our preparations for Christmas 2023, move than 2000 years ago, the entire world experienced the culmination of the promise first made in the Garden of Eden with the birth of Jesus.
When the fulness of the time came, God sent His Son, born of a woman, born under the Law, so that He might redeem those who were under the Law, that we might receive the adoption as sons and daughters. Galatians 4:4-5 (NASB)
Wednesday, December 20, 2023
Danish Christmas Cookies
As the countdown to Christmas 2023 winds down, I hope that you all are putting the finishing touches on your holiday preparations. Through the years I've shared some of our recipes for Christmas caramels, chocolates, and cookies. For this short blog, I thought I would share another cookie recipe that has become a Christmas season favorite over the past few years.
In at least one of my past postings, I've shared that I'm half Danish. The only Danish recipe I have that has been handed down through the generations, though, is my paternal grandmother's recipe for aebelskivers. Through the years, I've picked up a couple of Danish recipe books with the larger goal of learning some new cooking skills and enjoying some new foods. A few years ago, I decided to add a Danish cookie to our repetoire of Christmas cookies. A recipe titled "Countess Cookies" caught my eye as one that seemed like one we would enjoy. After following the recipe as published, it was quickly evident that something wasn't entirely right, and I needed to make some modifications. I did some searching for "Countess Cookies" and "Danish Countess Cookies" on the Internet without any success in finding a recipe that was conceptually close to this one.
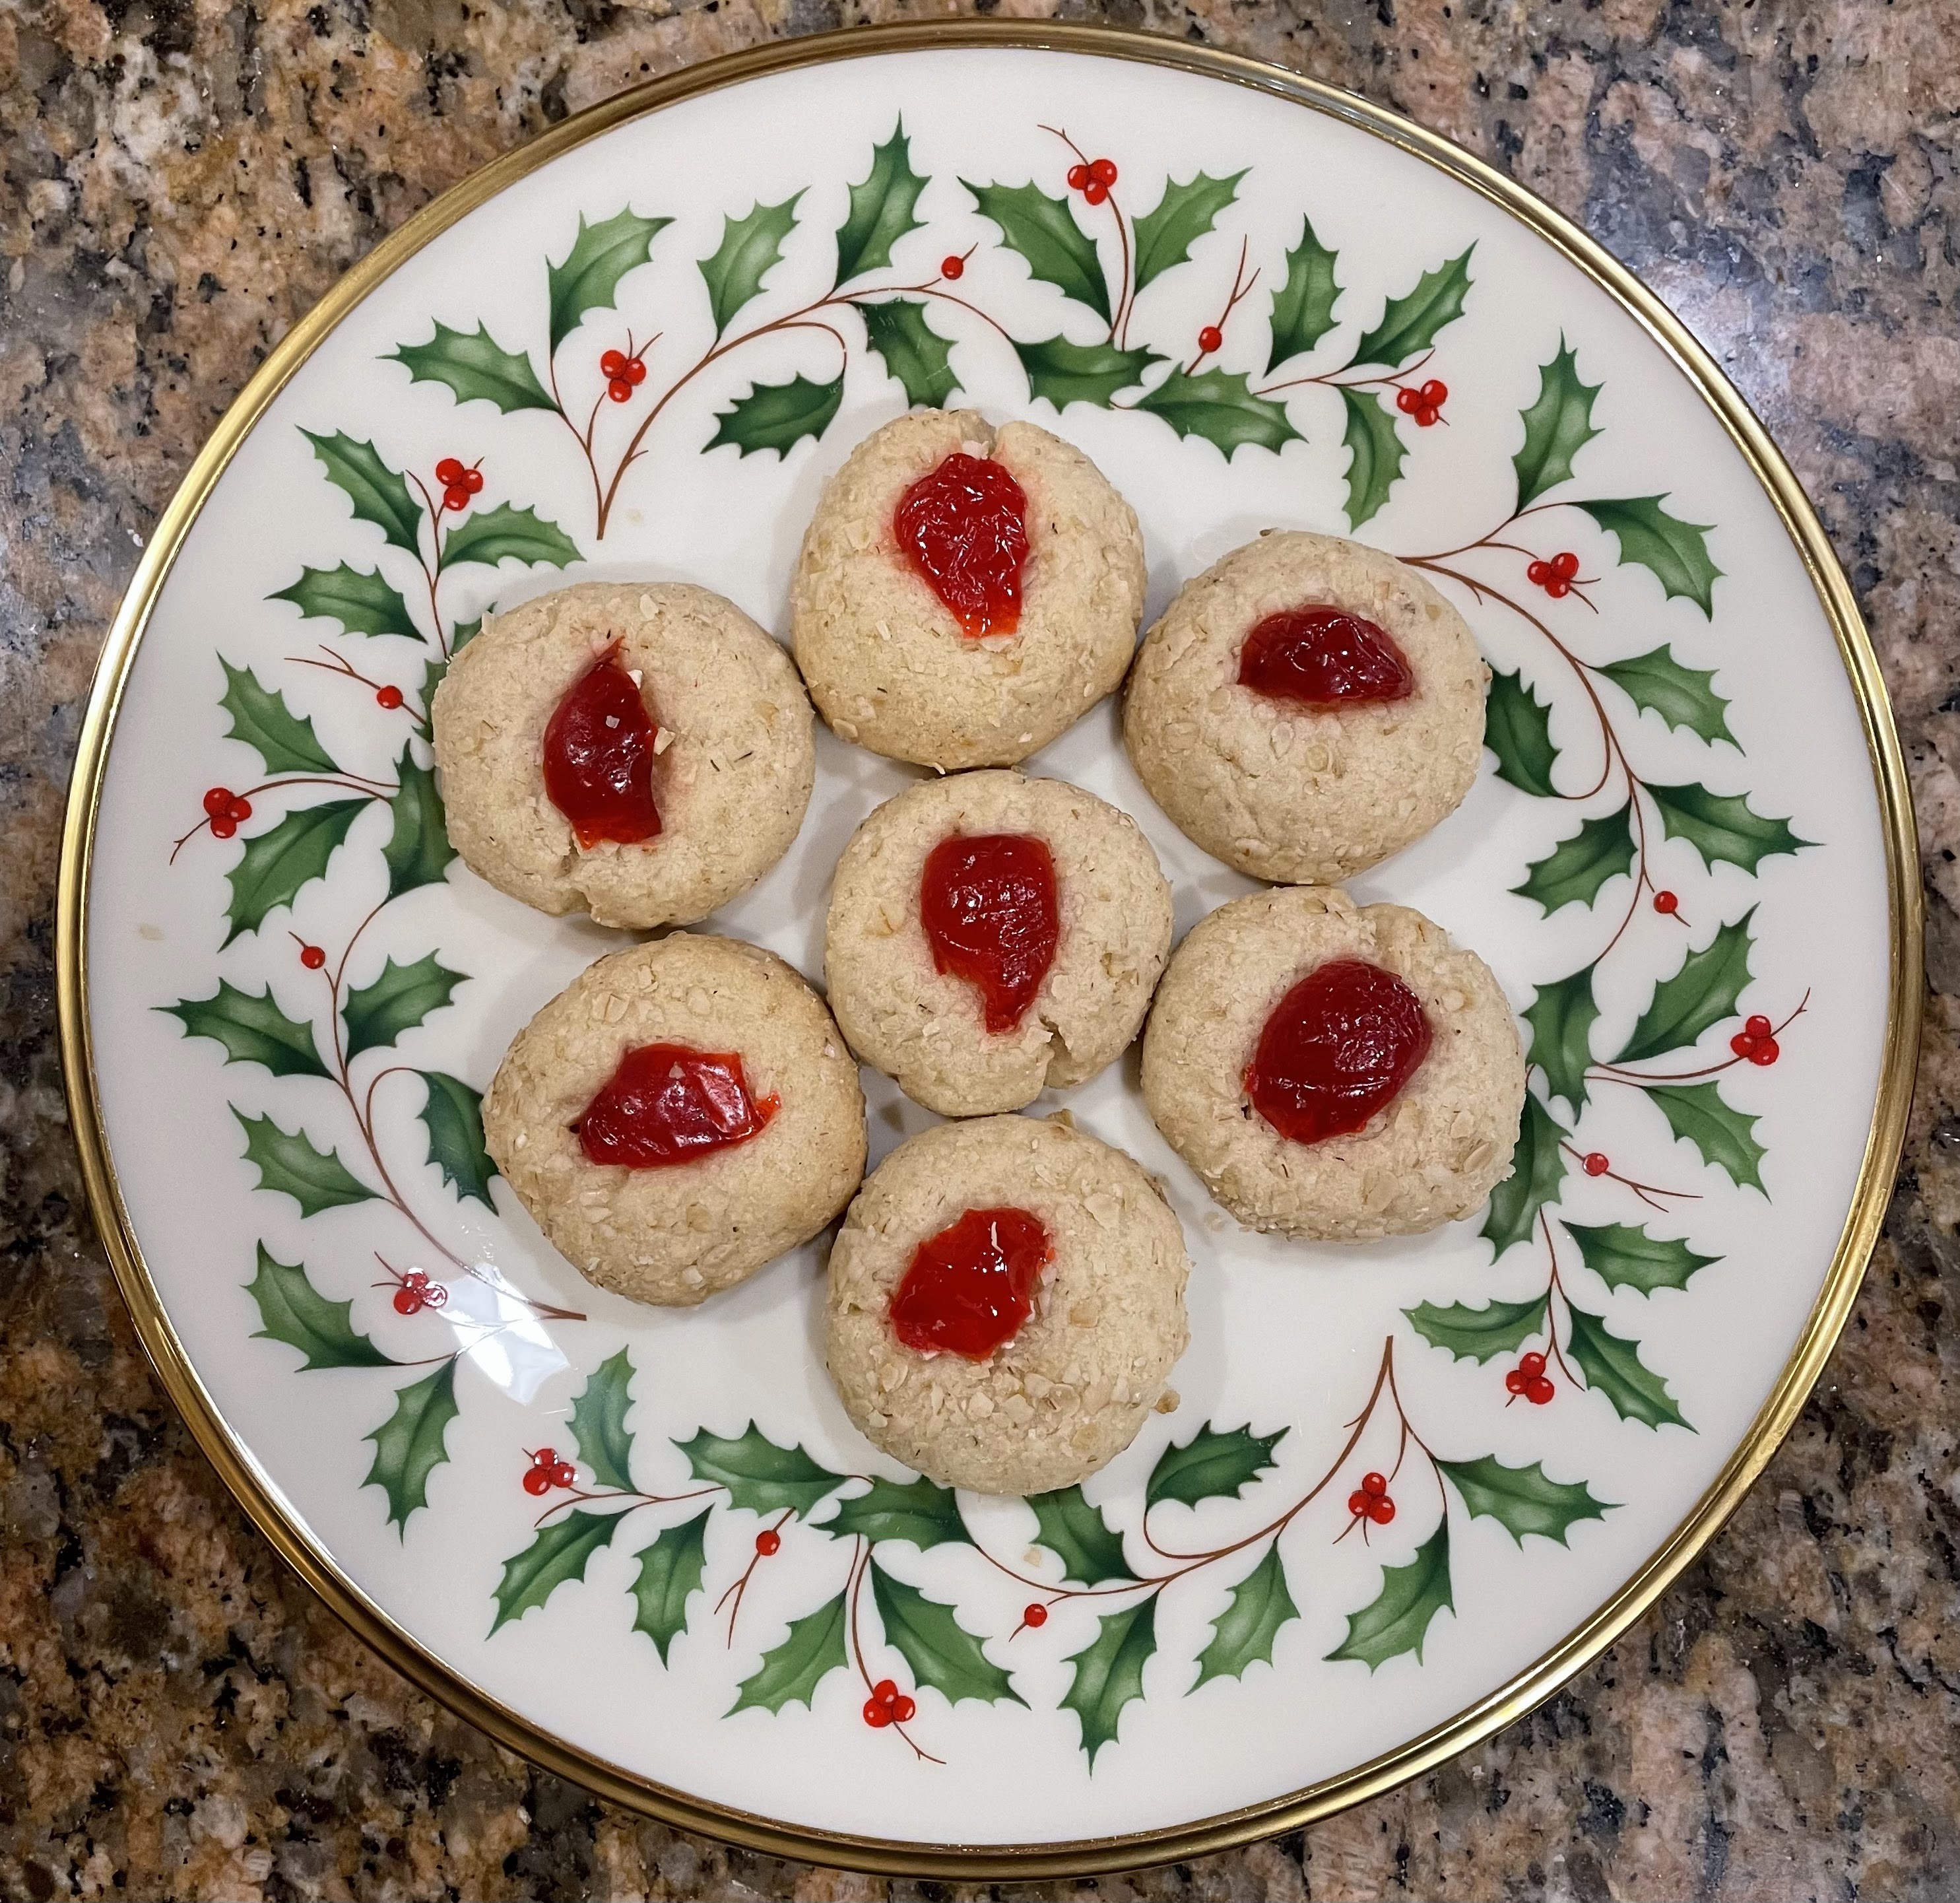
Despite these challenges, I've managed to create a recipe that my family likes. The extent to which it is authentically Danish is probably debatable. Just the same, it's at least intended to be in the spirit of the Danish butter cookie. Here is our recipe along with a few pictures.
Ingredients:
- 3/4 cup butter
- 1/2 cup shortening
- 3/4 cup brown sugar
- 1 egg
- 1 tsp vanilla
- 2 1/2 cups flour
- 1/2 cup ground oats
- 1 1/4 tsp baking powder
- 3/4 tsp salt
- Additional ground oats
- Maraschino cherries cut in halves or quarters
Saturday, December 9, 2023
An Advent Sampler and Memories of Sunday School
Although the church I grew up in didn't celebrate the Advent season in the same manner as those with liturgical traditions, December always shifted to a season of anticipating Jesus' birth. This was especially true in the children's Sunday School lessons during the month of December.
Sunday School has always had a very special place in my life, and several of my limited memories of living in Alaska are tied to Sunday School. To be honest, I really don't have a lot of memories of the specific things I learned given that I was not quite 4 years old when we left. I primarily remember church as being a special place and that I liked going to Sunday School. I remember having a little black purse in which I would carry a small red New Testament. I also remember going to some type of Christmas service and being able to walk up to the front and see baby Jesus in the manger.
The fall of 1974 found me in Sunday School for the first time in over 3 years. From the summer of 1971 until our move to Corinne, Utah, in August 1974, we lived in a very remote area of Utah and did not have access to a church to attend regularly. Looking back now, that little 1st through 3rd grade Sunday School class has had a central influence on my life. As we entered the month of December, the lessons shifted to the Christmas story. I still remember the sense of wonder and amazement as I learned about the prophets who foretold Jesus coming. While the story of baby Jesus being born in Bethlehem was familiar, this aspect of the Christmas story had me in awe. I also remember the kindness of my teachers, a husband-wife team, and how each Sunday morning, they had a small Christmas craft for us to complete - nothing particularly fancy but a little something special as we came in the door each week of December.
Through the years, I've come to love the Advent-themed hymns even more. In this post, I'm sharing a sampler from my favorite stitching shop, Shepherd's Bush, in Ogden, Utah. This is a project that I began working on a number of years back and finished in 2021. Earlier this fall, I finally brought it in to be framed so that we could enjoy it this Christmas season. The hymn featured on this piece, O Come, O Come Emmanuel, reflects the message of the prophets for Emmanuel, God with Us, to come here to earth to walk among us. Here are a few additional close up pictures of this piece.
Therefore the Lord Himself will give you a sign; Behold, the virgin will conceive and give birth a son, and she will name Him Immanuel. Isaiah 7:14
Monday, November 20, 2023
A half pound cake for the fall holiday season
Preparing desserts for two is also a challenge. We enjoy a nice dessert, but full size recipes result in far more than we need. About a year ago, I was delighted to find a half sized bundt cake pan at a local kitchen store. Pound cake is one of our favorite desserts (and breakfasts), so I was very quick to purchase it. Historically, pound cakes have included a pound of butter, a pound of eggs, pound of sugar, and a pound of flour.
Fall is our favorite time of year, and we enjoy the tastes and flavors that go with fall, including cranberries and a little spice. A few weeks ago, I was looking for a fall-themed pound cake to try in our pan and came across this one. I've made it several times now, and it has quickly become a new favorite both as a dessert and a breakfast cake. The caramel, cranberry, and pecan flavors are ones that are great for kicking off the fall season and continuing on through Christmas.
Here's how to make this half pound cake. Please remember to double it if you are making a full-sized bundt cake.
Ingredients:
- 1 cup of butter
- 1.25 cups brown sugar
- 3 eggs
- 1.5 tsp vanilla
- 1.5 cups flour
- 1 tsp baking powder
- 1/2 tsp cinnamon
- 1/8 tsp salt
- 1/8 tsp baking soda
- 1/2 cup buttermilk
- 1 cup chopped fresh cranberries
- 1/2 cup chopped pecans
- Cream together the butter and brown sugar until light and fluffy - about 4-5 minutes.
- Beat in the eggs one at a time, and beat in the vanilla.
- Mix in the dry ingredients, alternating with the buttermilk. When I make this cake, I typically mix in 1/2 cup of flour along with the baking powder, cinnamon, salt, and baking soda, then mix in 1/4 cup of buttermilk, then mix in another 1/2 cup of flour, the remaining 1/4 cup of buttermilk, and then 1/2 cup of flour.
- Stir in the chopped cranberries and then the chopped pecans. For each of these ingredients, I typically measure them and then use a small food processor for the chopping.
- Pour into a greased and floured bundt pan. One of the most anxiety-producing aspects of making a bundt cake is whether it will come out of the pan without sticking. Over the years, I've found success in melting Crisco in the microwave and then using a brush to "paint" the inside of the pan. The melted Crisco tends to resolidfy fairly quickly after being "painted" into the pan. I then flour the pan and check to make sure that the entire inside is well covered. If there are any unfloured spots, I add Crisco and re-flour that area. The picture above is what my pan typically looks like. The picture below is what the pan looks like after the batter has been added, and it is ready to go into the oven.
- Bake the cake in a 350 degree oven for about 55 minutes. Pound cakes can be a bit tricky because they are fairly dense and deep. The addition of the fresh cranberries results in some additional internal steam and moistness. I've found that 55 minutes tends to be about right. Of course, each oven is just a little different.
- Let the cake cool on a cooling rack for about 15 minutes. I typically set a timer. If I let the cake sit too long, it tends to adhere to the pan. If I flip it too soon, the weight of the lower portion of the cake can cause it to tear away from what will become the top.
- After 15 minutes, flip the pan over onto another cooling rack. Sometimes I will tap the sides of the pan with the end of a table knife. Breath a major sigh of relief if it comes out intact. Allow the cake to cool completely before you add the frosting.
- 1/2 cup brown sugar
- 1/4 cup butter
- 2 tbsp milk
- 1/2 cup powdered sugar
- 1/2 tsp vanilla
- Bring the brown sugar, butter, and milk to a boil on the stove, stirring constantly over medium heat. Allow the mixture to boil for about one minute and remove it from the heat.
- Whisk in the powdered sugar and vanilla. A kitchen whisk really is all you need to get the ingredients combined.
- Spoon the frosting over the cake. I use a gravy ladle to spoon the frosting over the top of the cake. This lets the frosting run down the sides of the cake and into the ridges.
Saturday, August 12, 2023
Hairy Coos and Haggis
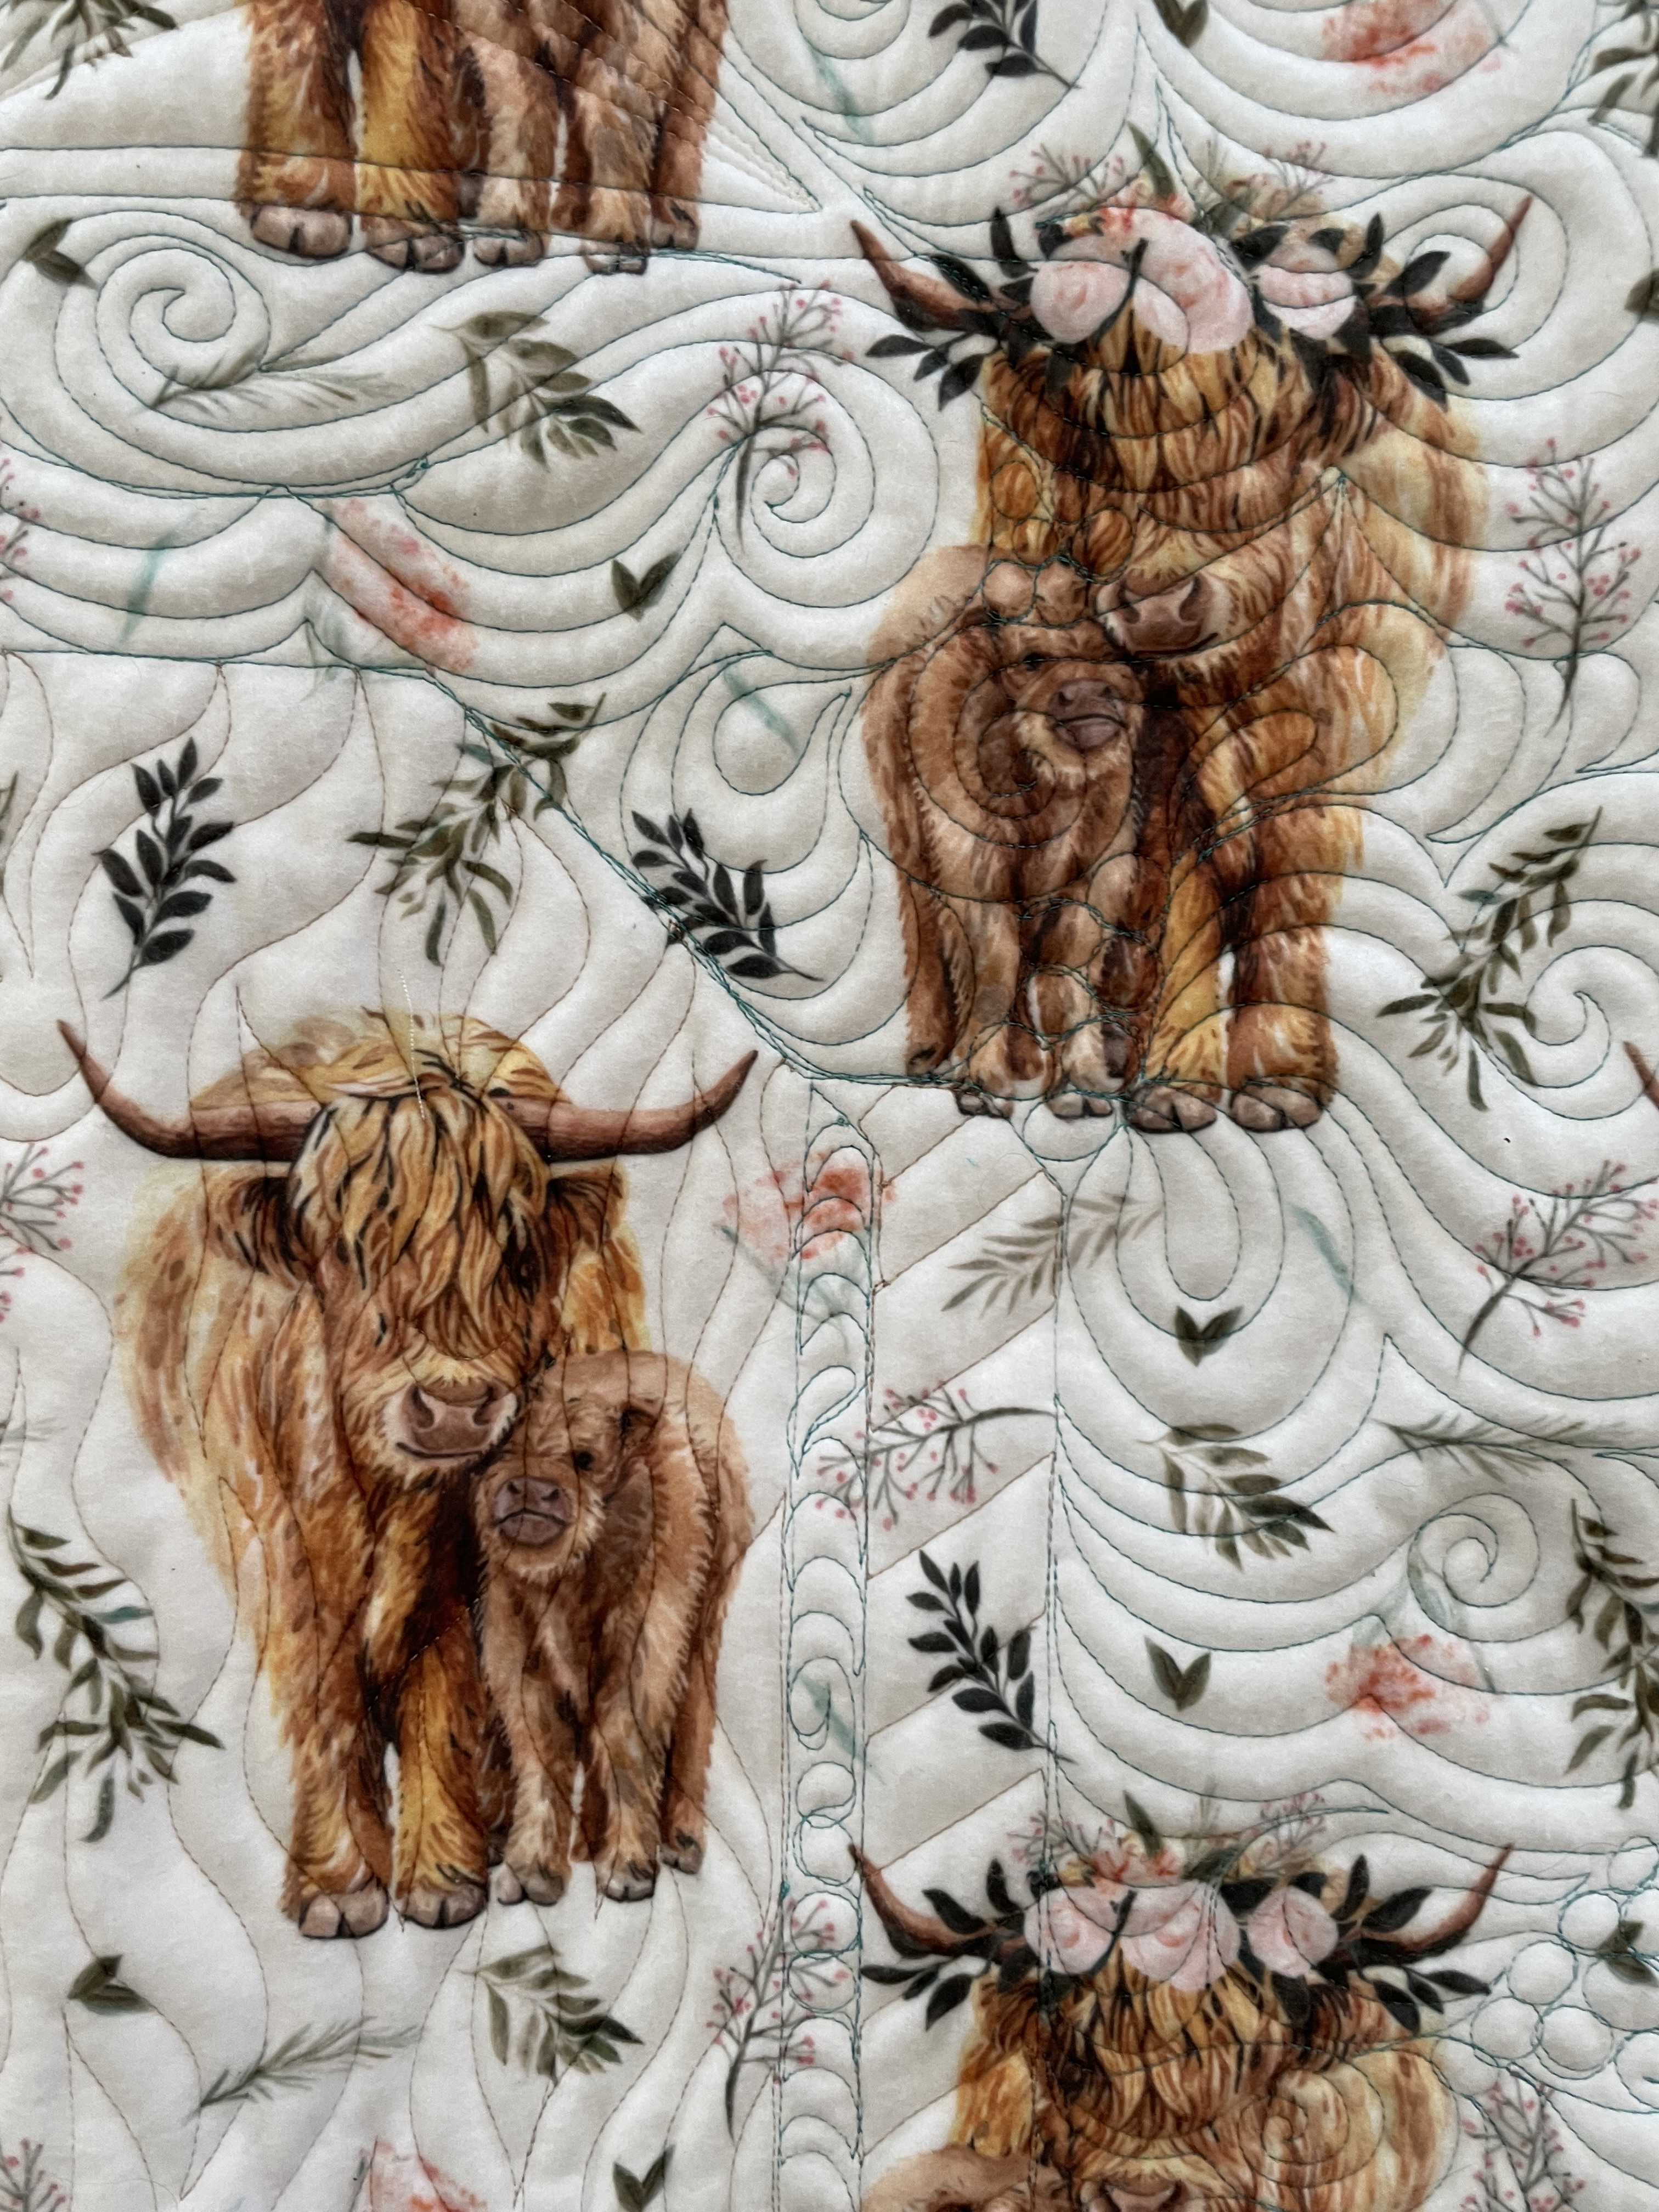
To give you a sense of some of the unique sizes of the pieces in this quilt, here's a little close up look at the cow's face.
- Highland cattle originated in the Scottish Highlands and Outer Hebrides islands off the northwest coast of Scotland as early as the 6th century.
- Although the reddish coloring of Highland cattle is what we are most familiar with today, black coloring was originally the most common.
- Highland cattle have a double coat of hair giving them their fluffy appearance aka "hairy coo."
- Highland cattle can live up to 20 years.
- If you have the opportunity to visit Scotland, take it.
- Edinburgh is absolutely beautiful and picturesque. Enjoy walking the Royal Mile and take the time to hike up to Arthur's seat.
- Don't be afraid to try haggis.
Saturday, June 3, 2023
Strawberry Rhubarb Jam
Despite our extended winter, some of the early garden plants are growing nicely, including my rhubarb plant. We had some nice weekend weather which provided a good opportunity to get out, do some weeding and harvest most of the stalks that had emerged on my plant. Because the plant was already sending out some flowering stalks, I wanted to get it cut back to stimulate growth of more edible stalks. Also, i was eager to make the first pie of the season. Given the large quantity of stalks that were ready for harvest, I decided to go ahead and make a batch of jam. We were already buying strawberries so I had my husband get the extra large container of them from the store.
Before I proceed to the recipe, here's a little breakdown of the differences between jellies, jams,, and preserves:
Jellies are made from fruit juice which is typically extracted from cooked, crushed fruit. The process of making jelly involves straining the cooked fruit through some type of very fine sieve or fine mesh fabric. The resulting juice is then cooked with sugar, and sometimes pectin, to create a firm texture.
Jams are made from chopped fruit that is cooked down with sugar and often pectin. Jams are looser in texture than jellies and are more spoonable and spreadable.
Preserves contain larger pieces of fruit, or even whole fruit. Cherry or strawberry preserves often contain whole fruit. The syrup in which the fruit is held together may be more like a syrup or more like a jam.
A quick word about pectin. Pectin is a soluble fiber that is found in fruit. it is used as a thickener in jams and jellies. You can buy it in boxes or in a jar. Given that the amount of jam that I make at a time can vary greatly based on the fruit that I have on hand, I've come to prefer just having a jar on hand from which I can spoon out the given amount that I want. One 2-ounce box of pectin contains approximately 3.5 tablespoons of pectin.
The amounts listed below will make approximately five 1/2 pint jars. I will add some comments below the recipe regarding our preferences and ways that you can introduce your own style.
Strawberry Rhubarb Jam
- 4 cups of chopped rhubarb
- 4 cups of chopped strawberries
- 4 tablespoons of pectin
- 1 tablespoon of lemon juice
- 2 cups of sugar