For those of you who may be less familiar with hummus, it is a spread or dip made from chick peas, also known as garbanzo beans. Hummus is actually taken from the Arabic word that means "chick peas." Archeological evidence suggests that chick peas have been part of humans' diets since about 6000 BC. Today, they are grown throughout the Middle East, southern Europe, north Africa, and India. Here is a picture of chick pea plants and pods. Note that the pods typically contain only 1or 2 peas.

In addition to being the main ingredient in hummus, chick peas are used in a number of dishes throughout the world. Chick peas are a nutrient-dense food and a great source of protein, dietary fiber, folate, iron, and phosphorus. Their protein quality is ranked higher than that of many other legumes and cereals so they are a great option for those of you who prefer a vegetarian diet.
In addition to pureed chick peas, key ingredients in hummus include tahini, lemon juice, and olive oil. Tahini is a paste made of ground sesame seeds. You can generally find it in the ethnic foods section of the grocery store. It can be rather messy to work with, and I will share how I go about measuring it for this recipe. Depending on your tastes, you can add other spices and flavorings such as garlic.
So, now for the story of how we got ourselves involved in making hummus …
A little over a year ago, my husband was marking his 15th anniversary with his current company. He wasn't going to pick out an anniversary gift, but I encouraged him to look through the catalog anyway. One of the choices was a nice Cuisinart food processor. I reminded him that our daughter enjoyed making smoothies and other similar concoctions during the summer months so it might be a nice choice. At that time, we had also made an attempt at hummus using our tiny food processor. Here is a picture of this gadget. Please excuse the Apple product power supply cables in the background.
Now, for the recipe and instructions for roasted red pepper hummus
2 red bell peppers
2 15-ounce cans of chick peas, drained. Reserve some of the liquid from one of the cans in case you want to add it to thin out the hummus mixture a little.
1/3 cup tahini
1/4 cup lemon juice (you may want to add a little more to taste after you have mixed the ingredients together)
2 tablespoons olive oil
2 teaspoons crushed garlic
salt to taste
sprinkling of cayenne pepper to taste
Step 1: Roast the red peppers. This is really the most time consuming part of the process. It's also a bit messy, but the end result is great so hang in there.
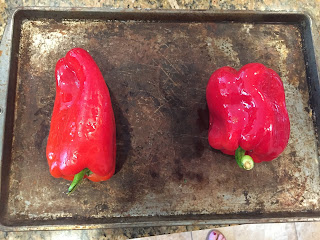
Start by brushing the peppers with olive oil, poking a few holes in them and then placing them on a pan under the broiler.
As they broil, you want the outer skin to get nice and charred. Turn them every few minutes so that all of the sides are evenly roasted. When they have finished roasting, they will look something like this.
Place them in a plastic bag and allow them to cool. This cooling process will also allow the skins to loosen. After they are cool enough to handle, peel off the outer skin, cut them open, and remove the seeds. Place the pepper strips in the food processor and puree.
Step 2: Add the chick peas, tahini, lemon juice, olive oil, and garlic to the food processor and puree. Quick tip: here is how I measure the tahini.
As you can see from this picture, the tahini is pretty oily and can be messy to work with. Often times, the oil will separate from the paste so you will need to stir them together before measuring. I have a long cake frosting spatula that I like to use for this purpose. Because the tahini is so thick, I don't want to bend one of my regular spoons. When I go to measure the 1/3 cup for this recipe, I get out the 1/3 measuring cup so that I can get a visual image of how much it is. I then use the spatula to scoop out the approximate amount and put it right into the food processor so that I don't have a messy measuring cup to deal with.
Step 3: Here is where you add additional seasonings as desired. I often add in another teaspoon or two of lemon juice, some salt, and a sprinkling of cayenne pepper. I don't want to overwhelm the hummus with too much spice, but a little hint of cayenne is nice.
Step 4: Eat and enjoy. You can serve hummus with about anything - flatbread, pita bread, pita chips, vegetables - whatever it is you prefer.
I've had some complements on this hummus from two Middle Easterners who are rather discriminating in their tastes. I take that to be a good thing, and I hope that you will enjoy this recipe as well.


No comments:
Post a Comment