Tuesday, March 1, 2022

Jambalaya for a Mardi Gras dinner and a few reflections on the 2022 season of Lent

This past week certainly has felt anything but celebratory, but here we are at Mardi Gras with Lent beginning tomorrow. While I'm not really one to get into the idea of getting all of one's indulgences in before a season of self-denial, I do enjoy good New Orleans food regardless of the season. Mardi Gras gives occasion to be intentional with foods that have taken on a distinctive North American style. Whether or not your denomination formally observes Lent, this year's season leading up to Easter seems a particularly appropriate time for humility, self-reflection, repentance, and praying for the welfare of others. I will share links to some resources at the close of this post.

For now, let's learn a little about the history of jambalaya. Like many New Orleans-style dishes, jambalaya represents a blending of French, African, and Spanish influences. In its simplest sense, jambalaya is meat and vegetables cooked together with rice. A recipe for jambalaya first appeared in spring in 1878 when it appeared in the Gulf City Cook Book published by the ladies of the St. Francis Street Methodist Episcopal Church in South Mobile, Alabama. Given its simplicity and flexibility, jambalaya had a brief surge in popularity during the 1920s and 1930s.

Jambalaya typically includes the Creole trinity of onions, celery, and bell peppers; rice; tomatoes; and meat. The meat can vary but is typically chicken, sausage, and shrimp in any combination or singly.

When making jambalaya from scratch, rather than from a Zatarain's mix (which is still pretty good), I've had the best luck using parboiled rice. Parboiled rice is also known as converted rice and refers to rice that has been partially boiled while still in its husk. Parboiling preserves some of the micronutrients in the rice. Most important for jambalaya, parboiled rice is firmer and holds its shape. I also tend to use parboiled rice in soups when I need the rice to hold its shape over time.

Here's how we prepared our jambalaya:

  • 1 lb boneless, skinless chicken breasts (Note: You can use bone-in chicken, too you will just need to do the work of removing the meat from the bones. We have also used smoked turkey that we had on hand. If the poultry has already been cooked, you will just need to use prepared broth.)
  • Cooking oil
  • 1/2 lb smoked sausage, cut into rounds (We use 2 links of Aidells cajun style andouille)
  • 2 cups chopped onion
  • 1/2 cup chopped bell pepper - feel free to use a little more if you like
  • 1/2 cup chopped celery
  • 2 tsp minced garlic
  • 1 quart jar of home canned tomatoes (We use the entire jar - juice and all. You could substitute a 30-ounce can.)
  • 1/2 tsp white pepper
  • 1/2 tsp black pepper
  • 1/4 tsp cayenne pepper
  • 1 tsp salt (if using prepared broth, you may need less)
  • 1 1/2 cups parboiled rice
  • 1 1/2 cups chicken stock (from cooking the chicken)
Steps:
1. Cover the chicken with approximately 2-3 cups of water. Simmer until cooked through. Reserve the stock to use for later. Cut the chicken into bite-size pieces and set aside.
2. Heat the oil in a heavy-bottomed Dutch oven. We like using our LeCreuset Dutch oven. Sauce the sausage until lightly browned and it slightly sticks to the bottom of the pan. Remove and set aside.
3. Saute the chopped onion, bell pepper, and celery until tender. You may need to add a little oil. It's okay if they stick to the bottom of the pan a little. This is what helps with the flavor.
4. Stir in the tomatoes, garlic, salt, and the 3 types of pepper. Cook for about 10 minutes, scraping the bottom of the pot.
5. Stir in the rice and mix well
6. Stir in 1 1/2 cups chicken stock, the chicken, and the sausage. Bring to a boil, and then reduce to a simmer. Cook uncovered for 20 minutes, stirring occasionally.
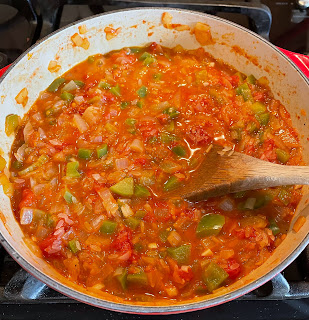
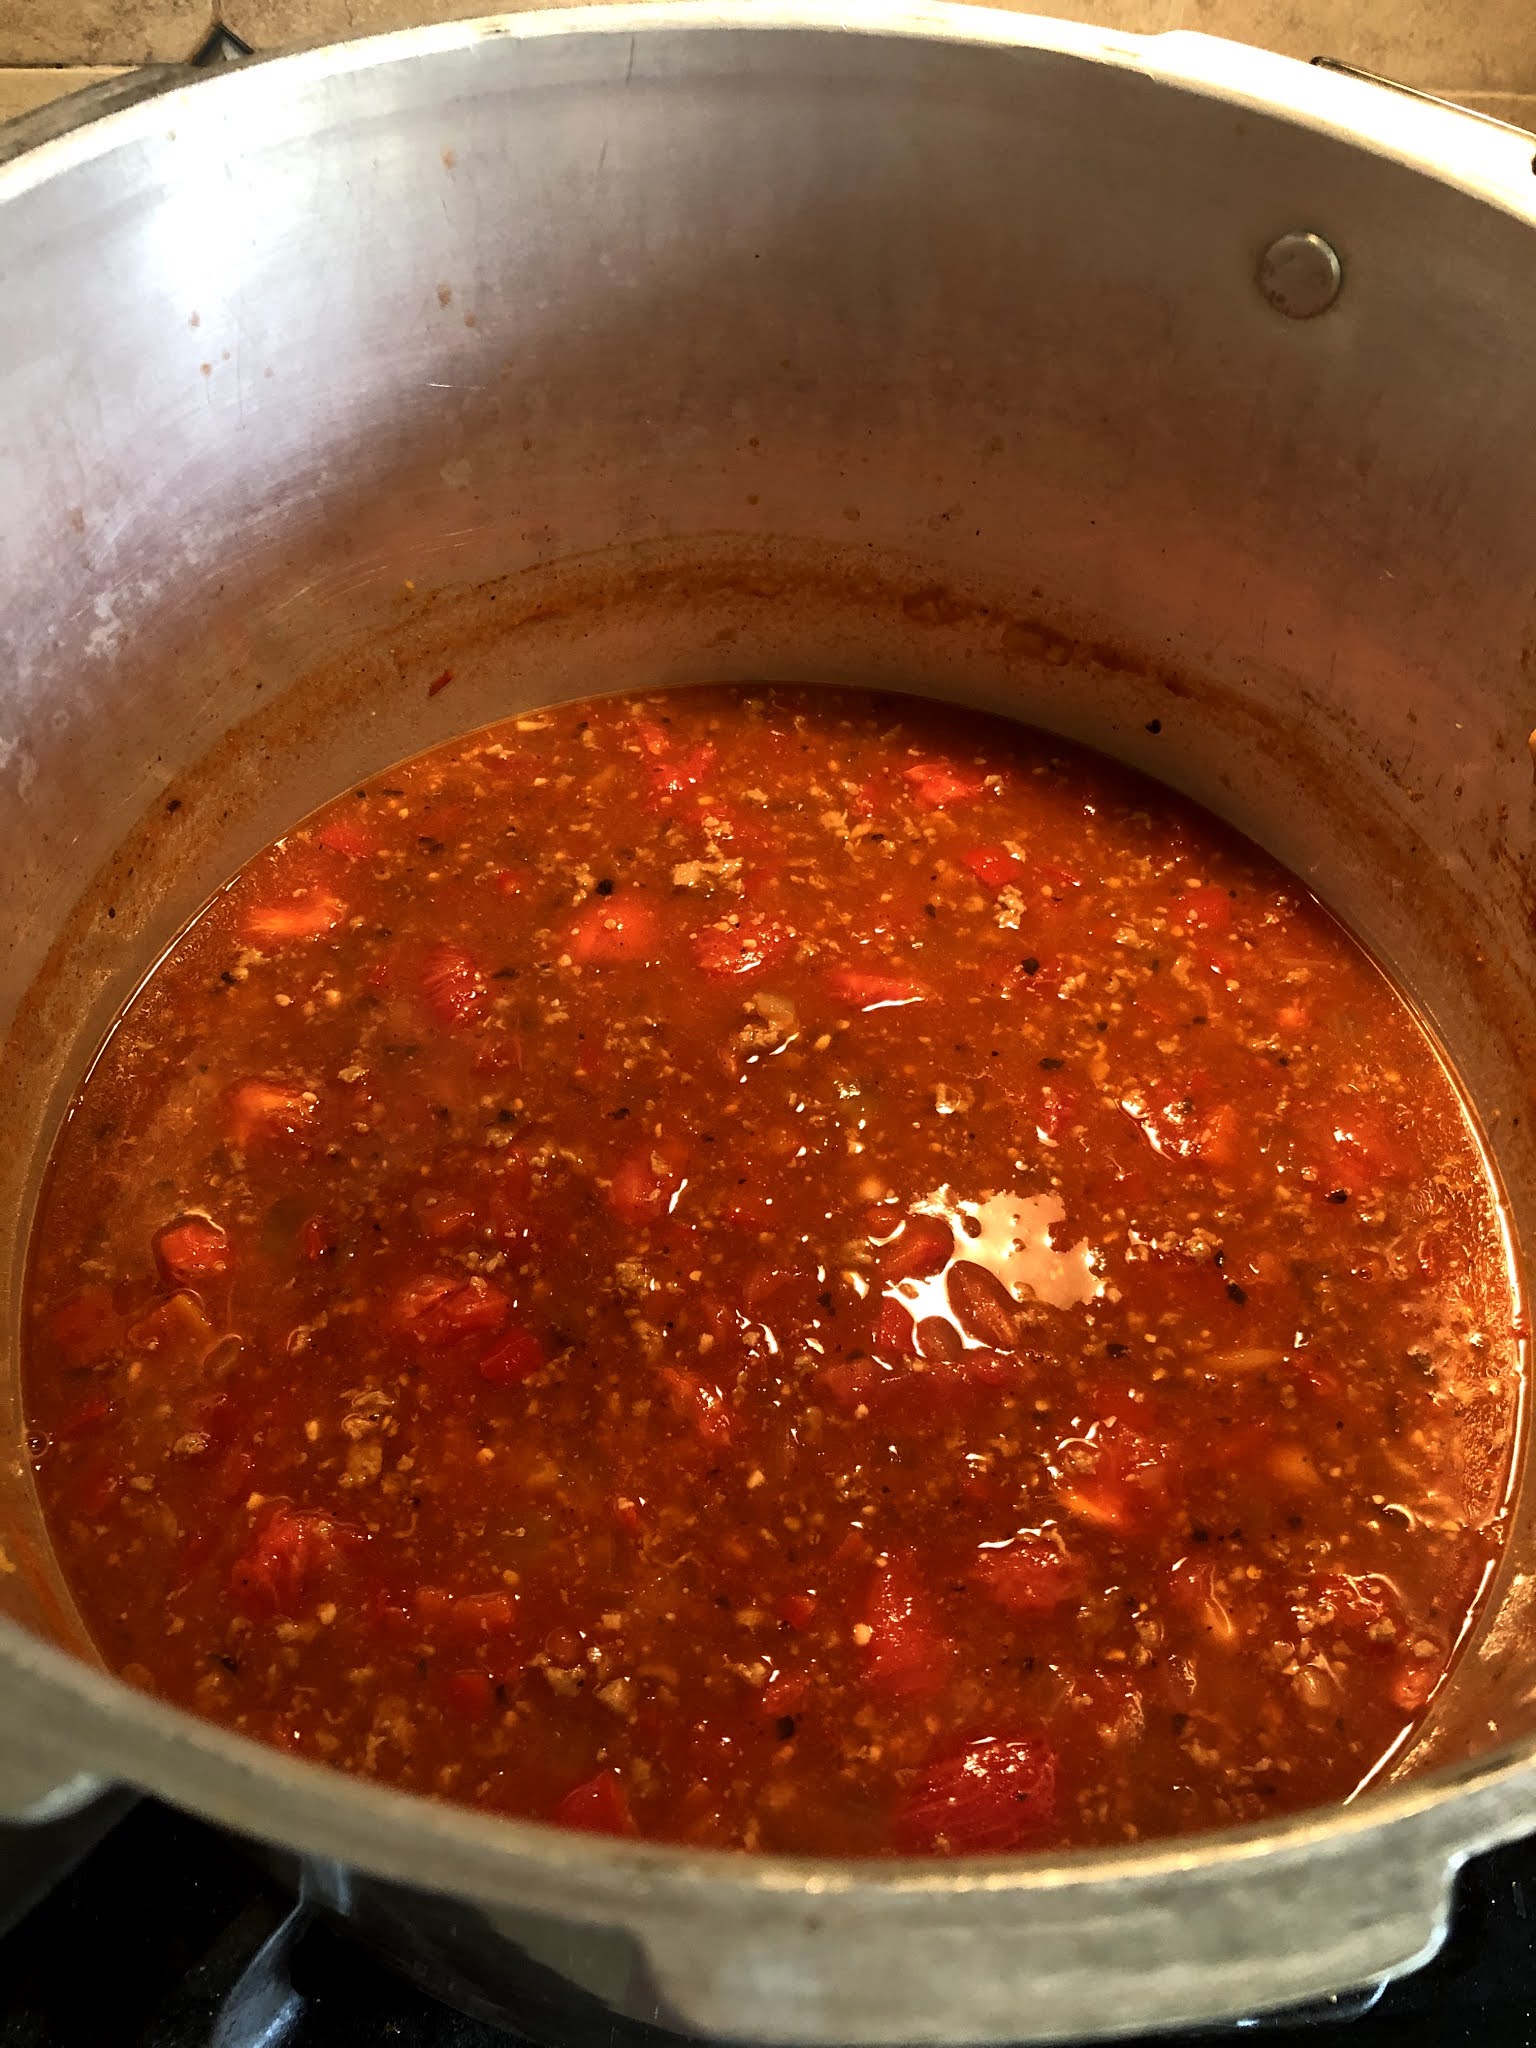
7. Turn off the heat, cover the pot, and allow any excess liquid to absorb. The picture below shows that ours still had a bit of liquid after the 20-minute cooking period. Covering the pot and letting it sit for a while got it looking like the picture at the top of the post. Stir, add additional seasonings as desired, and enjoy!
So now, back to the season of Lent. While my denomination doesn't formally observe Lent in the tradition of those that follow the liturgical calendar, I value a time to prepare for the remembrance of Jesus' death and resurrection. The following sites provide links to devotions that you may find meaningful during the Lent season as well as this time of global unrest:
For those of you who may wish to pray for the the people of Ukraine as part of your daily devotional time, here is a link to a prayer guide with specific requests.

Sunday, February 20, 2022

Steamed Buns to Celebrate the Olympics and the Year of the Tiger

As many of you know by now, I've been a big fan of the Olympic Games dating back to the 1980 Lake Placid games. Although I recall hearing names from the 1976 Winter and Summer games, I didn't get to watch them on television. I think we somewhat unintentionally turned the TV on to find a broadcast of the pairs short program figure skating event, and I was hooked.

Fast forward a number of years now, and we've turned the Olympics into a time to try out new foods representative of the host country such as borscht, feijoada (Brazilian black bean and pork stew), and bulgogi. We tried out hand at tempura vegetables during the Tokyo games this past summer (perhaps I'll write a little more about that later). With early February marking the start of the Year of the Tiger and the Winter Olympic Games being held in Beijing, we decided to try our had at steamed buns. 

The Chinese zodiac features 12 different animals, and 2022 marks the Year of the Tiger. The tiger is associated with strength and bravery, and is regarded as the king of the beasts in Chinese culture. Many children in China wear hats or shoes featuring a tiger image as a sign of good luck. These are some little tiger slippers that I bought during my trip to China in 2000.
So, let's move on to learning how to make steamed buns. Steamed buns or "bao" are bread-like dumplings. The dough is made with a mixture of flour, sugar, cornstarch, yeast, liquid, and baking powder. Because of the sugar, they are typically a bit sweeter than a typical dumpling. Although the fillings can vary, pork is among the most common. The recipe we used is largely derived from one found on the cooking blog, The Woks of Life. I anticipate we will be coming back to this blog for more good recipes. For the present, though, here is how we made steamed buns with pork. Note: Because the meat will need to marinate for 8 hours or overnight, you will need to plan ahead. Just the same, don't be intimidated. The results are worth it.

Part 1: Make the roast Chinese barbecue pork (Char Siu)

Ingredients:

  • 3 lbs boneless pork shoulder or butt roast
  • 1/4 cup white sugar
  • 2 teaspoons salt
  • 1/2 teaspoon Chinese 5-spice (click here for substitute ideas)
  • 1/4 teaspoon white pepper
  • 1/2 teaspoon sesame oil
  • 1 tablespoon soy sauce
  • 1 tablespoon hoisin sauce
  • 1/8 teaspoon red food coloring (optional, but adds nice color)
  • 3 cloves finely minced garlic
  • 2 tablespoons honey
  • 1 tablespoon hot water
Steps
  • Cut the pork into long strips about 2 to 3 inches thick
  • Stir together the remaining ingredients except for the honey and hot water. Here is what your marinade will look like. (Don't let the glare from the stainless steel mixing bowl scare you too much.)
  • Reserve about 2 tablespoons of the marinade (you will be using it for basting later) and place it in the refrigerator. 
  • Place the pork strips in a bag, pour the marinade over the pork, making sure it is all coated. Place the pork in the refrigerator to marinate for at least 8 hours or overnight.
All wrapped up and ready for refrigeration.
  • Preheat the oven to 475ºF, and position the rack in the upper third of the oven. Line a baking sheet with foil and place a cooling rack on top of it. This will allow the pork to roast more evenly. Pour about 1 1/2 cups of water into the pan below the rack to prevent the drippings from burning or smoking
Pork ready for roasting on a cooling rack placed on the baking sheet.
  • Place the pork in the preheated oven. Roast for 10 minutes at 475ºF. Turn the oven down to 375ºF, and roast for another 15 minutes. 
  • After these initial 25 minutes, flip the pork. Add more water to the bottom of the pan if needed, rotate the pan 180 degrees, and roast for another 15 minutes.
  • While the pork is roasting, combine the reserved marinade with the honey and hot water. You will be using this sticky sauce to baste the pork.
  • After the initial 40 minutes of roasting, baste the pork, flip it over, and baste the other side. Roast for a final 50 minutes. Feel free to check the temperature with a meat thermometer. Ideally, the pork should reach an internal temperature of 160ºF.
  • Remove from the oven and based with the last bit of the reserved sauce. Let the meat stand for at least 10 minutes before slicing.

Part 2: Make the dough.
Ingredients:
  • 1 teaspoon dry yeast (If you are using packets, this will be roughly 1/2 the amount in the packet)
  • 3/4 cup warm water
  • 2 cups flour
  • 1 cup cornstarch
  • 5 tablespoons sugar
  • 1/4 cup vegetable oil
  • 2 1/2 teaspoons baking powder
Steps:
  • Dissolve the yeast in the warm water (temperature will depend on whether you are using regular or instant yeast) and about 1 teaspoon of the sugar. Adding the sugar will allow you to see if the yeast will "bloom."
  • Stir in the flour, cornstarch, remainder of the sugar, and the oil. I like just having my stand mixer do the work. 
  • Cover with a damp cloth and let rest for 2 hours.
  • After 2 hours, stir in the baking powder. Again, I like to let the dough hook on the stand mixer do the work. If the dough seems dry, add in a teaspoon or two of water. 
Part 3: Make the chopped pork filling while the dough was resting. Roasting the pork was just the first step. Now you will need to chop up some of the pork to make the filling for the buns.
Ingredients:
  • 1 1/2 cups diced Char Siu pork
  • 1 tablespoon oil
  • 1/3 cup finely chopped shallots or red onion
  • 1 tablespoon sugar
  • 3 tablespoons soy sauce
  • 1 1/2 tablespoons oyster sauce
  • 2 teaspoons sesame oil
  • 1/2 cup chicken broth or stock
  • 2 tablespoons flour
Steps:
  • Heat the oil over medium high heat. Add in the onion and stir-fry for a minute. 
  • Decrease the heat and add the sugar, soy sauce, oyster sauce, and sesame oil.
  • Add the chicken stock and flour and stir until thickened.
  • Stir in the chopped pork and the set aside to cool.
Part 4: Assemble the buns
Steps:
  • Prepare the steamer. We went ahead and bought a bamboo steamer. I anticipate that traditional steamers would work well, too. Ours had silicone mats inside to keep the buns from sticking. You can use parchment paper, if you don't have the mats.
  • Divide the dough into 10 equal pieces. Over the past couple of years, I've come to use my food scale more and more to help with ensuring uniform size. 
  • Roll each piece out into a circle about 4 1/2 inches in diameter, add some filling, and then fold the edges up, pleating them as you go, until they are closed on top. (You can access different videos for help with the technique.)
  • Steam the buns by placing the bamboo steamer in a wok with boiling water. Be sure that the water doesn't touch the bottom of the steamer. you will also need to monitor that the water doesn't evaporate out during the steaming process. Steam the buns for 12 minutes over high heat. (The steaming process really does work!)
We used some of the extra Char Siu pork to make fried rice
Here's another picture of our table before we took the lid off the steamer. Take a look at the little teapot with the handle on the side. This style is believed to have its origins in the Tang and Song dynasties in China.
Although we tend to be fair-weather soccer fans, we are looking forward to seeing what countries will be playing in the 2022 World Cup and may serve as an inspiration for future cooking escapades. We are also looking forward to the 2024 Summer Olympics which will be held in Paris and will inspire French cuisine.

Monday, January 31, 2022

Sunday Pot Roast


Who doesn't like a good pot roast for Sunday afternoon dinner? A few weeks ago, we found ourselves with some carrots and potatoes that were on their way out so we decided to put them to use with a pot roast. The term "pot roast" is simply used to describe a tougher cut of meat that is slow roasted in moist heat along with a preferred assortment of vegetables. 
Multiple cultural groups have their own variation of what many of us here in the United States have come to call a New England pot roast. Depending on where you live in the world, you simply add in your own preferred seasonings and vegetables to give it a distinct regional flair.
You will see that we prepared our pot roast in an oblong Le Creuset Dutch oven. Does Le Creuset cookware live up to its hype? In a short answer, yes. In a longer answer, it's not essential to cook a good pot roast dinner. We acquired this one as a 20-year work anniversary gift option. 
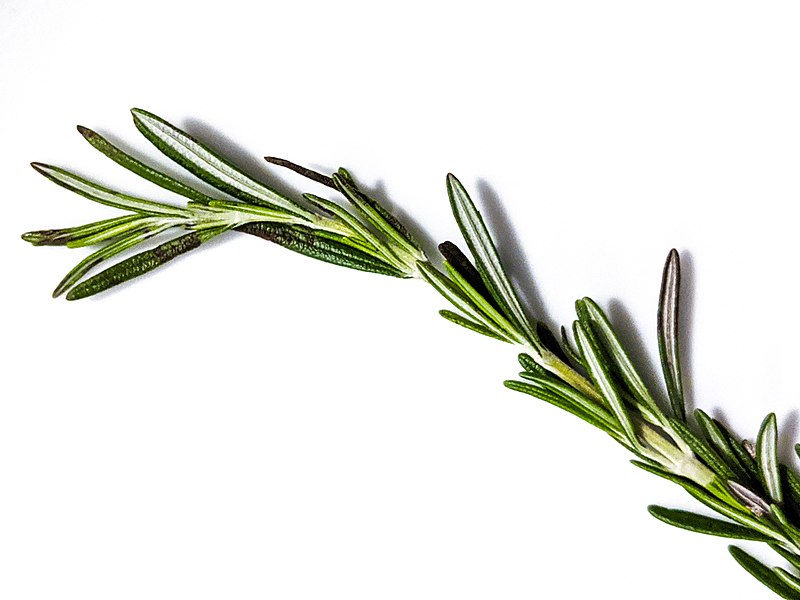
Before I go into the description of how we prepared our dinner, here's a little about the herbs we used as seasonings. We tend to like to keep things simple and let the seasonings enhance, rather than obscure the flavor of the meat and vegetables. In addition to the typical salt and pepper, we added in some dried thyme and rosemary from our garden.
Thyme
RosemarySprig.jpg
Rosemary
Both thyme and rosemary are evergreen shrubs that originate in the Mediterranean. Although both are perennials, we've had an easier time sustaining thyme rather than rosemary in our herb garden. Just the same, we have plenty of dried rosemary to last us quite a while. Rosemary leaves resemble pine needles so they do need to be crumbled a bit when added into foods. It is commonly used in roasted foods. in folklore and literature, rosemary has been associated with mourning and remembrance. For those of you who are Shakespeare aficionados, Ophelia remarks, "There's rosemary, that's for remembrance, Pray you, love, remember."
Although multiple varieties of thyme exist, we grow a variety with small needle-like leaves that is commonly used along with sage in poultry seasoning. In ancient Egypt, however, thyme was used in the embalming process. During medieval times in Europe, thyme was placed under pillows as a sleep aid and to prevent nightmares. Women supposedly gave thyme to knights to bring them courage.
With that, let's assemble a pot roast dinner.
Step 1: Start with a cut of meat that will fit your roasting pan or Dutch oven. We used a chuck roast. This picture just shows how ours fit in the pan. Remove it before starting the next step.
Step 2: Heat some cooking oil in the bottom of the pan and sear the roast on both sides. This will help lock in the flavor and keep the roast from getting too dry.
Step 3: Prepare the vegetables you wish to use. As I mentioned, we had some fingerling potatoes as well as some carrots that were on their way out. We also had a half an onion in the refrigerator. Don't make this harder than it needs to be. Use what you like/have on hand and is in proportion to your cut of meat. Here's our vegetables before they went into the pot.
We also chopped up a couple of cloves of garlic to add to the mix.
Step 4: Add in a cup or so of beef broth to deglaze the roasting pan. Dump the vegetables on top of the meat. Add in some salt and pepper along with the herbs. We added about a teaspoon each of thyme and rosemary as well as the chopped garlic, salt, and pepper. At this point, you may wish to add in another cup of beef broth to ensure adequate liquid through the roasting process. Note: most broths, regardless, of how prepared, will have a fairly high sodium content so you can go sparingly on the salt up front and then adjust later.
Step 5: Cover and roast at 325ºF for about 3 hours until the vegetables are tender and the meat is approximately 145ºF and is tender.
Step 6: Enjoy! Pot roast also makes great leftovers. Ours lasted us for 2 full meals. We then made up a batch of mashed potatoes and used the remaining bits to make a shepherd's pie that lasted us another two meals!

Saturday, December 25, 2021

Joyeux Noel


A very Merry Christmas to you all. I had grand intentions of writing more this past year, but it wasn't to be. Just the same, I wanted to close out this year with some reflections on the past couple of years. This Christmas quilt is one that spans these past two years. It also represents the last of my international travels and is the one major project I have completed over the past two years. This quilt is by Buttermilk Basin and is titled Joyeux Noel.

In October 2019, I had the wonderful privilege of traveling to Lyon, France, to an international professional meeting. This trip was all the more special because my daughter, who was a college sophomore at the time, came with me. One of the noted landmarks of Lyon is the basilica which sits up on a hillside overlooking the Seine River.

Lyon dates back to Roman times. Its position at the convergence of the Seine and Rhone Rivers made it a natural hub for transportation and communication. The ruins of the amphitheater still stand and are a popular tourist attraction. 
The marble that is featured in this stage area within the amphitheater were transported from many areas of the known world at the time including Greece, Tunisia, Turkey, and Egypt. The detail remains exquisite.
Given my fondness for wool appliqué projects, for Christmas 2019, my daughter gave me the kit for this block to commemorate our trip.

Once we realized that this was the first of nine blocks, I made the commitment to complete the larger quilt. I bought the next two blocks later in the spring of 2020. The challenges of the COVID pandemic and then the multiple petals in the second block proved a bit intimidating for a while, but I finished these next two blocks by the fall.

My daughter bought me the fourth block kit for my birthday in October 2020, and then I bought the fifth and sixth blocks. The final three blocks were my Christmas gift for 2020. Here are the fourth and fifth blocks.
Here are the last four blocks.
 

The final stages involved putting the blocks and borders together. I'm not one to do my own machine quilting, but I am very grateful for those who offer their services and make my quilts look so nice. 
We've enjoyed having this quilt hanging in our family room this Christmas season. It has allowed us to reflect on the trip to France that inspired the gift of the initial block. This quilt is also a reminder of some of the challenges since the onset of the COVID-19 pandemic. I don't know about you, but I have had my share of disruptions and disappointments. Working on these quilt blocks has been a bit of a creative respite from other work and life demands. Some of them were more challenging than others and are reminders of the rewards of persistence and even small forward steps. This quilt is also the one major project I have been able to complete in the past two years. 
I hope that you all have a wonderful Christmas and Happy New Year! In the spirit of a Joyeux Noel, I will leave you with the response of the magi as they followed the star to worship Jesus.
When they saw the star, they rejoiced exceedingly with great joy. And after they came into the house, they saw the Child with His mother Mary; and they fell down and worshiped Him. Then they opened their treasures and presented to Him gifts of gold, frankincense, and myrrh. Matthew 2:10-11 

Saturday, January 30, 2021

A warm skillet meal for winter


Even though COVID-19 keeps us working at home these days, we still appreciate an easy recipe for the work week. If that recipe can generate leftovers, even better. This recipe is one that we have come to enjoy over the past couple of years. It's easy, filling, and features bacon - we all know that bacon makes everything just a little bit better.

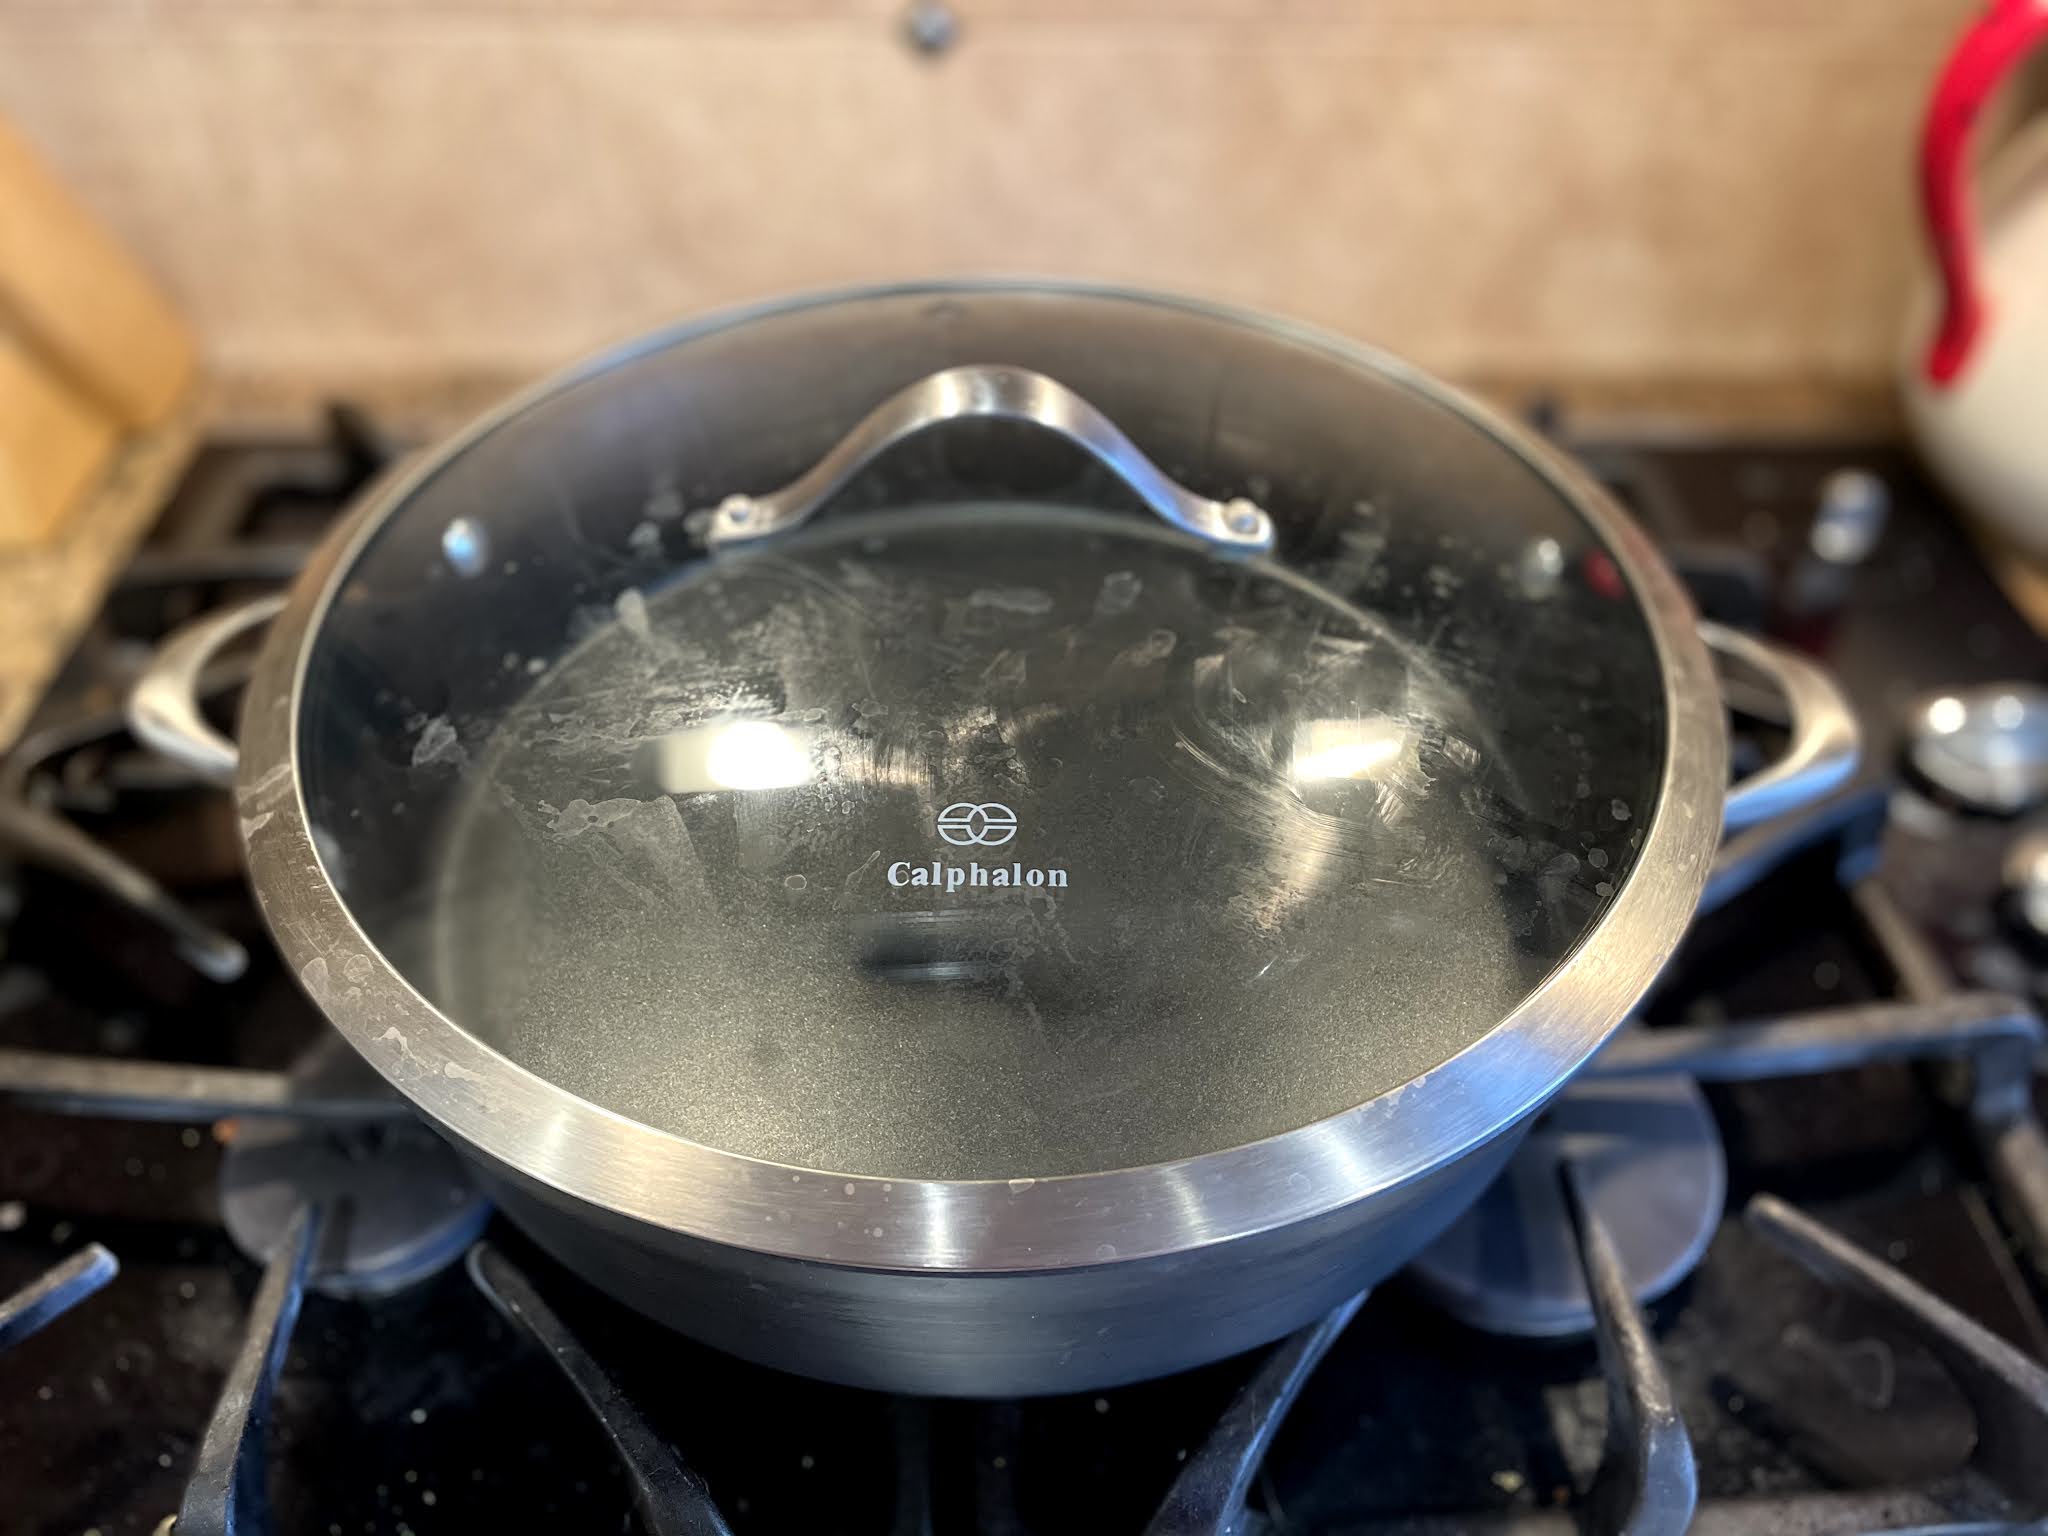
With the exception of the pasta that is cooked separately, we prepare this meal in an everyday pan. You can think of an everyday pan as an oversized skillet that is deeper than a typical skillet and may or may not have a long side handle. They come in a variety of sizes and typically have a non-stick surface which makes cooking and clean up easier. Ours is a Calphalon brand and is 13.5 inches in diameter and about 3.5 inches deep. A number of varieties are available along with accompanying reviews so you can decide which might best suit your needs.

This particular dish includes pasta, leeks, and bacon. The choice of pasta is pretty much up to you. The main thing is that you want to select a pasta that is going to hold up well. We've used rigatoni, bowties, and medium shells. I will feature rigatoni in the pictures below.

One of the nice things about this recipe is that it really goes together easily and efficiently. When just three of us are at home, we can get three separate meals (9 total servings) from this recipe. When others are at home and eating, it's a bit of anyone's guess.

Here are the ingredients:

  • 16 ounce package of pasta (suggestions: rigatoni, bowties, medium shells)
  • 6 slices of bacon cut into pieces
  • 2 or 3 large leeks - If you are buying your leeks from the store, 2 or 3 big ones will be sufficient. When I'm using leeks from the garden, I pull a bunch and then eyeball them to estimate the equivalency. At the end of the day, it's really up to you regarding how many leeks you want to include
  • 1 cup heavy cream
  • 1/2 cup grated parmesan cheese
  • Salt
  • Ground black pepper
  • Fresh chopped parsley for garnish
Here are the steps:
  1. Prepare the pasta according to the package directions. Reserve about 1 cup of the pasta water and then drain the pasta.
  2. While the pasta is cooking, prepare the leeks. I like to cut them into thin rings extending up into the green portion of the leek. Depending on the diameter of the leek, I may further cut them into halves or quarters. It's not a perfect science so go with what you like. Set the leeks aside until you are ready to cook them in the bacon grease (yum!)

  3. Cook the bacon in the everyday pan. Once it is nearly finished cooking and you have some accumulated bacon grease, stir in the leeks along with some salt and pepper. Cook until the leeks are soft. You can keep the lid on the skillet as the leeks are cooking to minimize evaporation.

  4. Once the leeks have softened to your satisfaction, turn down the heat and stir in the cream. Stir until the mixture thickens.
  5. Stir in the pasta, parmesan cheese, and enough of the reserved pasta water to loosen the pasta, bacon, and leeks. You're really not out to create a typical sauce. Rather, you don't want everything tightly stuck together. Of course, you can always add in a little extra milk and more water as you wish. 

  6. Season with salt and pepper to taste
  7. Serve with additional grated parmesan cheese and fresh chopped parsley (feel free to substitute dried if you wish).
Note: when rewarming leftovers, anticipate the need to add additional liquid (milk and/or water).

Wednesday, December 23, 2020

O Little Town of Bethlehem

A very blessed Christmas Eve Eve to you all! Despite all the challenges of 2020, Christmas will soon be here. I'm finding comfort in the reality that Christmas can't be hindered. If anything, this year serves as a reminder that, even in difficult circumstances, the good news of Christmas  cannot be diminished. 

In some ways, this piece that I am sharing is, to me, a bit symbolic of the hope of Christmas and a season of perseverance. This particular piece is called, Follow Me to Bethlehem, and is available through Bits and Pieces by Joan. I purchased this piece at least three years ago, possibly longer, eager to add a nativity banner to my Christmas collection. Even though I've completed a number of wool pieces through the years, this is one that had a journey of its own. It also involved some additional steps before proceeding to stitching the individual appliqué pieces in place.

As you can see, the individual pieces are stitched on top of a quilted background. This meant that the first step was getting some backing fabric to go with the flannel background and having it quilted. The next step was cutting the quilted piece to the appropriate dimensions and stitching the binding in place. I then elected to fuse and stitch the stable and palm tree pieces before proceeding to the people and the animals. With the multiple tiny pieces for the hands and faces and then trying to determine which colors in the kit to use for which individual, I let myself get a bit overwhelmed at this stage in the process and turned my attention to other projects. Later this summer, I managed to push through to get all of the figures cut and fused. The project then sat for a few more months until I found myself at a spot in which I couldn't avoid settling down to finish this project any longer. As I set small goals and persisted, I found that I was actually looking forward to spending time on the project. Sooner than expected, I was at a point where I could see that I would actually finish it.

I anticipate that, for many of us, 2020 has been fraught with both seen and unseen challenges. For me, this piece reflecting the story of Christmas, will serve as a tangible reminder of persisting one step at a time, even when it would have been easier to avoid the situation and even during stretches of frustration and inertia. 

My Scripture reading this morning was from the Old Testament book of Micah. Many of us are familiar with Micah 5:2 which tells that the Savior will be born in Bethlehem. This morning, I was particularly struck by the promise and hope in Micah 5:4. A very Merry Christmas to all!

And He will arise and shepherd His flock in the strength of the LORD, in the majesty of the name of the LORD His God. And they will remain, because at that time He will be great to the ends of the earth. Micah 5:4

Sunday, December 13, 2020

Turkey sausage and kale chili

I will readily admit that this sounds a bit unusual and not something that would be at the top of my list to try. This is a recipe we first tried a few years ago - probably looking for something to do with the last of the tomatoes and kale. This recipe has become one that we look forward to pulling out each fall. Given that the predominant colors are red and green, it is also a chili that could work well for dinner during the Christmas season. Please accept my apologies for the Halloween tablecloth in the background. Let's just say that my good intentions for an October food post just didn't happen.
So - a quick word about kale and how we came to preparing recipes that include kale. It's been several years now that we started growing kale in our garden. We use one of our raised beds for the kale crops - cabbage, kale, and collards. We've found that the kale tends to grow quite well, and it is more pest-resistant than the cabbage. Given that we're not exactly part of the kale smoothie brigade, we've needed to find other uses for our kale. In addition this recipe, we have a Portuguese kale, potato, and sausage soup that we enjoy. We've also used some kale in curry dishes.
Before I move on to the recipe, here are a five fun facts about kale, or leaf cabbage. The picture below is of curly kale, which is the type we've been growing in our garden.
  1. Kale originated in the eastern Mediterranean and Asia Minor. It is believed to have been cultivated as early as 2000 BC.
  2. Kale was introduced to the US by Russian traders in the 19th century.
  3. Although kale originated in temperate climates, it is pretty hardy and can survive temperatures as low as 5 degrees Fahrenheit. Just the same, it is typically grown as an annual rather than a perennial.
  4. Kale is a great source of vitamins, including A, C, B6, and folate as well as several dietary minerals including iron, calcium, potassium, and phosphorus. As with most vegetables, the dietary content of these vitamins and minerals decreases with boiling.
  5. Kale is a bit of a comfort food in many European countries and is and commonly served in soups or with potatoes, sausage, and/or bacon. How can anyone go wrong with sausage and bacon?
So, let's get on with the recipe:
1 tbsp olive oil
1 lb spicy turkey sausage (we typically buy a package of 5 large links and then remove the casings)
1 large onion, diced
2 cloves garlic, minced
1 red bell pepper, diced
1/2 tbsp chili powder (feel free to start with less and adjust from there)
1/2 tsp cayenne pepper (see about note with the chili powder)
1 tsp dried oregano
2 tbsp tomato paste
2 cups chopped fresh tomatoes (ok to substitute a 15-ounce can)
1 15-ounce can cannelloni beans
3 cups chicken broth - think of this as a starting volume and adjust from there
1 large bunch kale, chopped into pieces - I am usually going out to the garden to cut what is available and then use my best guess as to whether it looks like what a bunch from the store would be

Steps
  •  In a large heavy-bottomed pot, heat the oil and then saute the onion until it is soft and becoming translucent.
  • Add the turkey sausage and cook until it is cooked through.
  • Stir in the garlic, red pepper, chili powder, cayenne, and oregano. Cook until the peppers are tender, roughly 6-7 minutes. A word about the seasonings - keep in mind this is coming from someone who likes a dish that packs a bit of heat. Don't be afraid to start small. The turkey sausage that we typically use is quite spicy. We also have some New Mexico chili powder that I picked up on a trip a few years back. When we use this particular chili powder, we will typically start with about a third of the amount specified in the recipe. Don't say I didn't warn you. Here's a picture of everything simmering in the pot. We typically make at least a double batch - go big or go home.
  • Stir in the tomato paste and cook for about one minute.
  • Stir in the tomatoes, beans, and chicken broth, and bring to a boil. Here's a picture of the brand of beans we typically use along with a picture of the chili before we stir in the kale.

  • Stir in the kale and simmer until the leaves are tender. Stir in any additional chicken broth to get the chili to the desired consistency.
  • Enjoy with bread or crackers!