Saturday, November 30, 2019

How to stitch a wooly block

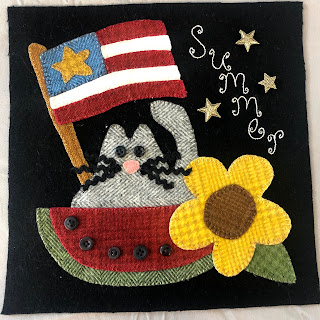
As I shared in my most recent sewing-focused post, I've been enjoying the 2019 Wooly Block Adventure. I love seeing the participating shops' designs and the posts from individuals who are using the patterns to create their own blocks. I've also noticed from some of the posts, that some are new to wool appliqué. I thought it might be fun to use this post to highlight some of the techniques and processes involved in creating block. The block that I will be featuring is the "Chubby Kitty" block from Cotton Pickins' Quilts in Stanwood, Washington.
Before I get started, I will preface this entry by indicating that I will be featuring the techniques and processes that I find most successful. Another stitcher might disagree and demonstrate other preferred approaches. The take away point is that there really aren't a lot of rights and wrongs. Learn from different stitchers and adopt the styles that work best for you. I will also highlight some of the tools that I like to use. You may wish to consider adding some of these to your Christmas wish lists.
I will be illustrating appliqué using fusible web. Because you are applying your fusible web to the reverse side of your wool, the first thing you need to do is to determine whether the pattern pieces have been reversed. Typically, the author of the pattern will communicate whether the pieces have or have not been reversed. With this particular pattern, the pattern had not been reversed. This isn't a huge deal, it just means another quick step before you get started. 
In this case, the pattern was drawn heavily enough so that I could just flip it over and trace the reverse side. To make the process easier, I used my light pad. A light pad isn't necessary, you can also use a window on a sunny day. Mine is a Litup brand light pad, and I've had it for several years. You can see that I used a Sharpie marker to do my tracing. Had I been working with smaller pieces, I would have used a smaller tip pen.


Now to look through the wool pieces and determine which piece of wool corresponds to which pattern pieces. Fortunately, this block has a relative few number of pieces, and they are fairly good sized so I had an easy time of it. Just the same, before I start fusing and cutting, I like to feel confident that I've matched up colors to pattern pieces.
So, now it's time to start tracing the pieces. Here are the tools that I need for this phase of the project. On the right is a mechanical pencil. I do prefer tracing in pencil, and I don't like having to hunt down a pencil sharpener. During back-to-school season a few months ago, I bought a couple of bags of these to keep myself tracing and fusing for years to come.
The white object is a roll of Soft Fuse which is the fusible web I prefer. It is distributed by Shades Textiles in Georgia. While many local quilt shops carry it, not all do. You can also order it from Amazon. I recommend buying 3 yards at a time. It's one of those supplies that lasts forever until it's gone. I also highly recommend saving "scraps" as you cut out pattern pieces. I put my scrap pieces in a tin and then use them first as I am about to trace a new project. More often than not, I can trace all of the small pattern pieces (e.g. leaves, stems, flower centers) using these scraps.
I really do use all three scissors. The black-handled one in the center is for cutting the fusible prior to fusing it to the wool. The ones on the right and left sides are Fiskars scissors. I use the smaller one for the little pieces and the big one for cutting the larger pieces once they have been fused.

Now for tracing and fusing. Trace the pieces onto the paper side of the fusible web. Cut the pieces out leaving about 1/8 - 1/4 inch from the drawn line. I will admit that most of mine are closer to 1/8 than 1/4. The next step is to fuse the cut pieces to your wool. Here's a little hint - think about which side you want facing up. Given that wool also has different textures and patterns, also think about whether the direction of the pattern matters or whether you want a given feature of the wool in a given location in your piece. Here's a quick look at my fused pieces.
A quick hint about tracing pieces - also keep in mind whether you need to account for overlapping pieces and extend the edges of some of the pieces so that they can be hidden by the overlapping piece. For example, I added about 3/16 inch to the lower border of my kitty to tuck it under the watermelon piece. Given that the stripes on the flag were so small, I did cut each to size and then took extra care to avoid any gaps when I was stitching. If you look closely, I also numbered the order of the stripes. The long ones were pretty obvious, but I wanted to be able to remember the sequence for the two small red ones. Here's a look at them all cut out and ready to be fused to the background.

Now it's time to peel off the paper and fuse the pieces to the background. Given that I am making an 8-inch block, I like to have my background cut to 8.5 inches to help me have a sense of where my actual boundaries are. I tend to start by fusing smaller to larger pieces - e.g. the star on the flag, center on the flower, nose on the cat. Of course, I won't be removing the paper on these larger pieces until after the smaller ones are fused down.
When it comes to fusing to the background, I tend to start by arranging the larger, focal pieces.

Then, I will add in the other pieces. You can see that I have committed to an approximate 1/4-inch border all the way around.
Once you are ready to commit to placement, go ahead and fuse in place with an iron set on wool and lots of steam.
Now, it's time to start stitching. Here are some of the supplies that I use. In recent years, I have had to swallow my pride and wear reading glasses for stitching. My bifocal contacts are great for reading, but I value the extra precision when sewing. On the left, you will see the size 24 chenille needles that I prefer for stitching. These are distributed through Primitive Gatherings and are also carried by many local quilt stores as well. They are a comfortable length for stitching and are nice and sharp for poking through layers of wool. The box below the pink floss contains appliqué pins. These are available at most local quilt shops. I like keeping them on hand in case I need a little extra reinforcement holding a piece in place until I can stitch it. The nice think about the pins is that they are quite short and the points tend not to get in the way as you are working. 
Deciding on thread color - I use a combination of Valdani #12 threads and regular embroidery floss. I like the look of Valdani threads. At the same time, I don't have the budget for every possible color so I will also substitute 2 or 3 strands of embroidery floss. In general, you are looking for thread colors that will blend in with your wool. Most of the time, I just have to unwind the thread a little, place it on my wool and see what I think. Most of the time, you are better off erring on the side of just a little dark than going a little too light. Given the variation in the wool itself, overdyed threads with their variegated patterns can add interest to your piece. Most of my pieces will include both solid and overdyed thread. I've also completed pieces in which I was attempting to achieve contrast. 
Now for stitching, I'm a fan of the traditional blanket stitch for going around the edges. With the larger pieces included in this block, the blanket stitch is an ideal choice. When working with extra small pieces, other stitches such as a simple whip stitch might be appropriate. A series of cross stitches might be appropriate to hold a narrow stem in place.
Now that the blanket stitching is done, it's time to add the word "Summer." My preference for words is to trace them onto tissue paper, pin the paper down to the background, and outline stitch over the top of the traced letters. The picture on the left is the traced letters. The picture on the right illustrates the stitched over letters.

When the stitching is complete, you tear away the tissue paper. I will admit that I often need to take my needle to help pick the residual paper from underneath some of the stitches. I am also someone who is not at all comfortable drawing the letters freehand so  I bear with the added nuisance for letters that look nice when I am finished.

Now, for the final touches - stitch on the rickrack whiskers. The pattern had suggested to cut the shorter whiskers 1.5 inches long and the longer whiskers 2 inches long. I ended up trimming mine down to 1 inch and 1.5 inches respectively. I'm not a fan of sewing narrow rickrack down - especially when it's more or less black on black. Let's just say I used my machine, did the best I could, and secured the rickrack. The final step is sewing the buttons, and here is another look at the completed block.
I also finished the block from last year. I had completed everything but the whiskers. I figured that while I was sewing down one set of whiskers, I might as well complete a second set.
While I was ordering this year's block, I was also taken in by the winter and fall blocks from previous years. I will definitely have plenty to keep me busy this winter. We had some record snowfall in the Intermountain West these past few days so this could turn out to be a very good winter for completing wooly projects.
As we shift our focus from Thanksgiving to Advent, I wish you all a very blessed season. From the time I was little, I've enjoyed December's Sunday School lessons beginning with the messages of the prophets concluding with Jesus' birth in Bethlehem. The theme of the first Sunday of Advent is hope. I will conclude this post with the message of hope spoken by the prophet Isaiah. 
Then a shoot will spring from the stem of Jesse, and a branch from his roots will bear fruit. And the Spirit of the Lord will rest on him, the spirit of wisdom and understanding, the spirit of counsel and strength, the spirit of knowledge and the fear of the Lord, and he will not judge by what His eyes see, not make a decision by what His eyes hear, but with righteousness He will judge the poor, and decide with fairness for the afflicted of the earth. Isaiah 11:1-4
Saturday, November 23, 2019

A filling fall curry


As we transition to late fall, we typically find ourselves looking for ways to use up the last of those garden vegetables that can't easily be preserved. We ended up with a number of butternut squash this year and were looking to try something other than soup. We ended up making a rather tasty curry and thought we would share the recipe here with you.
I've elaborated a bit about curry and squash in past posts, so I won't belabor these two topics in greater detail. I will, however, sing the praises of a rather delightful ingredient in this particular curry.
Red curry uses dried chilis in its base and is purported to be hotter than green curry. We decided to proceed with caution as we added the red curry paste to our curry. To make a long story short, we used the entire bottle and didn't feel that the curry was too hot. Granted, we do like a little kick of heat in our curries. At the same time, we still want to be able to taste our food and enjoy the flavor. 
My advice to those who may wish to try this recipe, follow our lead and stir in a spoonful or two to start. Add more to achieve your desired flavor.
We also went rather generous on our butternut squash because we didn't see any point of not using the entire squash. We picked one of our bigger ones. The picture below illustrates my approach to cutting up a butternut squash. We cut the squash into lengthwise wedges, peel them with a vegetable peeler and then cut them up into whatever size seems appropriate to the given recipe. Here is what ours looked like. This is about an 8-cup pitcher full of squash. I will explain a little more with how we managed our leftovers when we reheated them. On a side note, curries are a type of dish that always reheats well and even tastes better the second day as the flavors continue to blend together.


Here is how to go about preparing this delightful curry.
1-2 tbsp cooking oil
1 medium onion, chopped
2 medium carrots, sliced 
1-1.5 lbs boneless, skinless chicken thighs, cut into pieces
4 tsp minced garlic
Thai red curry paste - see above note regarding how to use it
Medium butternut squash - peeled and cut up
1/2 pound fresh green beans, trimmed and cut up
14 ounce can coconut milk
1 tbsp brown sugar
salt and pepper to taste

1. Saute the onions in cooking oil. As the onions start to soften, stir in the carrots and saute until the onions become translucent.
2. Add in the chicken and cook until the chicken is beginning to brown. Stir in the garlic and a "starter" amount of the curry paste. (You can add in more later.) By now, your kitchen is smelling very good.
3. Add in the butternut squash and green beans. Cook for another 5 minutes, stirring as you go.
4. Stir in the coconut milk and bring to a simmer. Add in the sugar and about 1 tsp of salt. Simmer for about 10-15 minutes until the vegetables are tender. Adjust seasonings as desired. 
5. Serve over steamed rice.
Tips for reheating. Given that we had used a generous amount of butternut squash, our curry was quite thick when we went to reheat it the next day. We stirred in another can (maybe 2) of coconut milk and another entire jar of red curry paste - yes really. Remember, the desired thickness and heat from the curry is really up to you. 
Enjoy this yummy fall dinner!

Thursday, October 31, 2019

Feathered Friends and France

As one of our coldest Halloweens on record comes to a close, I thought I would write a few lines as I wait for the final trick-or-treaters to come by. Last week marked the last of my fall meetings, and it was one that brought me "across the pond" to France. As I have already shared in some of my posts, these long flights provide a great opportunity for some stitching. 
October also marks the start of the Wooly Block Adventure. Participating shops design an 8-inch block based around a given theme. This year's theme is Holiday Celebrations. As you might imagine, shops are featuring holidays and seasons throughout the year. I find myself rather partial to patterns featuring fall themes. When I saw this pattern from Piecemaker's Quilt Shop in Hackensack, Minnesota, I promptly ordered it.
Although I missed the opportunity to document the process of tracing and fusing, here are a few tools of the trade that I thought I would share. There really aren't hard and fast rules about what thread and what stitches to use. The main thing is that you secure your pieces down. Depending on your overall goal, you can use either matching threads or ones that bring some contrast. As you can see from my picture above, I used a combination of both. The larger pieces are stitched to the background using a blanket stitch and matching colors. The leaves feature an outline stitch in a contrasting color. 
The picture below shows the different colors and types of thread that I used. For the most part, I use Valdani size 12 thread. As nice as these threads are, they are also a bit expensive. If I'm just needing a small amount of a given color, I most likely won't head to a quilt shop that sells Valdani thread. Rather, I will go to my stash of cross-stitching floss, pick the color I want, and use two strands of it for my stitching. Depending on the color and tones of the wool I am using, I may opt for an overdyed thread to add a little interest.

The tool in the picture below is a must for anyone with midlife eyes who needs some extra light for close work on an airplane. This is actually a necklace with an LED light that supports enhanced lighting to allow one to pass those long hours on an overseas flight with some stitching. Those overhead lights are nice, but they just don't cut it in the overall low lighting environment. This little device costs about $35 and is well worth it. I like to think of it as a quality of life intervention.
Although I had previously been to Europe on several occasions, I hadn't been to France. The international meeting I typically attend each fall was being held in Lyon, France, and I was fortunate to share some of my research at this meeting. An added bonus was bringing my daughter along. She had studied French in high school and was eager for her first trip to Europe.
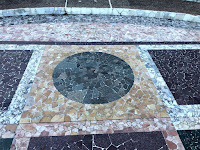
Please rest assured that we were fully engaged in the meeting and attended our sessions. Here are a few highlights from our free time and adventures in Lyon. Lyon actually dates back to Roman times. It sits at the convergence of the Rhone and Saone rivers and was founded about 34 BC. One of the "must see" places in Lyon is the ruins of the Roman era theater. What you are seeing below is a picture of the "stage" of one of the theaters. The marble work was very impressive. Each of the different colors was imported from a different part of the known world including Greece, Turkey, Tunisia, Egypt, and Italy.
The precision of the original work is still very much intact.


Here is a view of another portion of the theater to give you a sense of its size.

Now for a more "modern" structure in the city. The following picture is of the St. John the Baptist Cathedral. Construction began in 1180 on the ruins of a 6th century church. It was not fully completed until 1476. It was absolutely gorgeous. On our final evening in Lyon, we had our dinner at a cafe just to the left of this picture. It was quite an ending to an amazing week.

One of the most iconic structures in Lyon is the Basilica Notre Dame de Fourviere. It is even more "modern," having been built in the late 1800s over about 12 years. It sits on the hillside overlooking the Saone and is actually only a short walk from the Roman theater. Here is what it looks like as you approach it from below.
And here is a front view once you make it to the top. We took the cable car given how steep the walk would be.
Finally, here was our final nighttime view of the basilica as we concluded our dinner by the cathedral. Unfortunately, the picture really doesn't do it justice.
 So, here we sit a few hours away from November. It's been quite a great year with many new adventures. Through them all, God has been faithful. I will close out this post with a verse from my last evening's devotion. It was a great reminder of God's sustaining faithfulness.
Do you not know? Have you not heard?
The Everlasting God, The LORD, the Creator of the ends of the earth
Does not become weary or tired.
His understanding is inscrutable. Isaiah 40:28

Saturday, October 5, 2019

Potato Leek Soup … with Sausage

2019 has definitely not been my year for regular blog posts. I've still been quite busy cooking and even finding some time for sewing projects. The majority of my writing, by necessity, has been scientific in nature. While I don't regret those efforts, I'm also feeling glad for a slight respite to share a blog post.
As those of you who read these posts probably know, fall is probably our favorite season and also one that finds us turning much of our garden produce into soup. This year has been no exception. This weekend found us pulling all of our leeks and converting them into not just one, but three different kinds of soup. I few years ago, I wrote about a good old stand-by potato leek soup. We jazzed it up with some bacon this year. After all, who doesn't like bacon?
This post will feature another variation on potato leek soup. This time, one with sausage and carrots. You can certain cut the recipe in half for a more manageable amount. We tend to approach soup-making with a "go big or go home" approach. This attitude does tend to keep our freezer full and help cut down on the mid-week cooking. 
Before I get into the recipe, here's my approach for cutting leeks. You will first notice that my garden leeks are a fair bit smaller than the ones you will find in the store. You can see the actual portion of the leek that I include after cutting off the roots and most of the green leaves. I then cut the remaining portion into about 1/2 to 1 inch segments. I then cut each segment lengthwise into fourths. Depending on how wide the white bulb is, I may cut it down a little more.

Here's the ingredients and steps for making this very warm and filling fall soup.
Ingredients
2 lbs Italian sausage; for this recipe, we prefer mild because the objective isn't to create a spicy soup but rather one that is full of flavor
2 tbsp olive oil
2 pounds of chopped leeks
4 medium carrots, or more depending on your preferences
4 minced garlic cloves
4-5 quarts chicken broth
2 lbs Yukon gold potatoes
2 bay leaves
3-4 sprigs of fresh thyme
salt and pepper to taste
1 cup heavy cream

Directions:
1. Brown the sausage in the bottom of the pot you will be using to make the soup. After the sausage is browned, spoon it into a bowl for later, leaving the drippings behind in the pot.
2. Add the olive oil, leeks, and carrots to the pot and saute them until softened, about 5-7 minutes. As you can see from the pictures below, I ended up with about 6 cups of chopped leeks and 4+ cups of chopped carrots. The carrots were also from the garden, and I was glad for the chance to use some them up. After you saute the vegetables, stir in the garlic and cook for another 1-2 minutes.


3. Add the broth - start with about 3 quarts, potatoes, bay leaves, thyme, and some salt and pepper. Boil until the potatoes are fork tender and the carrots are cooked through - about 20 minutes. Here's the size I cut my potatoes. I wasn't going for larger stew-sized pieces but rather what would fit on a spoon.
4. Add any additional broth as desired. We did end up using 5 quarts total. Stir in the sausage and the cream. Heat until the soup comes to a slight simmer and then turn the heat off. 
5. Serve with some nice warm bread and enjoy.

Monday, June 24, 2019

Curried Chicken Salad

For us, summer time means salad time. As we move towards July and temperatures that near 90 degrees, we lean towards cold dinners that don't require heating up the house. A few weeks ago, we tried our hand at making curried chicken salad. We were quite pleased with the results, and I am happy to share our recipe with you. Here's a little background on the rationale for this post …
My husband and I recently returned from a cruise of the Baltics. I anticipate you will be hearing more of that adventure in future posts. One of my favorite afternoon activities on board was going to afternoon tea. Among our sandwich options was one with curried chicken salad. It was actually quite good so I looked for a recipe after we came home. Here is how we put ours together:

Curried Chicken Salad
1.5 to 2 boneless, skinless chicken breasts
Olive oil
Salt & pepper
2 tablespoons mango chutney
1.5 tablespoons curry powder
1/2 cup diced celery
1 or 2 chopped green onions - use the white and green parts
1/4 cup dried cranberries (you can substitute raisins or even omit)
1/2 cup cashews
3/4 cup mayonnaise

1. Place the chicken breasts on a sheet pan. Brush with olive oil and sprinkle with salt and pepper. Roast in a 350 degree oven for about 35 to 40 minutes until the chicken is cooked through. Allow to cool and cut into bite-sized pieces. Here is what ours looked like.
2. Stir together the chutney, curry powder, celery, onions, dried cranberries, and cashews in a medium sized mixing bowl. Your mixture will look something like this.
3. Now, stir in the chicken and combine
4. Stir in enough mayonnaise to moisten everything and reach the desired consistency. To be honest, I didn't actually measure the mayonnaise. I just scooped out what looked like the right amount and stirred it in.
5. Serve on the bread of your choice. We opted for croissants. A honey wheat bread would also be good. 
Stay cool and enjoy your summer!

Sunday, March 31, 2019

Warm wooly blocks for cold winter days

Although we have officially passed the first day of Spring, we've continued to see some off and on snowstorms. Just two days ago, we had a storm that resulted in several inches of wet, heavy snow. Today, however, the sun is shining, and the day looks more like the last day of March. Here are a few images from my around back yard during the past week.


Before we turn the calendar page to April, I thought it might be fun to share some of my warm and wooly creations from this past winter. Some of my past posts have featured some of my Row by Row creations. The group that sponsors the Row by Row event of the summer also sponsors a Wooly Block Adventure event in the fall. Because fewer shops participate in this event, the sponsors spotlight patterns from two or three shops on their website every other day. "Woolies," as they like to call their followers, can download these patterns for free during this spotlight period. Most participating shops also offer kits of their patterns for sale during this fall event as well. 
To get to the point of this story, I followed along during October and November when the patterns were featured. In the spirit of true confession, I also did my fair share of ordering kits. This meant that I also had plenty of explaining to do as multiple packages were arriving in the mail (well, not really that much). At the same time, it was rather fun to come home and find packages waiting on the kitchen counter for me.
During the past 5 months, I've had two trips to Asia. Wool projects travel very well and are a great way to pass the time on these long extended trips. I also need to take care to discipline myself to use stitching time as a reward for completing other work-related tasks first.
Here are a few of the blocks. Not all are fully complete with the added embellishments. Just the same, I thought they would be fun to showcase.
These sunflowers are from The Quilter's Lodge in Draper, Utah. This is a delightful shop with rooms that can be used for a quilting retreat. 
This little hummingbird is from Piecemakers Quilt Shop in Hackensack, Minnesota. The flowers in this block reminded me of our hanging baskets from last summer that attracted several hummingbirds.
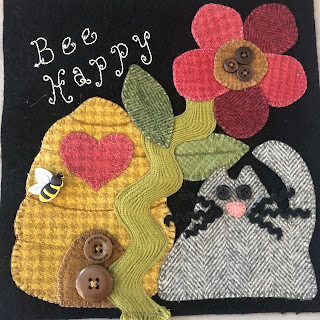
I purchased this block kit in honor of my daughter who is quite a fan of bees. This block is from Danner's Bernina Shop in Hanover, Pennsylvania.
As I have mentioned in several other posts, I love sheep. This block is from Calico Patch Designs in Morehead, Kentucky. 
The chickadee block featured at the top of this post is from Primitive Gatherings in Racine, Wisconsin. We enjoyed watching a number of chickadees at our bird feeder this past winter.

Just as we are coming out of a literal season of winter, I also seem to be coming out of a bit of a figurative season of winter with some of my work projects. I've needed to remind myself that just as the literal seasons do not last forever so also these figurative seasons do not last forever. These verses from Isaiah remind us of God's faithfulness to accomplish his purposes.

"Remember the former things long past,
For I am God, and there is no other;
I am God, and there is no one like Me,
Declaring the end from the beginning,
And from ancient times things which have not been done,
Saying, 'My purpose will be established,
And I will accomplish all My good pleasure';
Calling a bird of prey from the east,
The man of my purpose from a far country.
Truly I have spoken; truly I will bring it to pass.
I have planned it, surely I will do it.
Isaiah 46:9-11