Sunday, November 16, 2014

Preparing for Black Friday and Gumbo!

Lest you jump to the conclusion that we have fallen prey to the uber-consumerism of the Black Friday craze, please rest assured that we have not. My preference is to remain as far way as possible from any retail establishment on the day after Thanksgiving. Over the past few years, I have come to enjoy Small Business Saturday, an emphasis on supporting local small businesses, but that is another story for another day.

As many of you are already well aware, our family loves to eat. Thanksgiving is one of our favorite holidays, and I truly enjoy the multi-day effort of preparing our family's Thanksgiving meal. One of our more recently acquired Thanksgiving weekend traditions is to spend Black Friday making gumbo with some of our leftover turkey.

A few years ago, one of my work-related trips was to New Orleans. I brought home a cookbook featuring recipes from Gumbo Shop, a rather well known establishment in New Orleans. I have to admit, we really didn't know much about New Orleans-style cooking, other than that it tastes incredible. We have come to enjoy several recipes from this cookbook, however, I think the turkey and sausage gumbo one remains our favorite. Here are a few things we have learned about New Orleans cooking as well.

Gumbo …
Although we often associate gumbo with Louisiana, gumbo is a dish that combines culinary traditions from French, Spanish, German, West African, and Native American cultures. Even today, different variations of gumbo can be found. Gumbo was first named in the early 1800s and was described as a thick soup eaten with rice. Earlier records dating back to the 1700s describe soups mixing cooked okra with rice to make a meal. At any rate, here are a few contributions from different cultural groups that are often represented in gumbo.

  • West African - rice and okra
  • Native American - filé powder and corn
  • German - sausage
  • French - tomatoes
  • Spanish - onions and bell peppers
  • Canary Islands - seafood and cayenne pepper
  • Caribbean - hot peppers

First you make a roux …
Although a roux is essentially a mixture of flour and some type of fat, it's also a rather interesting lesson in chemistry. This gumbo recipe calls for a roux made of butter and flour. We use a heavy-bottomed pan to melt the butter and then whisk in the flour. The consistency of the mixture will change as it is cooked. At first it will bubble, indicating that the moisture is being cooked out of the flour. Once the bubbling stops, the mixture will start to smell like popcorn, which means that the flour is frying. At this point, watch the mixture closely so that it does not brown too quickly. The goal is to get the roux to about the color or peanut butter. Here is a picture of a roux in its bubbling stage.
The Cajun holy trinity…
When speaking of New Orleans' cuisine, this term refers to a combination of onion, bell pepper, and celery. This combination of vegetables serves as a base for the gumbo as well as étouffée and jambalaya.

Filé powder …
Filé is actually an herb derived from dried leaves from the sassafras tree and was first used by the Choctaw Native Americans. The sassafras tree is native to the southeastern United States. Filé powder provides seasoning to the gumbo and serves as a thickening agent. Here are pictures of the sassafras tree and the filé powder. 

Turkey and Hot Sausage Gumbo
Prepare the turkey stock on Thanksgiving night after the dishes are cleared away using:
  • Turkey carcass broken into pieces
  • 3 quarts of water
Bring to a boil and then simmer together for about 3 to 4 hours. Strain the stock and set it aside until Friday morning. Also, set aside about 1 1/2 pounds of cooked turkey meat to use in the gumbo.

On Friday morning, the real work of cooking the gumbo begins. Here are the ingredients:
  • 1 1/2 pounds of cooked turkey meat
  • 1 pound of hot sausage (we like using andouille sausage, Chaurice sausage, a type of hot Creole sausage can also be used)
  • 3/4 cup butter
  • 1/2 cup flour
  • 1 cup chopped onion
  • 1 cup chopped green bell pepper
  • 1 cup chopped celery
  • 1 tbsp minced garlic
  • 1 tbsp filé powder
  • 2 bay leaves
  • 1 tsp thyme
  • 1/2 tsp basil
  • 1/2 tsp sage
  • 1/2 tsp white pepper
  • 1/2 tsp black pepper
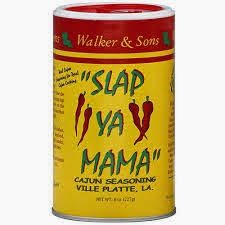
  • 1/4 tsp cayenne pepper
  • 2 tsp salt
  • 2 cups diced tomatoes (may use fresh or canned)
Slice the sausage into 1/2 inch rounds and spread on a baking pan. Place in a 400º oven and brown for about 20 minutes. Drain the rendered fat and set the sausage aside. Here's a quick picture of the sausage rounds with the turkey added on top.
Now it's time to prepare the roux. In a large, heavy-bottomed pan, melt the butter and whisk in the flour. Prepare a dark brown roux. During this stage, it's helpful to have someone tending to the roux and another chopping the vegetables.

Once the roux is the proper color, stir in the onion, bell pepper, and celery. Stir well, and cook until tender. From time to time, allow the vegetables to stick (not burn down) a bit and then scrap them up from the bottom of the pan. At this point, your mixture will be looking something like this:
Once the vegetables are nice and tender, stir in the garlic and cook for about another minute. Stir in the herbs and cook for another minute. Stir in the tomatoes and cook for another 5 minutes, continuing with the sticking and scraping process. Don't these herbs look tasty? Given the number of bay leaves, this was a batch of herbs for at least a double batch of gumbo.
Slowly pour in the reserved turkey stock and mix well. Bring to a boil and simmer for about 30 minutes. Now the house is really starting to smell good.
Add in the turkey meat and sausage. Bring back to a boil and simmer for about another 15 minutes. Adjust the seasonings as desired. Serve over steamed rice.
This recipe is a bit of work, but so well worth it. Of course, if you aren't up to spending your Black Friday making gumbo, you can always come over to our house.

Friday, October 31, 2014

Pumpkin Season - Part II: Sewing Pumpkins

Since my last post addressed cooking with pumpkin, I thought I would devote this one to sewing pumpkins. Fall colors are my favorites, and I enjoy decorating with them. I have a lot of neutrals and earth tones in my home, making it very conducive to fall-themed decorations. I'm not particularly into Halloween decorating, but I do enjoy pulling out the pumpkin decorations once Labor Day weekend comes around.

Through the years I have accumulated, and managed to complete, a number of pumpkin-themed projects. The picture at the top is the most recent project. It is a row of pumpkins to be included in a future quilt. This past summer, a number of quilt shops from around the country sponsored the "Row by Row Experience." Participating stores designed a row pattern about 36 inches wide. The challenge was for individual quilters to collect rows from different stores and then create a quilt with them. I collected about a dozen row patterns and kits from shops across Utah, but am only in the process of starting to put them together. The row above was designed by Village Dry Goods in Brigham City. I decided to make it first for a couple of reasons - first, because it was a relatively easy pattern to put together, second because I really liked the fabric colors and textures. Watch for future posts about additional rows. 

The next picture features a couple of small decorative pillows that I made a few years back. I usually keep them up through Thanksgiving.  

The final project for this post is a wall hanging that I made about 3 or 4 years ago. Even though I have been sewing and quilting for years, I think this was the first actual formal quilting class that I took. The project is called "Wonky Fall Foliage" by Pine Mountain Designs which is based here in Utah. If you look closely at the log cabin-style blocks (upper and lower rows), you will see where the "wonky" part comes in. If you look closely again, you can see that I had a bit of a challenge creating the wonky look. The lower center block probably is the one that best illustrates the wonky concept. The idea is that as you add strips around the center square, you cut them asymmetrically. I found breaking some of the more traditional quilting "rules" a little challenging, but became more confident with each successive block. 
Another think I enjoyed about this project was the combination of sewing styles within it. In addition to the wonky blocks, I learned how to work with hexagons. I also learned some basic fused appliqué skills. I enjoyed the opportunity to embellish the appliqués with different embroidery stitches. The designer gave some guidelines for the embroidery work, but also emphasized that we also needed to feel free to be creative with our choices. Again for someone like me who tends to be more comfortable sticking with the rules and matching my work to the example, this challenged me to step out of my comfort zone.

In thinking about stepping out of "rules" and "traditions," I am reminded of Paul's letter to the Galatians. In this letter, Paul admonishes the early Christians in Galatia for living as though in bondage to the Law. He reminds them that they have been set free in Christ and that they were to stand free in Christ and not be bound to a yoke of slavery. 
Given that today, October 31, is Reformation Day, in addition to Halloween, it is somewhat fitting that we reflect on the book of Galatians. Through studying the book of Galatians, Martin Luther came to understand the freedom we have been given in Christ and the free gift of salvation that we have through faith in Christ.
As we contemplate our freedom in Christ, Paul reminds us that this freedom is not just for ourselves but is to be an outlet for serving others.

For you were called to freedom, brethren; only do not turn your freedom into an opportunity for the flesh, but through love serve one another. Galatians 5:13

Tuesday, October 28, 2014

Pumpkin Season - Part I: Pumpkin Bread

My initial statement for this post is that I have liked pumpkin even before the "pumpkin spice" craze of more recent years. Of course, given that I have an October birthday, I'm not sure that I have had much choice. I can probably count on one hand the number of birthday cakes that I had growing up that did not feature a pumpkin in some shape or form.

In addition to pumpkin pie at Thanksgiving, one of my favorite pumpkin recipes is pumpkin bread. The recipe that I am featuring is one that my mother got from a friend during the time that we lived in Alaska. We left Alaska in 1971 so you can tell that I have been enjoying this recipe for quite some time. One of the best features of this recipe is that it doesn't include eggs. Within the past few years, I have become friends with a young girl who is horribly allergic to eggs but absolutely loves anything pumpkin flavored. Whenever I make pumpkin bread, I like to be make some just for her. I can usually count on a big smile.

This year, I have found a new pumpkin-flavored treat. A few weeks ago, someone had brought some Pumpkin Spice Oreos to an event I attended. I typically do my best to avoid unusual artificial flavors, but decided to give these a try. I was very pleasantly surprised to find that they were very good. They also make a great late evening treat with a pot of tea (in a pumpkin-shaped tea pot, of course).


In the spirit of the season, I thought I would provide a brief homage to a somewhat famous pumpkin from American literature. Although many of us are familiar with The Legend of Sleepy Hollow and its tale of the headless horseman, I would venture to guess that most have not taken the time to read the original text. If you are one of those who has not, you have missed out. I must confess that it has only been in more recent years that I have taken the time to read the original text for myself. I actually enjoyed the detailed description of post-Revolutionary War America in the Hudson River Valley that Washington Irving provided. 

I should also probably interject here that The Legend of Sleepy Hollow is the first scary story that I ever heard. I remember my second grade teacher telling us the story (I can't remember if she read a children's-type version or just told the story). At any rate, as a seven-year-old who had never heard a scary story, I found it quite unsettling and was troubled by it for weeks to come. I'm also wondering if, perhaps, this stamp that was issued about the same time may have furthered my anxieties. 
So, back to the infamous pumpkin in this story. For good or for bad, its identity is not disclosed until very near the end of the story when the reader learns that when the villagers go out searching for the now missing Ichabod Crane, they find a shattered pumpkin near his hat. The part of the story that I find most entertaining is Washington Irving's choice of words in describing the scene in which the pumpkin takes center stage. At this point in the story, Ichabod realizes that the headless horseman has not disappeared after crossing the bridge, as the local legend had described. Instead, he is now face-to-face with the horseman and perceives the headless horseman about to hurl his head towards Ichabod. Although Ichabod attempts to dodge it, Washington Irving relates that, "It encountered his cranium with a tremendous crash." 

However you choose to spend Halloween night, I hope that you will enjoy a fun time of treats, that tricks will be at a minimum, and that no pumpkins will encounter your cranium with a tremendous crash.

Now back to the pumpkin bread recipe:
Pumpkin Bread
3 cups sugar

3 cups pumpkin (one 29 ounce can - Libby's pumpkin is my standby - be careful not to use the canned pumpkin pie mix)
3/4 cup oil
3/4 tsp vanilla
3 3/4 cups flour
3 tsp baking soda
1/2 tsp cloves
3/4 tsp cinnamon
1 1/2 tsp salt
1/2 cup walnuts

Beat sugar, pumpkin, oil, and vanilla together. Sift together and add flour, baking soda, cloves, cinnamon, and salt. Stir in walnuts. Pour into 3 greased and floured loaf pans (may use non-stick cooking spray). Bake 45 minutes at 350ºF. As you can see from the picture, this recipe can also be prepared as muffins. I should also add that both the loaves and muffins freeze well.

Tuesday, September 30, 2014

Sewing at Sea - Part II

As I contemplate this post, it seems that a more apt title would be "Fusing at Sea." The actual sewing that I did on these project occurred after I had returned home. The focus of my efforts during the cruise was to fuse assorted small pieces of fabric together in an effort to create a larger, cohesive piece.
Both of the designs that I will feature in this post are from Ribbon Candy Quilts. Although I like to take advantage of the opportunity to develop new and different skills, I liked both of these patterns so much that I signed up for both classes. I really liked the idea of completing the Alaskan Sampler quilt as a souvenir from the cruise that told the story of the places we visited. The Wilderness Skinnie featuring the bear is just too cute to pass up.
The basic techniques are pretty much the same: trace, cut, fuse, apply decorative stitching either by hand or by machine. To be honest, the process can get pretty tedious especially when tracing, cutting, fusing, and then stitching very small pieces. Here's a look at some of my efforts in creating the Wilderness Skinnie. Take note of the wonderful batik prints that were used in this project. Also, note the odd-shaped pieces.
Fortunately, the pieces look much better when organized and fused down to the background. The pattern for this project is available online.
The project looks even better with the decorative stitching. Yes, I really did stitch around each of the individual flowers. I am looking forward to getting it back from the quilter.
I was absolutely thrilled to be able to take the Alaskan Sampler class even though it meant two class sessions (and several "open sew" sessions) of tracing, cutting, and fusing. If you are interested in the Alaskan Sampler, the pattern is available online. This project was designed to feature the ports of call for the cruise. This project also included some impressive batik fabrics. 
Here are a few close ups of the blocks that feature a ship cruising through Glacier Bay National Park, Alaska's state flag, and state flower. 


Other blocks featured an orca whale, a totem pole, salmon, hanging baskets from Victoria, a moose, and Russian nesting dolls. The nesting dolls were in reference to Sitka, the original capital city of Alaska when it was under Russian control.


As I mentioned earlier, I didn't get a chance to do the stitching until I returned home. I chose to keep things fairly straightforward by machine appliquéing each fabric piece using a blanket stitch rather than using a variety of stitches. This is also in part related to my confidence (or lack thereof) in using the decorative stitches on my machine. One of the key tips that I learned (and highly recommend) is to complete all of the pieces that use a given color together rather than switch thread color multiple times while completing any single block. Even though you just work with one color at a time, you do get the variety of switching back and forth between blocks. I will also add that the shapes can be somewhat of a challenge to navigate around while trying to keep the appliqué stitching close to the fabric edge. I also learned to adjust my stitch width for each piece. For example, I used a wider stitch to outline background mountains, and a much narrower stitch to outline the eyes on the totem pole.
I think that Sitka was my favorite port of call during the cruise. This town is so small that we had to take small tenders from the cruise ship to the docks. 

To gain a little additional perspective regarding the size of Sitka, here is a picture of the high school. Yes, this really is the high school. 
Here is a picture of the Russian Orthodox church in the center of town. It really isn't leaning. Perhaps we were leaning while taking the picture.
My favorite activity in Sitka was the raft tour which took us out to a volcanic island off the coast. We enjoyed some great wildlife sightings including this amazing group of a few dozen (yes, dozen) sea otters. At first I didn't see them because I thought I was looking at a mass of kelp floating along off the shore and was looking for perhaps one or two sea otters. After my husband got me to take a closer look, I realized just how many there were. Here is the picture:
We also saw gray and humpback whales as well as large quantities of puffins. Call me odd, but I think puffins are rather fascinating, and I was excited to see them. Here are a couple of them flying across the sea.
One of my favorite souvenirs that we purchased in Sitka was this Alaska-themed nativity set. I was intrigued with it for a number of reasons. First of all, I love nativity sets and enjoy collecting nativity sets from different regions of the world. Second, I love the wildlife of the Pacific Northwest and the Arctic. Thirdly, to me this set serves as a tangible reminder of the message of the Christmas story for all people. I am looking forward to displaying it this Christmas season.
In reflecting on the message of Jesus for all people, I will simply close with Jesus' words in John 10:10.
I came that they may have life, and have it abundantly. John 10:10

Thursday, September 11, 2014

On the topic of okra …


Okra is one of those foods which tends to draw dichotomous responses from people. They either like it or they don't. Then of course, some people aren't quite sure what okra is. Interesting enough, okra's biologic and geographic origins are uncertain as well.

Okra is regarded as an allopolyploid. To a nerd like me who likes genetics, this is a rather fascinating term. It essentially means that okra has sets of chromosomes that have most likely come from two different species. Because okra doesn't occur as a "wild" species of plant, scientists presume that it was most likely deliberately developed by people by crossing two other plant species - can you say genetically modified organism i.e. GMO? Descriptions of okra date back to at least 13th century Egypt. Too bad we don't have access to these early agriculturists' field notes.

As I mentioned, the geographic origins of okra are uncertain. Different sources have attributed the origins of okra to southeast Asia, western Africa, and eastern Africa. Regardless of its origins, okra plants spread across the Mediterranean during the Middle Ages. By the mid-1600s, it had been transported across the Atlantic to Brazil as a result of the slave trade. The earliest accounts of okra in North America date to the 1700s, and by 1800, it was well-established in the southeastern United States.
Where okra is grown in the world today - didn't expect to see so much grown in Europe
Today, okra is a common food in many parts of the world including Asia, Africa, the Middle East, the Balkan states, and the Caribbean, as well as the southeastern United States. Although the leaves of the plant are edible, the most commonly consumed part of the plant is the seed pod. The seeds, supposedly, can be dried and ground into coffee. I'm not a coffee aficionado so I don't think I will be attempting to make coffee from okra seeds.
Okra pod ready for harvest 
The okra pod is mucilaginous, meaning that it is slimy when cut open. The "slime" also serves as a thickening agent for dishes such as gumbo. Typically, the pods are sliced into coin shaped pieces prior to being used in culinary dishes. They can be prepared in a number of ways including breaded and deep-fried in cornmeal; steamed; broiled; prepared in curries, soups, and gumbos; or stewed with tomatoes. 
Cut up okra pieces ready for stewing or deep frying
This year I decided to grow okra for the first time. I only grew two plants not being certain how much space they would consume in the garden. The plants haven't grown very big so we haven't had large numbers of okra pods to harvest. I have learned, however, that okra pods need to be harvested fairly promptly after they develop. Otherwise, the pods become tough and pithy. Based on the websites I have reviewed this year, the rule of thumb is to pick early and often. In general, the pods can be picked once they are about 3 inches long. Next year I think I will grow 4 or 5 plants to be able to have extra pods to harvest and freeze for later use.

As I mentioned earlier, okra is common in southeastern US dishes. Our family enjoys down home New Orleans style cooking, which includes dishes with okra. My husband and I have discussed the possibility of a "foodie" vacation to New Orleans. Until that time, we will continue to prepare and enjoy our own New Orleans style food. Here is a recent recipe that we used that included some of the okra from our garden.

Stewed Okra and Tomatoes
Ingredients (for about 6 servings)
2 slices bacon (we prefer pepper bacon)
1 small chopped onion
1 teaspoon minced garlic
Chopped okra (fresh or frozen) - we only had about 6 pods and would have used more if we had them
1 quart canned tomatoes
Salt and pepper to taste

Steps
1. Chop up the bacon and fry in a medium-sized frying pan.
2. When the bacon is nearly done, add the chopped onion. Continue to sauté until the bacon is fully cooked and the onions are transparent.
3. Stir in the garlic and okra pieces. Cook together until okra begins to soften.
4. Stir in the tomatoes, juice and all. Simmer until mixture reaches desired consistency.
5. Season with salt and pepper to taste. You may also want to consider a sprinkling of cayenne pepper or some "Slap Ya Mama" seasoning to give it a little extra spice.
One of our favorite seasonings
Depending on how much okra you used, this can serve as a stand-alone side dish. Because we had less okra and more tomato, we served ours over rice. It made a great companion side dish for our New Orleans-style po' boy sandwiches with andouille sausage. Yes, we do like to eat!

Sunday, August 31, 2014

Meet Marigold


As we close out the summer season, I thought I would share one of my recently completed  projects. This one involves a sheep named Marigold. Come to think of it, I'm not entirely certain whether one can truly "name" an object. At any rate, this stuffed, wool sheep has been named Marigold.

Marigold was a "block-of-the-month"-type project sponsored by my favorite local quilt shop, K&H Quilt Shoppe of Kaysville. About a year ago, I received the pattern to make the sheep. Each month thereafter for the next 12 months, I picked up the wool appliqué supplies to make a new blanket for Marigold. About this time, I can imagine thoughts of, "Seriously? She's talking about making wool appliqué blankets for a stuffed sheep." I do have to admit that, as I am writing this, the idea does sound a bit odd. I don't know if I can fault anyone for any eye rolling that may be occurring.

At any rate, I did have fun with this monthly project. The pattern for the sheep and blankets is from Buttermilk Basin whose designs have a folk art flair to them. I've recently acquired another sheep project kit of theirs and am looking forward to working on it during my upcoming fall travel season.

Here are some pictures of the blankets. As you can see, a number of them feature blackbirds. I've also enjoyed the seasonal features of spring flowers, summer watermelon, fall leaves and acorns, as well as candy canes for Christmas. This project has also given me some opportunities to develop some creativity in working with each monthly pattern. Typically, with wool appliqué, the idea is to select a thread that closely matches the wool fabric. In some of the blankets, I have opted to use a contrasting thread (note the black thread on the candy canes) or even just a darker shade to add a little extra accent. 
Fall-themed blankets for September, October, and November. I think my favorite is November's with the pineapple as a symbol of hospitality and the sheep.

Candy canes for Christmas time. Note the contrasting black thread on this one.

A cozy log cabin for cold, January days and a lovebird with a Valentine heart for February.

Bouquets of spring flowers for March, April, and May

Strawberries and watermelon for June and July

I typically tend to be one who likes to "follow the rules" with projects. I tend to find myself referring back to the teacher's example if I am taking a class to learn a new technique or begin a new project. I've actually had some fun challenging myself to think more creatively and to focus more on what I want my project to look like rather than what I think it is "supposed" to look like.

I should probably add a word about why the sheep is named Marigold.  In an previous blog post, I mentioned that our family acquired some adult sheep when we first moved to northern Utah. Among these names we gave these sheep were Rose, Petunia, and Marigold. I was in the quilt shop at the time that the shop owners were discussing what to name the sheep as part of the promotion for this project. As we were discussing a variety of different names, I proposed Marigold.

In the midst of this Labor Day weekend, I pray that you are experiencing a time of rest and renewal during these few remaining days of the summer season. For this post, I will close with a passage from Ezekiel which describes God's heart for bringing restoration to His people who had been scattered by the enemy. Although I am just sharing two verses here, the imagery in chapter 34 of God as the true nurturing shepherd to his people is amazing and can only inspire deep gratitude for a God who is ever seeking to bring deliverance and restoration.
For thus says the Lord God, "Behold, I Myself all search for My sheep and seek them out … I will feed my flock and I will lead them to rest, declares the Lord God. 
Ezekiel 34:11&15

Friday, August 8, 2014

More Summer Salads

Last August, I wrote about summer salads. It seems only fitting that I go for an encore this August.
This time of year, we seem to enjoy trying out different salads, especially ones that will last over several days. A few weeks ago, I tried out a new Greek pasta salad recipe, and we really enjoyed it. To be honest, I'm not entirely sure how authentically Greek it is, but it does include some Greek flavors. 
In addition to the pasta, which is not Greek, the salad includes spinach, red onion, cherry tomatoes, Kalamata olives, and feta cheese. 
Bowl of Kalamata olives
Kalamata olives tend to be one of those foods hat you either really like or really don't. They are typically preserved in wine vinegar and olive oil. They also contain polyphenol which gives them a slightly bitter taste. Kalamatas are a good source of calcium, magnesium, potassium, phosphorus, and  vitamins C, A, E, and K. The majority of their fat is monounsaturated, also known as "healthy fat." 
In case you are interested, Kalamata olives are named for the Greek city of Kalamata which is located in southern Greece (see map). Kalamata's history dates back to Homer. Homer's writings mention a city called Pharai which was located where the Kalamata castle now stands. You can see the castle ruins in the picture below.

Note castle ruins on the hillside above the houses
Kalamata was actually fairly prosperous during the Byzantine era. The following is a picture of the Church of the Holy Apostles which dates back to the 11th to 12th centuries AD.

Getting back to the food …
Here is the recipe, which, of course, includes our modifications:
Ingredients:
16 ounce box of pasta (I have used both radiatore and bow tie pasta)
About 1/2 to 2/3 of an 8 ounce bag of fresh spinach
2 cups of cherry or grape tomatoes (if I don't have fresh ones from the garden, I typically buy a container of Cherub tomatoes at the store)
10 ounce bottle of Kalamata olives (drained) Note: if you really don't like Kalamata olives, you could substitute black olives or even just omit them altogether 
8 ounce container of crumbled feta cheese
1 small, chopped red onion
Greek salad dressing (I like the Kroger store brand, but you can use whatever you like)
Salt and pepper to taste.

Directions:
1. Cook pasta according to package directions. Rinse well and allow to cool.
2. Coarsely chop the spinach. What you see in the picture below is a large serving bowl containing a little more than half of an 8 ounce bag of fresh spinach. It's really up to you how much you want to use.  If you look at the picture at the top, you can get an idea as to how this amount disperses through the salad when it is all stirred together.
3. Cut the tomatoes in half. You could leave them whole if you want. For me, cutting them in half avoids getting squirted when you stick your fork into one. In the picture below, you can see the container of Cherubs tomatoes.
4. Stir all of the ingredients together and add enough salad dressing to moisten everything. I typically start with about half of the bottle but then often find that I need to add more dressing before serving.
5. Add salt and pepper to taste.